Woke up one morning motivated to do the laundry, and boy was I in for a big surprise when I ran a cycle. Out of nowhere, my washer was shaking, nearly dancing across the room as if I had challenged it to a dance battle.
After a few Google searches, I was relieved to know that my house wasn’t haunted and that my washer most likely had a balancing problem.
Thankfully, it was an easy fix but a laborious one. With a lot of patience and a little bit of help from us, you too can get through this in no time.
Below, we made an extensive guide to help you figure out why your Maytag washer is shaking violently on a spin cycle. And we’ll show you how to fix it.
Why is my Maytag washer shaking violently?
Your Maytag washer is shaking violently because of improper leveling and underloading. Although not as common, component failure can also cause excessive shaking.
In such cases, the faulty part must be replaced to fix the problem.
But before going into the repairs, you can try these few steps to troubleshoot the problem.
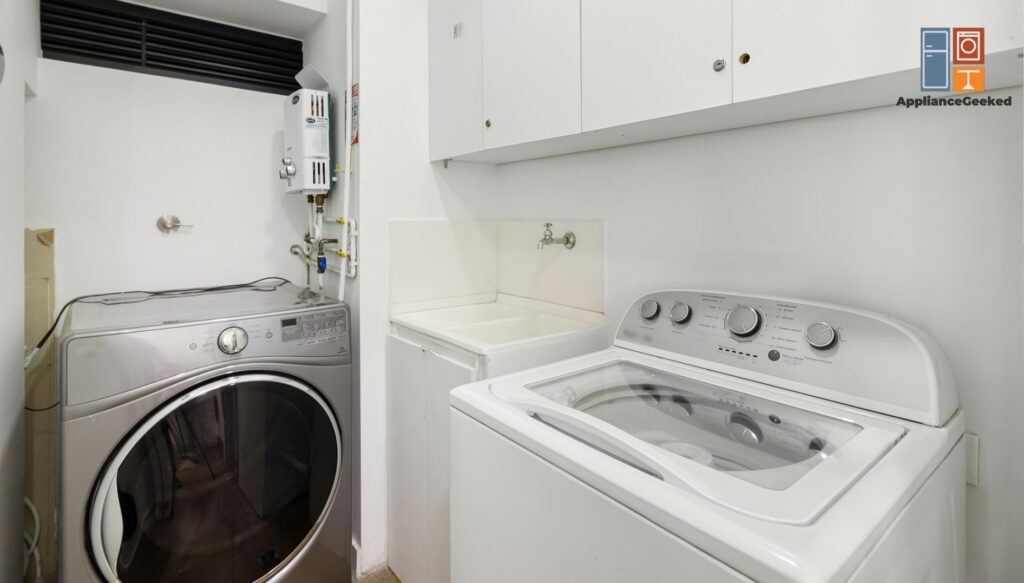
- Install your washer on a solid, stable surface. If the floor isn’t level, it may cause the unit to rattle during spin cycles.
You can move your washer to a more ideal spot. Or, you can adjust the leveling feet underneath to keep the unit from shaking.
- Check the error code. Your washer will display an error code to make it easier for you to determine the underlying cause of the problem. For example, an F7 E1 indicates that the shipping bolts have not been removed.
We made a guide, detailing the different error codes on a Maytag front load washer. Go over it to help you decipher the codes.
Continue reading our guide below if your washer still shakes during spin cycles. We’ll delve into other possible causes and give you step-by-step instructions on how to fix them.
Causes and Solutions
Here’s an overview of the possible causes of your washer’s excessive shaking, along with their respective solutions.
| Causes | Solutions |
| Unremoved Shipping Bolts | Unplug the washer from its power source. Turn off the water supply to the washer. Turn the washer around to access the rear panel. Locate the shipping bolts. Then, slide each bolt and space to the middle of the hole using a 5/18” wrench. Unfasten all the shipping bolts, and set them aside. Select the Pause/Cancel button and the Power button to remove the code on the display. Run a test cycle to check if the fix worked. |
| Improver Leveling | Set the carpenter’s level on top of your washer to check if it is leveled properly. If the model has a curved top, place the level between the cabinet’s seam and the unit’s top. Use a block of wood or other similar items to prop up your washer. Use a 9/16” wrench to loosen the jam nuts on the metal leveling legs, then turn them clockwise for about half an inch from the washer cabinet. Rotate the leveling legs counterclockwise to raise the height of the washer. Then, tighten the jam nuts on the metal leveling legs using the 9/16” wrench and rotate them counterclockwise until fully secured. If your washer has plastic leveling legs, use adjustable pliers to rotate each leg clockwise to raise its height. After adjusting the legs, place the carpenter’s level on top of the washer to verify that it is level from side to side and from front to back. |
| Underloading | Check the laundry tags on your items to confirm that they are machine washable. Remove the items that aren’t. Empty the pockets of your laundry before loading them into the drum. To prevent underloading, measure your load size. A regular load should take up about half the drum, while a large load should fill around three-quarters of it. Add heavily soiled items first. Place items one at a time to prevent them from getting tangled. Evenly distribute the laundry around the wash plate. |
| Worn Out Tub Bearing and Seal Kit | Disconnect your washing machine from power. Turn off the water supply to your washer and unplug the hoses. Open the door and remove the liquid fabric softener dispenser. Then, reach into the shaft and pull out the inner cap. Use a 7/16″ socket wrench with an extension to unscrew the center bolt. Grab the agitator from underneath and pull it up to remove it. Unfasten the corner screws on the washer’s back panel halfway using a flathead screwdriver. Pull the control panel forward and lift it to detach it. Use a flathead screwdriver to push the tab on the wire and pull to disconnect. Pry out the retainer clips on each corner using a flathead screwdriver. Tilt the cabinet towards you and pull it to remove it from the washer’s base. Then, set it aside. Locate the water break. Use pliers to loosen the clamp and slide it up the hose. Place a towel underneath the hose to avoid spills. Next, pull the hose off the water break. Hold the water break on each side and pull to remove it from the washer. Use pliers to remove the clamp. Remove the agitator washer. Place the spanner wrench into the shaft, hammer it counterclockwise to loosen the spanner nut, and then remove the nut. Remove the tub ring. Add penetrating oil around the inner top screw and hammer the screw to release it. Lift and remove the washer’s tub. Gently hammer the drive block until it comes off, and then set it aside. Set the washer on its back. Add a small wooden block to prop it up and a towel underneath to absorb spills. Use a flathead screwdriver to release the top and bottom clamps on the drain pump. Rotate each clamp by 90° to remove them. Pull the drain pump off the motor shaft and move it out of the way. Disconnect tab the motor plugs, open the retaining clips, and set the wires aside. Use a 1/2″ socket wrench to remove the transmission’s mounting bolts. Then, carefully pull the transmission off. Rotate the white cam on the basket drive counterclockwise. Remove the basket drive assembly. Lift the washer up, slip a socket extension into the tube, and hammer it to remove the blower bearing underneath. Then, pry off the two seals on the shaft. Spray penetrating oil in the tube and the top of the bearing. Wipe the grease off using tissue paper before adding more oil. Get a small strip of fine sandpaper, and roll it around your finger. Use it to remove dirt buildup in the tube. Lay the washer on its back. Slip a 1 1/8″ socket wrench with an extension under the washer and hammer it in to remove the upper bearing. Wipe the inner tube with tissue paper and add a generous amount of turbine oil inside. Then, rub turbine oil on the new upper bearing. Use the old bearing and a plastic mallet to push the new bearing into the tube. Spread more turbine oil around the new bearing and tube. Add grease around the inner cavity of the first seal before hammering it into the tube. Get your second seal and spread grease around its inner cavity. Mount it on the tube and hammer it in. Keep the washer upright. Add turbine oil around the shaft and the new bearing, and then spread grease around the inner groove of the seal. Mount the seal onto the shaft with the grooves facing upward and place the bearing on top. Hammer the seal and bearing about 1 ¼” into the tube. Spread a generous amount of turbine oil into the shaft before installing the upper seal on top of the bearing. Then, add grease to the groove of the upper seal. Lay the washer on its back again. Insert the basket drive into the support. Get the transmission and rotate the clutch’s spring in the opposite direction as the cam tooth. Mount the transmission and secure it in place using the bolts. Install the drain pump on the motor shaft and secure it with the clamps. Then, reconnect the wire harness to the motor plug before slipping it into the retaining clip. Keep the washer upright. Slide the drive block into the basket drive and carefully hammer it down. Install the inner basket and slip the spanner nut into the basket drive. Manually rotate it clockwise and use a spanner wrench to tighten it. Add the top of the agitator shaft and its clip to keep it in place. Install the tub ring and the cabinet. Reconnect the wire plug before closing the control panel. Then, install both screws at the back. Lower the agitator into the transmission shaft and push it down. Then, add the truss spacer, the top agitator, and the short cam onto the shaft. Insert the bolt in the center opening using a 7/16″ socket wrench and extension. Add liquid soap around the edges of the cap seal. Install the cap and the liquid softener dispenser. Turn on the water supply to the washer and reattach the hoses. Reconnect your washer to its power supply and run a test cycle to verify that the fix worked. |
| Broken Shock Absorber | Disconnect your washing machine from power. Turn off the water supply to your washer and unplug the hoses. Move the washer away from the wall to access the back panel. Use a 1/4″ nut driver to remove the screws mounting the top panel. Next, push the panel and lift it to remove. Pull the detergent drawer all the way out and press the locking tab to remove it from the washer. Use a Torx 15 screwdriver to unfasten the screws around the detergent drawer area. Then, remove the remaining screws on the front panel using a 1/4″ nut driver. Pull the control panel upward to release it from the locking tabs. After, open the panel to disconnect the wires and the retaining clip. Open the tub door to unfasten the screws mounting the door latch. Then, push the latch into the washer. Slightly pull up the door seal, slip a flathead screwdriver inside, and pry off the retainer spring. Pull off the front lip of the door seal and tuck it inside the washer. Then, shut the door. Tilt the washer back and add a 2”x4” wooden block underneath. Remove the screws on the bottom of the washer. Unfasten the screws on the front panel using a 5/16″ nut driver. Grab the panel from the top and lift it to remove. Use a flathead screwdriver to press the front tab on the upper part of the shock absorber. Turn it slightly to the left and press the rear to release it. Pull the shock absorber down to remove it from the mounting bracket. Use a flathead screwdriver to press the front tab at the bottom followed by the tab at the back. Remove the old shock absorber. Install the replacement into the cutout, press it down, and turn it clockwise to secure it in place. Slip the upper part of the shock absorber into the mounting bracket and turn it clockwise to lock it. Mount the front panel and reinstall the screws starting at the top. Then, tilt the washer back and place a wooden block underneath. Reinstall the screws at the bottom of the front panel. Remove the wooden block. Open the washer door. Mount the door latch assembly onto the cutouts and fasten the screws to secure it. Pull the door seal over the front lip and push the rubber into the grooves to prevent leaks. Use a flathead screwdriver to install the retaining spring into the groove. Reconnect the wires to the control panel and fasten the retaining clip. After, mount the panel and secure it with the screws. Slide the detergent drawer back into place. Next, reinstall the top cover and its screws. Use a 1/4″ nut driver to unfasten the screws and remove the back panel to access the rest of the shock absorbers. Unfasten the screws on the rear brace using a 1/4″ nut driver. Look for the remaining shock absorbers and remove each one. Use a flathead screwdriver to press the front tab on the upper part of the shock absorber. Turn it slightly to the left and press the rear to release it. Pull the shock absorber down to remove it from the mounting bracket. Use a flathead screwdriver to press the front tab at the bottom followed by the rear tab. Repeat the process until all the old shock absorbers are removed. Get the replacement part. Install it in the cutout and turn it clockwise to lock it in. Slip the upper part of the shock absorber into the mounting bracket and turn it clockwise to secure it. Repeat the process until all the new shock absorbers are installed. Mount the rear brace and reinstall the screws. Reinstall the back panel and fasten the screws to secure. Turn on the water supply to the washer and reattach the hoses. Reconnect your washer to its power supply. Run a test cycle to check if the washer still vibrates violently. |
Unremoved Shipping Bolts
New washing machines have shipping bolts attached to them to keep them secure during transportation. If you do the laundry without removing the bolts, you’ll notice excessive shaking and loud noises during spin cycles.
An F7 E1 error code should flash on the display when this happens, reminding you to remove the shipping bolts. You can do it all by yourself using only a wrench and zero repair experience.
What you’ll need:
- 5/18” wrench
Solutions: To remove the shipping bolts on your Maytag washer, follow these steps:
- Step 1: Unplug the washer from its power source.
- Step 2: Turn off the water supply to the washer.
- Step 3: Turn the washer around to access the rear panel.
- Step 4: Locate the shipping bolts. Then, slide each bolt and space to the middle of the hole using a 5/18” wrench.
- Step 5: Unfasten all the shipping bolts, and set them aside.
- Step 6: Select the Pause or Cancel button and the Power button to remove the code on the display.
- Step 7: Run a test cycle to check if the fix worked.
Improper Leveling
A washer must be leveled properly to prevent excessive vibration during spin cycles, loud noises, and potential leaks. If you continue to use an unbalanced unit, its efficiency and life span can be affected over time.
To level your washer properly, you’ll need a Carpenter’s Level. If the bubble is centered between the lines, it means your unit is level and doesn’t require further adjustments.
However, if the bubble moves to one side, your washer is unbalanced. It’s sloping towards the side where the bubble is resting.
What you’ll need:
- Carpenter’s level
- 9/16” open-end or adjustable wrench (metal leveling legs)
- Adjustable pliers (plastic leveling legs)
Solution: To level a Maytag washer, follow these steps:
- Step 1: Place the carpenter’s level on top of your washer to check if it is leveled properly. For models with a curved top, set the level between the cabinet’s seam and the unit’s top.
- Step 2: Prop up the front of the washer using a block of wood or other similar items.
- Step 3: Loosen the jam nuts on the metal leveling legs using a 9/16” wrench, then turn them clockwise for about half an inch from the washer cabinet. Rotate the leveling legs counterclockwise to raise the height of the washer.
Tighten the jam nuts on the metal leveling legs. Using the same wrench, rotate the legs counterclockwise until they are fully secured.
Proceed to Step 4 if your washer has plastic leveling legs.
- Step 4: Use adjustable pliers to rotate the plastic leveling legs of your washer. Turn each leg clockwise to raise its height.
- Step 5: Place the carpenter’s level on top of the washer to verify that it is level from side to side and from front to back.
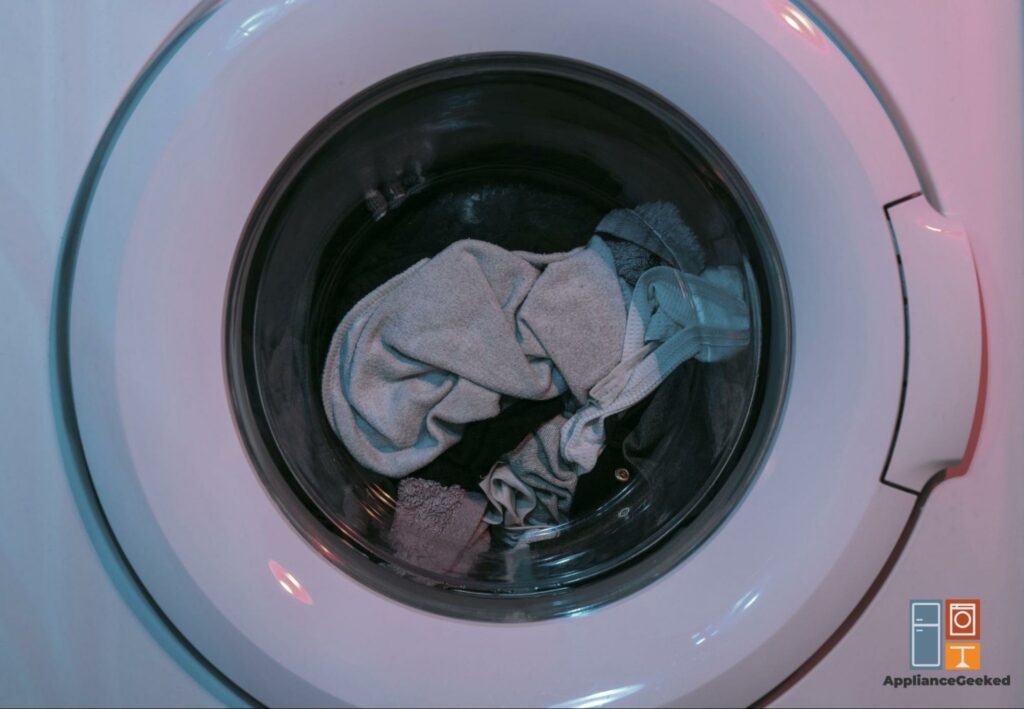
Underloading
Throwing in only a few pieces of clothing in the wash will cause an imbalance during the spin cycle. The clothes will clump together on one side of the tub, resulting in excessive shaking and lots of noise.
Believe it or not, underloading does more harm than good to your washer. It puts a lot of stress on the machine’s bearings, motor, and other components, which can potentially affect its efficiency and lifespan.
To prevent further damage, avoid underloading the tub and learn how to load the washer properly.
Solution: Measure the size of your laundry load to prevent your Maytag washer from shaking violently on spin cycles.
| Load Size | Measurement |
| Regular | 6 lbs |
| Large | 11 lbs |
| Extra Large | 21 lbs |
If you’re mixing fabrics, balance heavier items like towels with lighter clothes to keep the washer running smoothly and effectively.
A regular load should take up about half the drum, while a large load should fill around three-quarters of it. If you’re tackling an extra-large load, you can fill the drum close to the top—but make sure there’s enough room for the clothes to tumble freely.
That tumbling action is what gets them truly clean.
Quick Note:
Some Maytag washers have a Quick Wash setting, which lets you clean small, lightly soiled loads. You should use this if you have only a few items to wash to reduce the shaking.
Worn Out Tub Bearing and Seal Kit
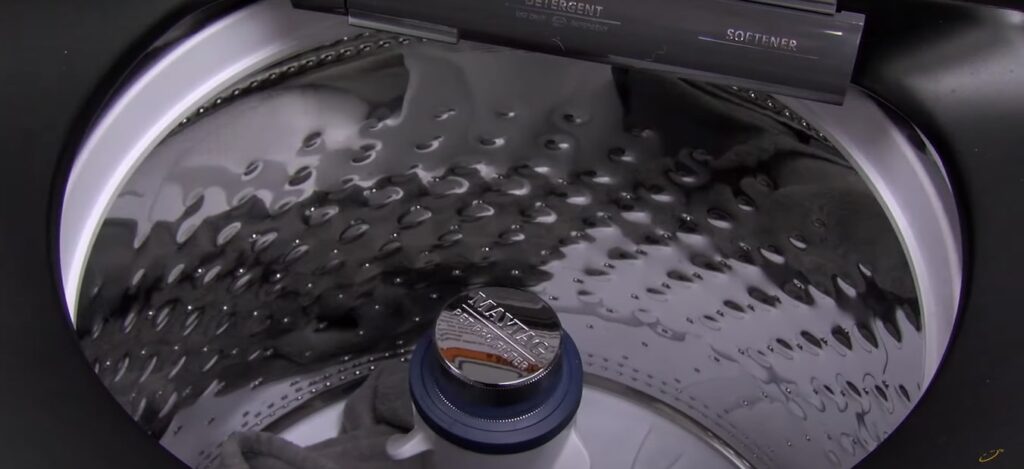
Is the excessive shaking accompanied by loud squealing noises? If adjusting your laundry load doesn’t fix the problem, you most likely have an unbalanced washer caused by a worn-out bearing and seal kit.
Greasy or rusty water running down from the transmission is a tell-tale sign. Another would be the UL error code, indicating an unbalanced load, even though the tub isn’t underloaded and the laundry is evenly distributed.
The only way to fix this problem is to replace the old kit with new components. It’s quite a time-consuming job, but an easy one, especially with the help of an easy-to-follow guide.
What you’ll need:
- Pliers
- Grease
- Phillips screwdriver
- Flathead screwdriver
- Towel and liquid soap
- Spanner wrench (TJ90TB123A)
- Rubber mallet
- Penetrating oil
- Turbine oil
- Heavy hammer
- Fine sandpaper
- 1 1/8″ socket
- 7/16″ socket with ratchet and extension
- 1/2″ socket with ratchet and extension
- New tub bearing and seal kit
Solution: To replace a top load Maytag washer’s tub bearing and seal kit, follow these steps:
- Step 1: Disconnect your washing machine from power.
- Step 2: Turn off the water supply to your washer and unplug the hoses.
- Step 3: Open the door and remove the liquid fabric softener dispenser. Then, reach into the shaft and pull out the inner cap.
- Step 4: Use the 7/16″ socket wrench with the extension to unscrew the center bolt. Grab the agitator from underneath using both hands and pull it up to remove it.
- Step 5: Unfasten the corner screws on the washer’s back panel halfway using a flathead screwdriver.
- Step 6: Pull the control panel forward and lift it up to detach it from the cabinet.
- Step 7: Use a flathead screwdriver to push the tab on the wire and pull to disconnect.
- Step 8: Pry out the retainer clips on each corner using a flathead screwdriver.
- Step 9: Tilt the cabinet towards you and pull it to remove it from the base of the washer. Then, set it aside.
- Step 10: Locate the water break. Use pliers to loosen the hose clamp and slide it up.
- Step 11: Place a towel underneath the hose to avoid spills. Next, pull the hose off the water break.
- Step 12: Hold the water break on each side and pull to remove it.
- Step 13: Use pliers to remove the clamp. After, remove the agitator washer.
- Step 14: Place the spanner wrench into the shaft and hammer it counterclockwise to loosen the spanner nut. Then, take the nut out of the washer.
- Step 15: Remove the tub ring.
- Step 16: Add penetrating oil around the inner top screw. Hammer the screw to break it loose.
- Step 17: Carefully lift and remove the washer’s tub. Gently hammer the drive block until it comes off, and then set it aside.
- Step 18: Set the washer on its back. Add a small wooden block to prop it up and a towel underneath to absorb spills.
- Step 19: Use a flathead screwdriver to release the top and bottom clamps on the drain pump. Rotate each clamp by 90° to remove them.
- Step 20: Pull the drain pump off the motor shaft and move it out of the way.
- Step 21: Disconnect tab the motor plugs and open the retaining clip using a flathead screwdriver. Set the wires aside.
- Step 22: Use a 1/2″ socket wrench to remove the transmission’s mounting bolts. Then, carefully pull the transmission off.
- Step 23: Rotate the white cam on the basket drive counterclockwise to unlock the brakes. After, remove the basket drive assembly.
- Step 24: Lift the washer up, slip a socket extension into the tube, and hammer it to remove the blower bearing underneath. Then, pry off the two seals on the shaft using a flathead screwdriver.
- Step 25: Spray penetrating oil in the tube and the top of the bearing and wipe the grease off using tissue paper. After, spray more penetrating oil around the area and let it sit for a while.
- Step 26: Get a small strip of fine sandpaper, and roll it around your finger. Use it to remove dirt buildup inside the tube.
- Step 27: Lay the washer on its back. Slip a 1 1/8″ socket wrench with an extension under the washer and hammer it in to remove the upper bearing.
- Step 28: Wipe the inner tube with tissue paper and add a generous amount of turbine oil inside.
- Step 29: Rub turbine oil on the new upper bearing. Use the old bearing and a plastic mallet to push the new bearing into the tube.
- Step 30: Spread more turbine oil around the new bearing and tube. Then, add grease around the inner cavity of the first seal before hammering it into the tube.
- Step 31: Get your second seal and spread grease around its inner cavity. Mount it on the tube and hammer it in.
- Step 32: Keep the washer upright. Add turbine oil around the shaft and the new bearing, and then spread grease around the inner groove of the seal.
- Step 33: Mount the seal onto the shaft with the grooves facing upward and place the bearing on top of the seal. Hammer the seal and bearing about 1 ¼” into the tube.
- Step 34: Spread a generous amount of turbine oil into the shaft before installing the upper seal on top of the bearing. Then, add grease to the groove of the upper seal.
- Step 35: Lay the washer on its back again. Insert the basket drive into the support.
- Step 36: Get the transmission and rotate the clutch’s spring in the opposite direction as the cam tooth. Then, mount the transmission and secure it in place using the bolts.
- Step 37: Install the drain pump on the motor shaft and secure it using the clamps. Then, reconnect the wire harness to the motor plug before slipping it into the retaining clip.
- Step 38: Keep the washer upright. Slide the drive block into the basket drive and carefully hammer it down.
- Step 39: Install the inner basket and slip the spanner nut into the basket drive. Manually rotate it clockwise and use a spanner wrench to tighten it.
- Step 40: Add the top of the agitator shaft and its clip to keep it in place.
- Step 41: Install the tub ring. Slide the cabinet into position and add the clips to secure it.
- Step 42: Reconnect the wire plug before closing the control panel. Then, install both screws at the back to lock the panel in place.
- Step 43: Lower the agitator into the transmission shaft and push it all the way down. Then, add the truss spacer, the top agitator, and the short cam onto the shaft.
- Step 44: Insert the bolt in the center opening using a 7/16″ socket wrench and extension.
- Step 45: Add liquid soap around the edges of the cap seal. Install the cap and the liquid softener dispenser.
- Step 46: Turn on the water supply to the washer and reattach the hoses.
- Step 47: Reconnect your washer to its power supply.
- Step 48: Run a test cycle to confirm that the fix worked.
Broken Shock Absorber
If your washer is shaking like it’s in a dance-off, even though you didn’t underload it, the culprit might be a damaged shock absorber. It supports the tub assembly’s weight and absorbs its movement, keeping everything steady during spin cycles.
Once worn out or broken, the tub’s wild motion goes unchecked, causing the entire machine to tremble violently. You must replace the shock absorbers promptly to avoid further damage to other internal parts.
It’s not a quick fix as you’ll need to unassemble the washer to get to the shock absorber. However, it isn’t a difficult one, which you can do (even with little to no experience) to save hundreds of dollars on repair fees.
Quick Note:
Each washer has a set of 3 or 4 shock absorbers. One is located at the front part of the machine, while the rest are located at the back.
What you’ll need:
- 2”x4” wooden block
- 1/4″ nut driver
- 5/16″ nut driver
- flathead screwdriver
- Torx 15 screwdriver
- Phillips screwdriver
- New shock absorber
Solution: First, isolate the shock absorbers to determine if they are broken and require replacement.
- Step 1: Disconnect your washing machine from power.
- Step 2: Turn off the water supply to your washer and unplug the hoses.
- Step 3: Move the washer away from the wall to access the back panel.
- Step 4: Use a 1/4″ nut driver to remove the screws mounting the top panel. Next, push the panel and lift it up to remove it.
- Step 5: Pull the detergent drawer all the way out and press the locking tab to remove it from the washer.
- Step 6: Use a Torx 15 screwdriver to unfasten the screws around the detergent drawer area. Then, remove the remaining screws on the front panel using a 1/4″ nut driver.
- Step 7: Gently pull the control panel upward to release it from the locking tabs. After, open the panel to disconnect the wires and the retaining clip.
- Step 8: Open the tub door and unfasten the screws mounting the door latch. Once freed, push the latch in.
- Step 9: Slightly pull up the door seal at the bottom, slip a flathead screwdriver inside, and pry off the retainer spring.
- Step 10: Pull off the front lip of the door seal and tuck it inside. Then, shut the door.
- Step 11: Tilt the washer back and add a 2”x4” wooden block underneath to keep it in place. Remove the screws on the bottom of the washer.
- Step 12: Unfasten the screws on the front panel using a 5/16″ nut driver. Grab the panel from the top and lift it to remove.
- Step 13: Use a flathead screwdriver to press the front tab at the upper part of the shock absorber. Turn it slightly to the left and press the tab at the back of the component to release it.
- Step 14: Pull the shock absorber down to remove it from the mounting bracket. Use a flathead screwdriver to press the front tab at the bottom followed by the tab at the back.
- Step 15: Remove the old shock absorber.
- Step 16: Use a 1/4″ nut driver to unfasten the screws and remove the back panel to access the rest of the shock absorbers.
- Step 17: Unfasten the screws on the rear brace using a 1/4″ nut driver. Then, locate the shock absorbers.
- Step 18: Use a flathead screwdriver to press the front tab on the upper part of the shock absorber. Turn it slightly to the left and press the rear to release it.
- Step 19: Pull the shock absorber down to remove it from the mounting bracket. Use a flathead screwdriver to press the front tab at the bottom followed by the tab at the back.
- Step 20: Repeat Steps 18 and 19 until all shock absorbers are isolated.
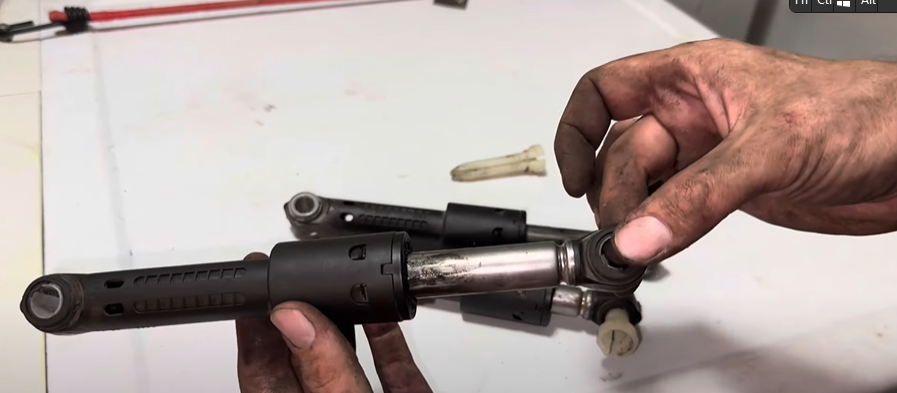
- Step 21: Inspect each shock absorber by moving it up and down.
If there is little to no resistance and some side-to-side movement, the component is worn out and requires replacement. Even if only one shock absorber is damaged, you must replace all of them at the same time to prevent further issues.
To replace a broken shock absorber on a front-load Maytag washer, follow these steps:
- Step 1: Disconnect your washing machine from power.
- Step 2: Turn off the water supply to your washer and unplug the hoses.
- Step 3: Move the washer away from the wall to access the back panel.
- Step 4: Use a 1/4″ nut driver to remove the screws mounting the top panel. Next, gently push the panel and lift it up to remove.
- Step 5: Pull the detergent drawer all the way out and press the locking tab to remove it from the washer.
- Step 6: Use a Torx 15 screwdriver to unfasten the screws around the detergent drawer area. Then, remove the remaining screws on the front panel using a 1/4″ nut driver.
- Step 7: Gently pull the control panel upward to release it from the locking tabs. After, open the panel to disconnect the wires and the retaining clip.
- Step 8: Open the tub door and unfasten the screws mounting the door latch. Once freed, push the latch in.
- Step 9: Slightly pull up the door seal at the bottom, slip a flathead screwdriver inside, and pry off the retainer spring.
- Step 10: Pull off the front lip of the door seal and tuck it inside. Then, shut the door.
- Step 11: Tilt the washer back and add a 2”x4” wooden block underneath to keep it in place. Remove the screws on the bottom of the washer.
- Step 12: Unfasten the screws on the front panel using a 5/16″ nut driver. Grab the panel from the top and lift it to remove.
- Step 13: Use a flathead screwdriver to press the front tab at the upper part of the shock absorber. Turn it slightly to the left and press the tab at the back of the component to release it.
- Step 14: Pull the shock absorber down to remove it from the mounting bracket. Use a flathead screwdriver to press the front tab at the bottom followed by the tab at the back.
- Step 15: Remove the old shock absorber. Install the replacement into the cutout, press it down, and turn it clockwise to secure it in place.
- Step 16: Slip the upper part of the shock absorber into the mounting bracket and turn it clockwise to lock it.
- Step 17: Mount the front panel and reinstall the screws starting at the top. Then, tilt the washer back and place a wooden block underneath.
- Step 18: Reinstall the screws at the bottom of the front panel. Remove the wooden block.
- Step 19: Open the washer door. Mount the door latch assembly onto the cutouts and fasten the screws to secure it.
- Step 20: Pull the door seal over the front lip and push the rubber into the grooves to prevent leaks. Use a flathead screwdriver to install the retaining spring into the groove.
- Step 21: Reconnect the wires to the control panel and fasten the retaining clip. After, mount the panel and secure it with the screws.
- Step 22: Slide the detergent drawer back into place. Next, reinstall the top cover and its screws.
- Step 23: Use a 1/4″ nut driver to unfasten the screws and remove the back panel to access the rest of the shock absorbers.
- Step 24: Unfasten the screws on the rear brace using a 1/4″ nut driver.
- Step 25: Repeat Steps 13 to 16 to remove the old shock absorbers and reinstall the replacements.
- Step 26: Mount the rear brace and reinstall the screws.
- Step 27: Reinstall the back panel and fasten the screws to secure it.
- Step 28: Turn on the water supply to the washer and reattach the hoses.
- Step 29: Reconnect your washer to its power supply.
- Step 30: Run a test cycle to confirm that the fix worked.
Frequently Asked Questions
Is it normal for a washing machine to shake?
Yes, slight shaking during spin cycles is normal for washing machines—regardless of the brand. However, excessive shaking, especially when accompanied by loud banging or thumping is not normal.
Are a washer’s shock absorbers worth replacing?
Yes, they’re worth replacing. Depending on your washer’s model, they each cost around $75 or more, which is less than getting a new machine.
Plus, if you replace the parts yourself, you can save more money. Although it’s a time-consuming fix, it’s quite easy to do on your own.
Do you need to replace all shock absorbers when one gets damaged?
Yes, you must replace all the shock absorbers even if only one is damaged. That’s because they tend to wear out at similar rates.
Ignoring the rest might save time now, but it’s setting you up for future headaches when the others start to fail. By replacing them all at once, you restore balance to your washer, ensuring a smoother spin cycle and saving yourself from repeated repairs.