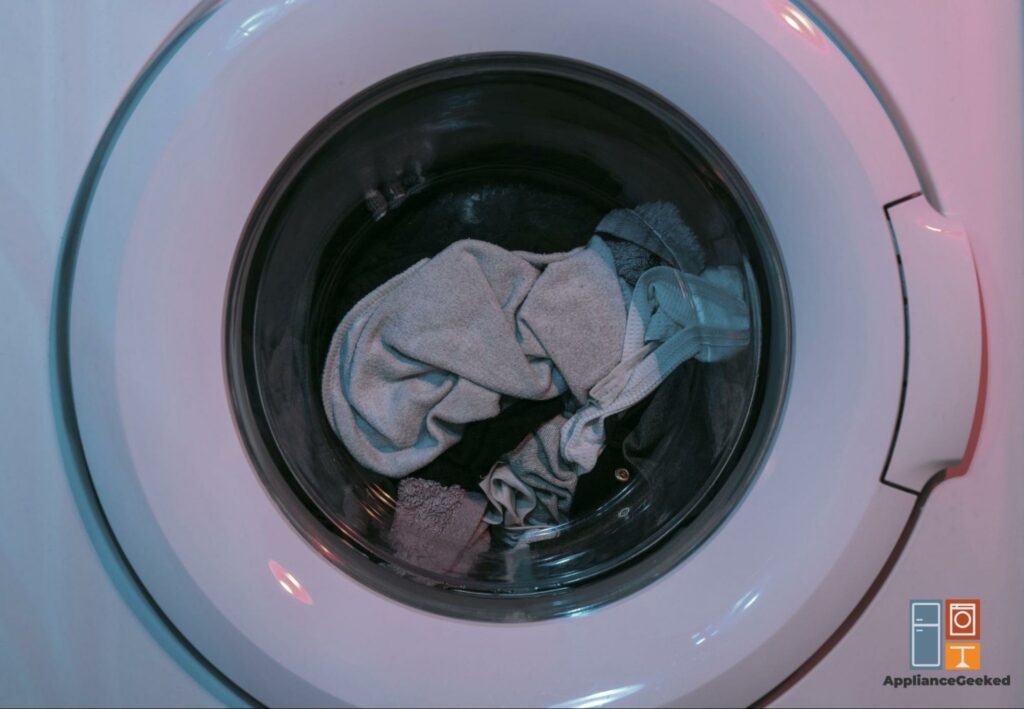
After years of doing the laundry, I’ve finally unraveled one of the greatest mysteries in life: where our missing socks go in the wash.
I’ve certainly entertained the great sock conspiracy theory of an interdimensional portal, but I’ve never been more wrong. I only found out when I encountered the F51 error code, which forced me to open up the tub.
As it turns out, the land of the missing socks is just at the very bottom of the washer. All my missing socks were just stuck in the tub, accumulating and causing problems that could be very expensive to resolve.
In this guide, we’ll delve into the F51 error code on a Maytag washing machine. We’ll go over all the possible causes and show you step-by-step solutions to resolve them.
What is the F51 error on a Maytag washer?
The F51 error on a Maytag washer indicates that the basket has failed to turn properly. It could be caused by obstructions in the drum, a malfunctioning sensor, or a faulty main control board.
Before making any repairs to your washer, here are a few simple steps you can do to troubleshoot it.
- Make sure you’re not overloading the tub.
Adding too much laundry in the tub can cause excessive strain on the rotor position sensor (RPS). It can cause the part to malfunction until it finally breaks down and becomes defective.
Other issues that you might observe prior to the complete breakdown of the RPS include filling errors and buzzing noises. Sometimes, your washer will turn off mid-cycle if the RPS is malfunctioning.
- Restart your washer.
Unplug the power cord, or cut off the power from the circuit breaker. After a few minutes, restore power to your washer to restart its system.
Causes and Solutions
Most of the time, an F51 error is easy to fix. With a few tools and our step-by-step guide, you can resolve the problem within minutes, which can save you precious time and money.
Let’s take a closer look at the common causes of an F51 error on a Maytag washer.
| Causes | Solutions |
| Obstruction in the Drum | Unplug the washer or turn off the power at the circuit breaker. Shut off the water supply to the machine. Secure the lid by taping it shut to the main top of the washer. Use a putty knife to pry the locking tabs securing the top ring to the tub. Open the lid. Lean it against the wall, or use a lanyard to prop it open. Release the top ring by slipping a flathead screwdriver into the tabs. Use pliers to release the clamp on the hose and slide it down to keep it out of the way. Detach the hose from the ring. Then, remove the entire top ring and set it aside. Pry the tab on the dust cap inside the tub using a flathead screwdriver. Remove the wash plate bolt using a 7/16” socket with ratchet and extension. Take out the bolt and wash plate; set them aside. Get your spanner wrench and place it over the spanner nut. Use a plastic hammer or rubber mallet to tap the wrench counterclockwise. Unscrew the nut by hand. Then, use a Phillips screwdriver to take out the screws mounting the hub. Lift the hub out of the washer and set it aside. Carefully pull the tub out of the washer. Take out all the obstructions causing the F51 error. Remove all the pieces of clothing, coins, lint, and gunk. Place the inner tub back inside the washer. Align the dry block with the splines and push it down to keep it secure. Lower the hub and align it with the screw holes. Fasten all the screws on the hub using a Phillips screwdriver. Reinstall the spanner nut and rotate it manually. Place the spanner wrench over the nut and use a hammer to secure it in place. Align the wash plate with the splines and push it all the way down to reinstall it. Reinstall the bolt using a 7/16” socket with a ratchet and extension to tighten it. Put the dust cover back on. Reinstall the tub’s top ring. Reattach the hose to the top ring and tighten its clamp using pliers. Lower the washer’s top part and remove the tape. Turn on the water supply. Reconnect your washer to power. Turn on the washer to check if the F51 error code has disappeared. |
| Loose Connections | Unplug the washer or turn off the power at the circuit breaker. Shut off the water supply to the machine, then disconnect both the hot and cold water hoses as well as the drain hose. Tape the washer’s lid shut. Pull the washer away from the wall and tip it over so it leans against the wall. Turn the rotor to align its holes with the holes on the stator. Put a screwdriver through the hole to keep it in place. Use a 1/4” Allen wrench to unfasten the bolt on the rotor. Grab the rotor and carefully pull it off the washer. Use a 3/8” socket ratchet to unfasten the screws on the rotor. Carefully unmount the stator from the washer and remove the wire harness clips. Inspect all the wire connections to the stator and RPS. Reconnect any loose wires. Reattach the clips that mount the stator’s wire harnesses to the bottom of the washer. Reinstall the stator and bracket. Then, fasten all the screws to keep everything secure. Apply a blue thread locker into the threads of the drive shaft. Align the splines on the drive shaft with the ones on the rotor. Mount the rotor, and use the 1/4” Allen wrench to fasten the bolt on the stator. Spin the rotor until the holes line up. Thread a screwdriver into the hole and tighten the bolt on the stator with the wrench. Keep the washer in an upright position and remove the tape. Reconnect all the hoses. Turn on the water supply and restore power to the washer. Run a test cycle to check if the F51 error has disappeared. |
| Faulty Rotor Position Sensor | Unplug the washer or turn off the power at the circuit breaker. Shut off the water supply to the machine, then disconnect both the hot and cold water hoses as well as the drain hose. Tape the washer’s lid shut and pull the washer away from the wall. Then, tip it over so it leans against the wall, making the bottom part accessible. Turn the rotor to align it with the holes on the stator. Put a screwdriver through the hole to keep it in place. Use a 1/4” Allen wrench to unfasten the bolt on the rotor. Grab the rotor and carefully pull it off the washer. Inspect the motor stator for visible signs of damage like cracks. Replace it if necessary. Use a 3/8” socket ratchet to unfasten the screws on the rotor. Hold the stator with both hands and pull it out. Remove the motor shield and set it aside. Unfasten the clips mounting the stator to the bottom of the washer. Unplug the wire connectors on the stator. Use a small flathead screwdriver to pry the tabs on the RPS and detach it. Unfasten the wires from the clips on the RPS. Press the locking tab and unplug the wire harness. Use small pliers to press the clip and push it through the other side of the RPS. Get your new RPS. Thread the wiring harness into the tab until it snaps in place and connect the wire harness. Place the wire harness through the clip on the RPS. Use a small screwdriver to push it down and keep it secure. Align the arrow on the RPS with the arrow on the stator. Push the locking tabs until you hear them snap. Refasten the wire harness on the stator and reattach its clips onto the washer. Mount the motor shield, stator, and bracket. Reinstall all the screws to secure everything. Apply a blue thread locker into the threads of the drive shaft. Align the splines on the drive shaft with the ones on the rotor. Mount the rotor, and use the 1/4” Allen wrench to fasten the bolt on the stator. Spin the rotor until the holes line up. Thread a screwdriver into the hole and tighten the bolt on the stator with the wrench. Keep the washer in an upright position and remove the tape. Reconnect all the hoses. Turn on the water supply and restore power to the washer. Check if the F51 error has disappeared. |
| Defective Main Control Board | Disconnect your washer from its power source. Turn off the water supply, then disconnect both inlet hoses. Carefully pull the washer away from the wall to access the back panel. Unfasten the bolts mounting the panel using a ¼” nut driver. Pry the front control panel housing open with a flathead screwdriver. Then, unplug the wire harness and set the control panel aside. Take a photo of the wires connected to the main control board. Refer to it during the reassembly process. Pull out the switch wire connectors and power wire on the control board. Next, remove the bracket and retainer using a flathead screwdriver. Disconnect the air pressure tube. Remove the screws securing the control board using a ¼” nut driver. Next, detach the center knob and remove the control board. Get your new control board and transfer the wire retaining bracket from the old assembly to the new one. Align the control board with the slots on the panel. Reinstall the screws securing the board and reattach the control knob. Use your reference photo to reconnect all the wires to the correct terminals on the control board. Secure the wires on the bracket and retainer. Then, reattach the air pressure tube. Align the control panel with the rear panel and push down until it snaps into place. After, reinstall the screws on the panel to keep it secure. Reconnect all the hoses. Turn on the water supply and restore power to the washer. |
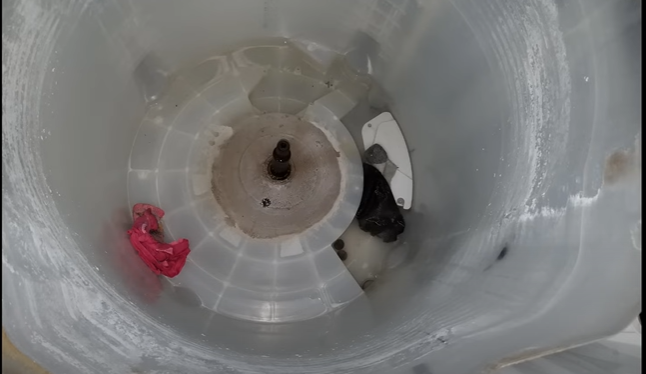
Obstruction in the Drum
One of the most common causes of an F51 error code is an obstruction in the drum.
All your missing socks? They’re probably stuck between the metal drum of the washer and the basin, preventing it from spinning properly.
You must remove the tub to take out all the obstructions and clear the code. Doing this will also prevent further issues, such as an E1 F9 error.
Sometimes, small objects like socks, lint, and hair will even accumulate in the hose, causing drainage problems. In such cases, you will have to clean your Maytag washer’s filter.
What you’ll need:
- Tape
- Putty knife
- Pliers
- Spanner wrench
- Plastic hammer or rubber mallet
- 7/16” socket with ratchet and extension
- Flathead screwdriver
Solution: To remove any obstructions causing an F51 error, follow these steps:
- Step 1: Unplug the washer or turn off the power at the circuit breaker.
- Step 2: Shut off the water supply to the machine.
- Step 3: Secure the lid by taping it shut to the main top of the washer.
- Step 4: Use a putty knife to pry the locking tabs securing the top ring to the tub.
- Step 5: Open the lid. Lean it against the wall, or use a lanyard to keep it open.
- Step 6: Release the top ring by slipping a flathead screwdriver into the tabs.
- Step 7: Use pliers to release the clamp on the hose. Slide it down to keep it out of the way.
- Step 8: Pull the hose backward. Then, remove the entire top ring and set it aside.
- Step 9: Pry the tab on the dust cap inside the tub using a flathead screwdriver.
- Step 10: Remove the wash plate bolt using a 7/16” socket with ratchet and extension.
- Step 11: Take out the bolt and wash plate. Set them aside.
- Step 12: Get your spanner wrench and place it over the spanner nut. Use a plastic hammer or rubber mallet to tap the wrench counterclockwise.
If you don’t have a spanner wrench, use a flathead screwdriver and hammer to loosen and remove the nut.
- Step 13: Unscrew the nut by hand. Then, use a Phillips screwdriver to take out the screws mounting the hub.
Do this manually instead of using a power tool to prevent potential damage to the washer’s components.
- Step 14: Lift the hub out of the washer and set it aside.
- Step 15: Carefully pull the tub out of the washer.
- Step 16: Take out all the obstructions causing the F51 error. Remove all the pieces of clothing, coins, lint, and gunk.
- Step 17: Wipe everything clean and let it dry.
- Step 18: Place the inner tub back inside the washer.
- Step 19: Align the dry block with the splines and push it down. Tap it down to keep it secure.
- Step 20: Lower the hub and align it with the screw holes.
- Step 21: Fasten all the screws on the hub using a Phillips screwdriver.
- Step 22: Reinstall the spanner nut and rotate it manually. Place the spanner wrench over the nut and use a hammer to secure it in place.
- Step 23: Align the wash plate with the splines and push it all the way down to reinstall it.
- Step 24: Reinstall the bolt using a 7/16” socket with ratchet and extension to tighten it. Put the dust cover back on.
- Step 25: Reinstall the tub’s top ring.
- Step 26: Reattach the hose to the top ring. Use the pliers to tighten the clamp over the hose.
- Step 27: Lower the washer’s top part.
- Step 28: Turn on the water supply.
- Step 29: Reconnect your washer to power.
- Step 30: Turn on the washer to check if the F51 error code has disappeared.
Loose Connections
Another possible minor issue that can cause an F51 error to appear on your Maytag washer is a loose connection.
If any wire harness or connector is loose or not securely plugged in, it disrupts the communication between these components, causing the control board to misinterpret the drum’s movements.
This confusion can result in the F51 error code flashing on the display. To fix this, you’ll need to check all wiring connections, especially around the RPS and the control board, to ensure everything is snug and secure.
What you’ll need:
- Pliers
- Glue
- Tape
- Screwdriver
- 1/4” Allen wrench
- 3/8” socket ratchet
- Small flathead screwdriver
Solution: To check for loose connections on your Maytag washer, follow these steps:
- Step 1: Unplug the washer or turn off the power at the circuit breaker.
- Step 2: Shut off the water supply to the machine, then disconnect both the hot and cold water hoses as well as the drain hose.
- Step 3: Tape the washer’s lid shut.
- Step 4: Pull the washer away from the wall. Then, tip it over so it leans against the wall, making the bottom part accessible.
- Step 5: Turn the rotor to align its holes with the holes on the stator.
- Step 6: Put a screwdriver through the hole to keep it in place.
- Step 7: Use a 1/4” Allen wrench to unfasten the bolt on the rotor.
- Step 8: Grab the rotor and carefully pull it off the washer.
- Step 9: Use a 3/8” socket ratchet to unfasten the screws on the rotor.
- Step 10: Carefully unmount the stator from the washer. Remove the wire harnesses from the clips.
- Step 11: Inspect all the wire connections to the stator and RPS. Reconnect any loose wires.
- Step 12: Reattach the clips that mount the stator’s wire harnesses to the bottom of the washer.
- Step 13: Reinstall the stator and bracket. Then, fasten all the screws to keep everything secure.
- Step 14: Apply a blue thread locker into the threads of the drive shaft.
- Step 15: Align the splines on the drive shaft with the ones on the rotor. Mount the rotor, and use the 1/4” Allen wrench to fasten the bolt on the stator.
- Step 16: Spin the rotor until the holes line up. Thread a screwdriver into the hole and tighten the bolt on the stator with the wrench.
- Step 17: Keep the washer in an upright position and remove the tape.
- Step 18: Reconnect all the hoses.
- Step 19: Turn on the water supply and restore power to the washer.
- Step 20: Run a test cycle to check if the F51 error has disappeared.
Faulty Rotor Position Sensor
If you’ve checked and removed all possible obstructions in your Maytag washer, but the F51 error code still shows up, you might be dealing with a faulty rotor position sensor (RPS).
The RPS oversees the position and speed of the rotor. It sends this information to the control board to confirm that everything is operating as it should.
A faulty RPS won’t be able to send that crucial signal to the control board, which will prevent your washer from running. The only way to fix this is to replace the faulty component.
What you’ll need:
- Pliers
- Glue
- Tape
- Screwdriver
- 1/4” Allen wrench
- 3/8” socket ratchet
- Small flathead screwdriver
- New rotor position sensor
Solution: To replace a faulty rotor position sensor on a Maytag washer, follow these steps:
- Step 1: Unplug the washer or turn off the power at the circuit breaker.
- Step 2: Shut off the water supply to the machine, then disconnect both the hot and cold water hoses as well as the drain hose.
- Step 3: Tape the washer’s lid shut.
- Step 4: Pull the washer away from the wall. Then, tip it over so it leans against the wall, making the bottom part accessible.
- Step 5: Turn the rotor to align its holes with the holes on the stator.
- Step 6: Put a screwdriver through the hole to keep it in place.
- Step 7: Use a 1/4” Allen wrench to unfasten the bolt on the rotor.
- Step 8: Grab the rotor and carefully pull it off the washer.
- Step 9: Inspect the motor stator for visible signs of damage like cracks. Replace it if necessary.
- Step 10: Use a 3/8” socket ratchet to unfasten the screws on the rotor.
- Step 11: Hold the stator with both hands. Gently wiggle it and pull it out.
- Step 12: Remove the motor shield and set it aside.
- Step 13: Unfasten the clips mounting the stator to the bottom of the washer.
- Step 14: Unplug the wire connectors on the stator.
- Step 15: Use a small flathead screwdriver to pry the tabs on the RPS and detach it. Set the stator aside.
- Step 16: Unfasten the wires from the clips on the RPS. Press the locking tab and unplug the wire harness.
- Step 17: Use small pliers to press the clip and push it through the other side of the RPS.
- Step 18: Get your new RPS. Thread the wiring harness into the tab until it snaps in place and connect the wire harness.
- Step 19: Place the wire harness through the clip on the RPS. Use a small screwdriver to push it down and keep it secure.
- Step 20: Align the arrow on the RPS with the arrow on the stator. Push the locking tabs until you hear them snap.
- Step 21: Refasten the wire harness on the stator.
- Step 22: Reattach the wire harness clips onto the washer.
- Step 23: Mount the motor shield, stator, and bracket. Reinstall all the screws to secure everything.
- Step 24: Apply a blue thread locker into the threads of the drive shaft.
- Step 25: Align the splines on the drive shaft with the ones on the rotor. Mount the rotor, and use the 1/4” Allen wrench to fasten the bolt on the stator.
- Step 26: Spin the rotor until the holes line up. Thread a screwdriver into the hole and tighten the bolt on the stator with the wrench.
- Step 27: Keep the washer in an upright position and remove the tape.
- Step 28: Reconnect all the hoses.
- Step 29: Turn on the water supply and restore power to the washer. Check if the F51 error has disappeared.
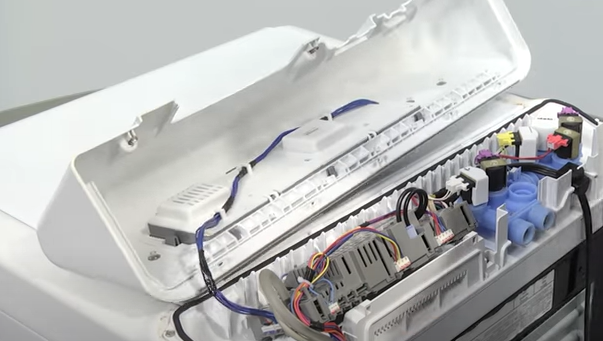
Defective Main Control Board
The main control board is like the command center of your washing machine, overseeing crucial tasks like starting cycles, washing, spinning, and drying. If it becomes damaged, your washer may start behaving unpredictably.
Since diagnosing a faulty control board can be challenging, you must only consider this after you’ve ruled out other potential problems.
To determine if the control board is the culprit, perform a continuity test. If the results indicate a lack of continuity, replace the control board to resolve the issue.
What you’ll need:
- Flathead screwdriver
- ¼” nut driver
- Pliers
- Multimeter
- New main control board
Solutions: To replace a Maytag top-load washer’s control board, follow these steps:
- Step 1: Unplug the washer or turn off the power at the circuit breaker.
- Step 2: Shut off the water supply to the machine, then disconnect both the hot and cold water hoses as well as the drain hose.
- Step 3: Slide the washer away from the wall to access the back panel.
- Step 4: Use a ¼” nut driver to remove the bolts securing the back panel and set it aside.
- Step 5: Insert a flathead screwdriver under the front control panel and gently pry it open.
- Step 6: Disconnect the wire harness and carefully set the control panel aside.
- Step 7: Take a photo of the wiring connected to the main control board. This will serve as a guide for reassembly.
- Step 8: Detach the switch wire connectors from the control board, including the power wire. Use a flathead screwdriver to release any brackets and retainers holding them in place.
- Step 9: Disconnect the air pressure tube attached to the control board.
- Step 10: Use a ¼” nut driver to remove the screws that are holding the control board.
- Step 11: Pull off the center knob, then carefully lift out the control board to separate it from the washer.
- Step 12: Inspect the control board for any burn marks or discoloration, which could indicate damage.
- Step 13: Grab a multimeter and set it to Continuity Test mode.
- Step 14: Place one probe on each side of the fuse on the control board to check for continuity.
If your multimeter beeps, the fuse is good, indicating that the control board is functioning well. On the other hand, if you hear no sound, the fuse is defective, which means that the control board needs replacement.
To replace the main control board of a top-load Maytag washer, follow these steps:
- Step 1: Unplug the washer or turn off the power at the circuit breaker.
- Step 2: Turn off the water supply, then disconnect both inlet hoses.
- Step 3: Move the washer away from the wall and turn it around to access the back panel.
- Step 4: Use a ¼” nut driver to remove the bolts mounting the panel.
- Step 5: Insert the flathead screwdriver under the front control panel housing, then pry it open.
- Step 6: Disconnect the wire harness and set the control panel aside.
- Step 7: Take a photo of the wires connected to the main control board. Use it as a reference for the reassembly process.
- Step 8: Disconnect the switch wire connectors on the control board, including the power wire. Then, use a flathead screwdriver to release the bracket and retainer.
- Step 9: Detach the air pressure tube.
- Step 10: Use a ¼” nut driver to unfasten the screws securing the control board.
- Step 11: Remove the center knob, then lift the faulty control board to remove it from the panel.
- Step 12: Get your new control board. Before installing it, transfer the wire retaining bracket from the old assembly to the new one.
- Step 13: Align the control board with the slots on the panel.
- Step 14: Reinstall the screws to secure the board. Then, return the center control knob.
- Step 15: Plug in all the wire connectors to the correct terminals on the new control board. Use your photo for reference.
- Step 16: Secure the wires on the bracket and retainer.
- Step 17: Reattach the air pressure tube.
- Step 18: Align the control panel with the rear panel, then push down until it snaps into place.
- Step 19: Reinstall the screws on the rear panel.
- Step 20: Reconnect all the hoses.
- Step 21: Turn on the water supply and restore power to the washer.
Frequently Asked Questions
Is a washer’s rotor position sensor worth replacing?
Yes, a faulty rotor position sensor is worth replacing because a replacement part is affordable. Although the price will vary depending on the make and model of your washer, it won’t have the same cost as a brand-new washer.
However, the repair fees can be expensive for such an easy fix. You can opt to do the fix yourself, which is quite possible with a few tools and our handy-dandy guide.
How do I find the right replacement part for my washer?
The easiest way to find the right replacement part for your washer is through the manufacturer’s website. You can look up your washer’s model, and they’ll show you a detailed list of the parts and components.
When you’ve pinpointed the part, consider buying from a reputable source. Authorized dealers, the manufacturer’s website, or trusted appliance parts stores are your best bet for quality and warranty-backed parts.
Double-check the part number before you make a purchase, so you’re not stuck with the wrong piece. You can also get in touch with the manufacturer’s customer services.
How do you know if a washer is overloaded?
To prevent unnecessary stress on the RPS and other internal components of your washer, you must load the laundry correctly. The best way to check if the tub is overloaded is the palm trick.
After loading your clothes into the washer drum, place your hand inside the drum. If your hand fits comfortably between the top of the laundry pile and the drum without squeezing or forcing it, you’ve got the perfect load size.
However, if you have to push down or there’s no room for your hand, the washer is overloaded. This trick works for both front-load and top-load washers and helps keep your machine from being overworked.
How do you know when it’s time to get a new washer?
If your washer is over 10 years old, less energy-efficient, or the repair cost is more than half the price of a new one, it’s probably time to consider an upgrade.
Investing in a new model can save you money on energy bills and prevent the hassle of constant breakdowns.