Whenever a washing machine breaks down unexpectedly, it can cause a lot of stress and frustration, especially when you have a growing pile of laundry. However, it doesn’t have to cause a strain on your finances.
Most of the time, you can fix the problems on your washing machine yourself — even with limited repair know-how and experience.
Before you call repair services, read our guide below to identify the most common error codes on Maytag front load washers. We’ll help you understand why they appear and walk you through all the steps to troubleshoot them.
Maytag Front Load Washer Error Codes
The most common error codes on Maytag front load washers are the following: LOC, SUD, Int, dET, rL or F34, F5 E2, F7 E1, F8 E1 or LO FL, F8 E2, and F9 E1.
Here’s an overview of the different error codes, their meaning, and their most common causes.
| Error Codes | Meaning | Possible Causes |
| LOC or LC | The controls are locked. | The Control Lock is engaged. |
| SUD or Sd | The washer detects an excessive amount of suds in the drum. | Non-HE detergent was loaded in the dispenser. Too much detergent was added. No Splash or Easy Pour liquid bleach was used. |
| Int | The cycle was interrupted. | Power surge or interruption |
| dET | The washer can’t detect the dispenser cartridge. | The detergent dispenser drawer is not installed correctly. |
| rL or F34 | The washer detects items in the drum. | There are clothes inside the drum during a Clean Washer with affresh cycle. |
| F5 E2 | The door is not locking. | Clothes might be caught on the door. The door gasket is dirty. The drum is overloaded. |
| F7 E1 | The washer detects a problem with the motor speed. | The shipping bolts haven’t been removed.The washer is overloaded. |
| F8 E1 or LO FL | The washer is slow to fill or not filling at all. | The hoses are kinked or obstructed. The faucets aren’t fully open. The water inlet screens are blocked. |
| F8 E2 | The washer detects a problem with the dispenser system. | The dispenser drawer is clogged with detergent. |
| F9 E1 | The washer isn’t draining. | The drain hose is obstructed. The drain system isn’t installed properly. The drain pump is defective. The control board is malfunctioning. |
How to Troubleshoot Error Codes
To troubleshoot a Maytag washer, identify the error code to reveal the fault that it has detected. Inspect your washer and rule out the possible causes, starting from the easiest to fix.
If needed, replace defective components and parts to get your washer back up and running.
Let’s take a closer look at the most common error codes on Maytag front load washers and learn how to troubleshoot them.
| Error Codes | Solutions |
| LOC or LC | • Push and hold the Control Lock button for 3 seconds. The washer’s display will count down while you press the button. • If the countdown doesn’t start, press the Power button to turn off the washer. Click it again turn on the appliance, and press Control Lock for 3 more seconds. • If the controls are still locked, reset the washer by unplugging its power cord or turning the power off at the circuit breaker. • After a minute or two, restore power to the washer. Push and hold the Control Lock button for 3 seconds. |
| SUD or Sd | Using Regular Detergent • Stop the cycle and empty the drum. Transfer your laundry to a separate container while you clean the washer. • Add affresh washer cleaner or a regular liquid bleach product, then run a cleaning cycle. • Run a rinse and spin cycle after the cleaning cycle. Then, remove and wash the agitator to remove any excess cleaner. • Open the washer door to let the drum dry thoroughly. • Clear away any excess detergent around the dispenser area using a damp cloth. Wipe the area dry. • Clean in and around the washer door. Wipe the exterior of the unit using a clean, damp cloth. |
| Using Too Much Detergent • Stop the cycle and transfer your laundry to a separate container while you clean the washer. • Wipe the door glass using a soft cloth or affresh Machine Cleaning wipe. Then, add affresh cleaner or a regular liquid bleach product. • Select the Clean Washer with affresh cycle. Press the Start button to run the cycle. • After the cycle, leave the door open to let the drum dry. If your washer has the Fresh Hold or Fresh Spin option, select it to dry the interior faster. • Clear away any excess detergent around the dispenser area using a damp cloth. Wipe the area dry. • Clean in and around the washer door. Wipe the exterior of the unit using a clean, damp cloth. | |
| Using No Splash or Easy Pour Liquid Bleach • Open the washer door and empty the drum. • Clean the door glass with a damp cloth or affresh wipe. Add affresh cleaner or a regular liquid bleach product. • Close the door, then run a cleaning cycle. Select the Clean Washer with affresh cycle, then press and hold the Start button to begin. • Select the Fresh Hold or Fresh Spin option to dry the washer’s interior. • Or, leave the door open for a few hours until it fully dries inside. • Clear away any excess detergent around the dispenser area using a damp cloth. Wipe the area dry. • Clean in and around the washer door. Wipe the exterior of the unit using a clean, damp cloth. | |
| Int | • Press the Pause or Cancel button two times. Then, click on the Power button once. • If the code is still displayed, reset the washer. Unplug the power cord or turn off the power at the circuit breaker. • Restore power to the washer after a minute or two. |
| dET | • Open the detergent dispenser drawer until it stops. Push the release tab and pull it straight out to remove it. • Lift the panel inside the drawer. Then, reinstall it correctly. • Slide the cover panel onto the posts on the dispenser. • Align the dispenser’s edges with the guides in the washer. Push and slide the drawer back into place. |
| rL or F34 | • Cancel the Cleaner Washer Cycle. • Remove the laundry in the drum and transfer it to a separate container while the washer is going through a cleaning cycle. • Restart the Cleaner Washer Cycle. |
| F5 E2 | Overloading • Check the laundry tags on your items to confirm that they are machine washable. Remove the items that aren’t. • Empty the pockets of your laundry before loading them into the drum. • Add heavily soiled items first. Place items one at a time to prevent them from getting tangled. • Evenly distribute the laundry around the wash plate. |
| Dirty Gasket • Open the washer door. • Carefully pull back the door seal and inspect the entire area for dirt build-up and other possible obstructions. • Remove any small items like coins or buttons that might have gotten stuck in the door seal. • Get your affresh wipes. Then, clean the entire surface of the rubber seal using the textured side of the wipes. | |
| F7 E1 | Unremoved Shipping Bolts • Disconnect the washer from its power source. • Turn the washer around to access the rear panel. Then, locate the shipping bolts. • Use a 5/18” wrench to slide each bolt and space to the middle of the hole. • Remove all the shipping bolts and set them aside. |
| Overloading • We recommend measuring the size of your laundry load to prevent unnecessary stress on your washer’s motor and other components. • Keep the drum half full to do a regular load. Or, fill up ¾ of its space to do a large one. • Place a hand inside the drum to check if there’s still enough space from the top of the load to the top of the washer. | |
| F8 E1 or LO FL | Clogged Inlet Screens • Turn off and unplug your washer. • Remove the hot water fill hose by rotating the coupling by hand. Repeat the same step for the cold water fill hose. • Use pliers to pull out the inlet screens on both valves. Wipe the screens clean using cotton swabs or soak them in soapy water. • Wipe the screens with a soft cloth or let them air dry before reinstalling them into the washer. • Use pliers to reinsert the inlet screens. • Attach the hot water fill hose to the inlet valve to the right. Rotate the coupling by hand until it is snug, then secure the connection using pliers. • Repeat the same step to attach the cold water fill hose. • Restore power to the washer. Turn it on and run a test cycle to check if the washer fills and starts. |
| Clogged Water Lines • Disconnect the hot and cold fill hoses from the washer. Use pliers, if needed. • Place the hoses over a laundry tub, bucket, or drain pipe. • Turn on the supply valves and run the water for a few seconds to clear the lines. • Reconnect the hot water fill hose to the inlet valve to the right. Screw the coupling by hand until it is snug, then secure the connection using pliers. • Repeat the same step to connect the cold fill hose to the inlet valve on the left. | |
| Poor Water Pressure • Call a licensed plumber to identify the root cause of the low water pressure problem and recommend the appropriate repair. • Depending on the underlying cause, they might recommend unclogging or replacing pipes to promote better water flow. | |
| F8 E2 | • Press the dispenser drawer level to unlock it. Then, pull out the drawer. • Clean the drawer under running water. • Wipe the housing area with a damp cloth or sponge. If needed, use a soft brush to remove any hardened detergent residue. • Rinse the dispenser drawer. Then, wipe it dry before reinstalling it. • Wipe the housing area using a dry cloth. Reinstall the dispenser drawer. |
| F9 E1 | Obstructed Drain Hose • Unplug the washer or turn off power at the circuit breaker. Disconnect the drain hose from its port. • Connect the end of the drain hose to a wet or dry vacuum. Then, use tape to seal the ends together. • Turn on the vacuum and keep it running for 5 minutes. • Clean the drain hose using a homemade solution of 1:1 warm water and distilled white vinegar. • Pour the solution down the hose and let it sit. After 15 minutes, pour hot water down the hose to clear the solution. • Wipe the drain port on the washer before reattaching the hose. • Restore power to the washer and turn it on. Run a quick cycle to confirm that the washer drains. |
| Incorrect Drain Hose Installation (Standpipe) • Use the measuring tape to confirm that the top of the standpipe is at least 39” from the floor and no more than 96” high. • Make the necessary adjustments to meet this requirement. • Insert the drain hose 4.5” into the standpipe. Don’t insert the hose too far down the pipe as it will cause siphoning. • Secure the drain hose to the standpipe using the supplied tie. | |
| Incorrect Drain Hose Installation (Laundry Tub) • Check that the top of the laundry tub measures at least 39” from the floor and no more than 96” high. • Hook the drain hose onto the laundry tub. Make sure to insert 4.5” of the hose into the tub to prevent siphoning. • Secure the drain hose to the leg of the laundry tub. | |
| Incorrect Drain Hose Installation (Floor Drain) • Remove the pre-installed drain clamp on the hose. • Elevate the siphon break at least 28” from the floor. • Insert the hose about 4.5” into the drain pipe. Refrain from inserting the excess hose too far down the pipe as it will cause siphoning. |
LOC or LC
An LOC or LC error code indicates that the Control Lock function is engaged, which locks all controls on your washer. This is to prevent unintentional changes to the settings during operations.
Solution: To disable the Control Lock function on a Maytag washer, follow these steps:
- Step 1: Push and hold the Control Lock button for 3 seconds. The washer’s display will count down while you press the button.
- Step 2: If the countdown doesn’t start, press the Power button to turn off the washer. Click it again turn on the appliance, then repeat Step 1.
- Step 3: If the controls are still locked, reset the washer by unplugging its power cord or turning off the power at the circuit breaker.
After a minute or two, restore power to the washer. Repeat Step 1.
- Step 4: Once unlocked, push the Start button to pause the cycle, or press the power button to turn off the washer.
SUD or Sd
If your washer is displaying a Sud or Sd error, it means it has detected an excessive amount of suds in the drum. Your unit automatically extends the rinse cycle and adds more water.

Using Regular Detergent
One of the main causes of excess suds is using the wrong kind of detergent. If you have a high-efficiency washer, you should use a high-efficiency detergent.
Using the regular kind will lead to an excessive amount of suds. Since your washer is designed to automatically correct the sud error, it will extend the cycle time in an attempt to fix the problem and clean the laundry.
Quick Note:
Not all HE detergents are made equal. For example, natural and organic formulas may generate more suds than the standard variety.
Never add single-dose laundry packets, color-safe bleach, or fabric softener crystals into the dispenser. The product will not be dispensed properly.
Solution: Maytag recommends the use of Swash laundry detergent, which is a low-sudsing and quick-dispersing formula for both front and top-load washers. Its Precision Pour Cap prevents the overuse of detergent.
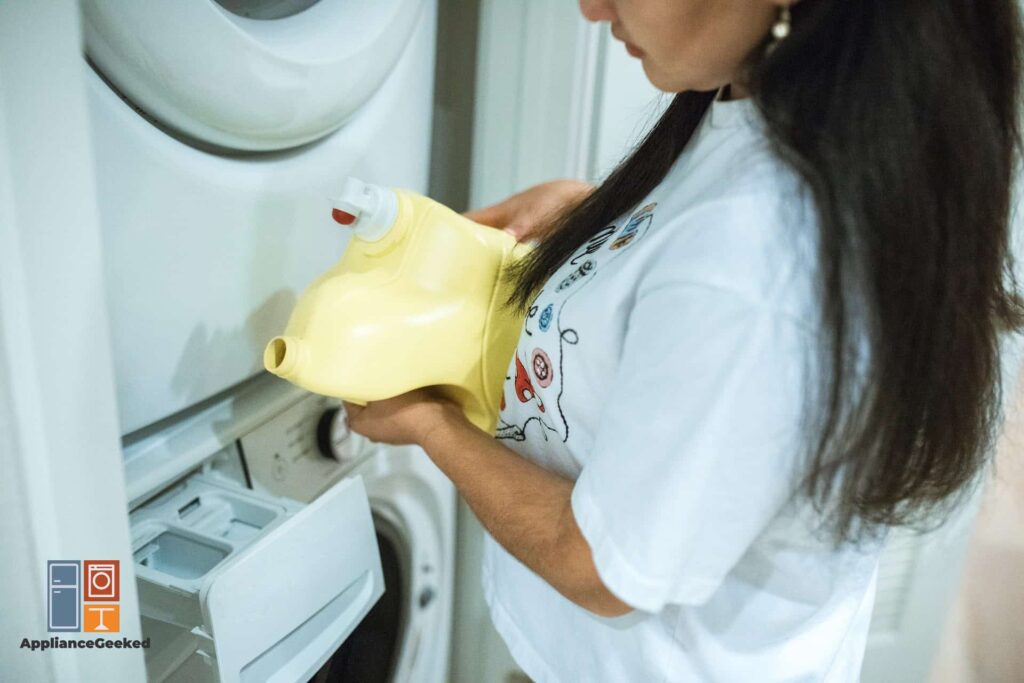
To add HE detergent to an Optimal Dispenser Drawer, follow these steps:
- Step 1: Open the detergent drawer.
- Step 2: Pour the detergent into the drawer. Never fill beyond the Max line.
Using an Optimal Dispenser Drawer, you won’t have to refill the drawer after every wash. It will automatically dispense the correct amount of detergent.
- Step 3: Add fabric softener into the liquid fabric softener compartment, if needed.
- Step 4: Adjust the detergent concentration settings, if needed. Press and hold the Temp & Soil button until you see the desired concentration level.
If the label doesn’t list the detergent’s concentration, calculate it yourself. Use the table below as your guide.
| Concentration | Measurement (No. of ounces / No. of loads) |
| 2X | 1.5–2.49 |
| 3X | 0.9–1.49 |
| 4X | 0.7–0.89 |
| 5X | 0.5–0.69 |
| 6X | 0.3–0.49 |
Using Too Much Detergent
More detergent doesn’t mean cleaner clothes. If you add too much, you’ll end up with a drum full of foam and laundry that needs another round of cleaning.
The best way to avoid this mess is to measure your detergent. If your washer has an Optimal Dispenser Drawer, you can add up to 424 ml of liquid detergent so you don’t have to measure and refill after every wash.
All you have to do is pour the detergent in and your washer will dispense the right amount for you during cycles.
Quick Note:
Some models have a Single Dispenser Drawer where you can add liquid bleach, liquid chlorine bleach, and liquid fabric softener.
What you’ll need:
- Affresh cleaner
- Affresh Machine Cleaning wipe
- Towels
Solution: Run a cleaning cycle to get rid of the excess foam and detergent residue in your Maytag washer. Follow these steps to resolve your problem.
- Step 1: Stop the cycle and transfer your laundry to a separate container while you clean the washer.
- Step 2: Wipe the door glass using a soft cloth or affresh Machine Cleaning wipe.
- Step 3: Add affresh cleaner or a regular liquid bleach product.
- Step 4: Select the Clean Washer with affresh cycle. Press the Start button to run the cycle.
- Step 5: After the cycle, leave the door open to let the drum dry. If your washer has the Fresh Hold or Fresh Spin option, select it to dry the interior faster.
- Step 6: Clear away any excess detergent around the dispenser area using a damp cloth. Wipe the area dry.
- Step 7: Clean in and around the washer door.
- Step 8: Wipe the exterior of the unit using a clean, damp cloth.
Measure your detergent, especially if your washer doesn’t have the Optimal Dispenser drawer. Look at the detergent label for the recommendations of the manufacturer.
Using No Splash or Easy Pour Liquid Bleach
No splash or easy-pour liquid bleach products are formulated with thickening agents. If you use it on your HE washer, it will produce an excessive amount of suds.
What you’ll need:
- Affresh Machine Cleaning wipe
- Soft cloth
Solution: To run a cleaning cycle after using No Splash or Easy Pour liquid bleach, follow these steps:
- Step 1: Open the washer door and empty the drum.
- Step 2: Clean the door glass with a damp cloth or affresh wipe.
- Step 3: Add affresh cleaner or a regular liquid bleach product.
- Step 4: Close the door, then run a cleaning cycle. Select the Clean Washer with affresh cycle, then press and hold the Start button to begin.
- Step 5: After, select the Fresh Hold or Fresh Spin option to dry the washer’s interior. If your unit doesn’t have the option, leave the door open for a few hours until it fully dries inside.
- Step 6: Clear away any excess detergent around the dispenser area using a damp cloth. Wipe the area dry.
- Step 7: Clean in and around the washer door.
- Step 8: Wipe the exterior of the unit using a clean, damp cloth.
Int
An Int error code is short for interruption. It happens when a cycle suddenly stops or pauses due to a power issue.
When this happens, your washer will take about 20 to 30 minutes to stop spinning and draining. There is really no need for troubleshooting, but you can remove the code by pressing a few buttons.
Solutions: To resolve an Int error code on a Maytag front-load washer, follow these steps:
- Step 1: Press the Pause or Cancel button two times.
- Step 2: Push the Power button once.
- Step 3: If the code is still displayed, reset the washer. Unplug the power cord or turn off the power at the circuit breaker.
- Step 4: Restore power to the washer after a minute or two.
dET
On select Maytag models, a dET error code will appear when the dispenser cartridge isn’t installed properly and the drawer isn’t closed all the way. Once you install the dispenser correctly, the problem should be fixed.
If you are using single doses of detergent, you don’t have to worry about encountering this error.
Solution: To resolve a dET error on a Maytag washer, follow these steps:
- Step 1: Open the detergent dispenser drawer until it stops.
- Step 2: Push the release tab and pull it straight out to remove it.
- Step 3: Lift the panel inside the drawer. Then, reinstall it correctly.
- Step 4: Slide the cover panel onto the posts on the dispenser.
- Step 5: Align the dispenser’s edges with the guides in the washer. Push and slide the drawer back into place.
rL or F34
Cleaning cycles must be run on an empty washer because it uses high heat to clean the interior thoroughly. Extreme heat may cause shrinkage and damage to your laundry items.
Thus, when your washer detects items in the drum when you’ve selected a Cleaner Washer Cycle, it will display an F34 or an rL error.
There really is nothing wrong with your washer. It’s just telling you to remove the load in the drum so that the cleaning cycle can begin.
Solution: Stop the cleaning cycle. Remove the laundry in the drum and transfer it to a separate container while the washer is going through a cleaning cycle.
After, simply restart the Cleaner Washer Cycle.
F5 E2
An F5 E2 indicates an unlocked door. When this happens, you won’t be able to start a cycle until you clear the code and close the door properly.
If the door appears closed, inspect the area for possible obstructions. Your problem could just be a piece of clothing caught between the door and the rubber gasket, preventing it from closing properly.
It could also be due to an overloaded drum or an improperly leveled washer.

Overloading
The easiest way to verify that the washer is overloaded is the palm trick. Just stick a hand inside the washer and see if there is enough space for it to fit.
If your hand can’t fit, then your washer is too full. Not to worry, removing a few items and distributing the laundry evenly around the drum should get that door to close.
Solution: First, check the laundry tags on your items to confirm that they are machine washable. Then, remove the items that aren’t.
- Step 1: Empty the pockets of your laundry before loading them into the drum.
- Step 2: Add heavily soiled items first. Place items one at a time to prevent them from getting tangled.
- Step 3: Evenly distribute the laundry around the wash plate.
Other Tips:
Don’t wash large items on their own (e.g. blankets, curtains, and sheets).Never twist sheets, towels, curtains, and other heavy items.
Never pack or push the laundry inside the tub.
Dirty Gasket
Over time, lint, hair, soap residue, and other foreign objects can get lodged into the rubber gasket of your washer. When all of that gunk accumulates, your door might struggle to latch properly.
What you’ll need:
- Affresh Machine Cleaning wipes
Solution: To clean a dirty door gasket on a Maytag washer, follow these steps:
- Step 1: Open the washer door.
- Step 2: Carefully pull back the door seal and inspect the entire area for dirt build-up and other possible obstructions.
- Step 3: Remove any small items like coins or buttons that might have gotten stuck in the door seal.
- Step 4: Get your affresh wipes. Then, clean the entire surface of the rubber seal using the textured side of the wipes.
F7 E1
An F7 E1 error indicates a problem with the washer’s motor. Although it is an easy fix, it is an important one that requires immediate attention because it can put a lot of stress on the motor and cause premature failure.
If you own a new washer, and it shakes violently whenever you run wash cycles, you most likely still have the shipping bolts installed. Not to worry, your washer should stop shaking once the bolts are removed.
However, if that isn’t the case, it could be caused by an overloaded washer.
Unremoved Shipping Bolts
Regardless of the brand, every washer comes packed with shipping bolts to keep the drum safe and secure during transportation. If you recently bought a new washer, this is the likely culprit of your F7 E1 error.
Aside from the error code, a tell-tale sign of unremoved shipping bolts is violent shaking during operations. Still, the best way to confirm this is to do a quick visual inspection of the washer’s rear panel.
What you’ll need:
- 5/18” wrench
Solutions: To remove the shipping bolts on your Maytag washer, follow these steps:
- Step 1: Disconnect the washer from its power source.
- Step 2: Turn the washer around to access the rear panel. Then, locate the shipping bolts.
- Step 3: Use a 5/18” wrench to slide each bolt and space to the middle of the hole.
- Step 4: Remove all the shipping bolts and set them aside. Keep the bolts as you can reuse them when you move to a new home.
- Step 5: Press the Pause or Cancel button and the Power button to remove the code on the display.
Overloading
Nothing good ever comes from overloading your washer. It won’t help you clean that pile of laundry faster, and it certainly won’t be good for the motor.
By loading the washer properly, you can ensure that each piece of clothing gets cleaned thoroughly. You can also extend the lifespan of your washer by preventing unnecessary stress on the motor.
Solution: We recommend measuring the size of your laundry load to prevent unnecessary stress on your washer’s motor and other components.
Here’s a little guide to help you determine the different load sizes for the average HE washing machine.

| Load Size | Measurement |
| Regular | 6 lbs |
| Large | 11 lbs |
| Extra Large | 21 lbs |
If you don’t want to measure your laundry, you can eyeball how much your laundry weighs.
A regular load will occupy only half of the drum, while a large one will occupy ¾ of the space. An extra-large load, on the other hand, fills the drum but has enough space for the clothes to tumble freely.
To check if the washer is overloaded, slip a hand inside the washer. If there isn’t enough room for it to fit, the washer is too full.
F8 E1 or LO FL
An LO FL or F8 E1 code indicates that your washer is taking too long to fill. In most cases, this minor issue arises when the lines are kinked or when the faucets are fully open.
Sometimes, it can be caused by obstructions in the filters or the hoses. In such cases, you’ll have to get rid of the clog to promote good water flow and clear the code.
Clogged Water Inlet Screens
Both hot and cold supply hoses have tiny mesh screens that collect dirt and debris from your water supply, protecting your laundry from getting soiled.
The mesh inlet screens should be cleaned at least once a year to prevent dirt from accumulating and blocking water flow. However, if you notice dirt on your freshly laundered clothes, check the filters and clean them up.
What you’ll need:
- Pliers
- Cotton swab
- Soft cloth
Solution: To clean the water inlet screens of your Maytag washer, follow these steps:
- Step 1: Disconnect the washer from its power source.
- Step 2: Remove the hot water fill hose by rotating the coupling by hand. Use pliers, if necessary.
- Step 3: Repeat the same step for the cold water fill hose.
- Step 4: Use pliers to pull out the inlet screens on both valves.
- Step 5: Wipe the mesh screens using cotton swabs or soak the screens in soapy water.
- Step 6: Wipe the screens with a soft cloth or let them air dry before reinstalling them into the washer.
- Step 7: Use pliers to reinsert the inlet screens.
- Step 8: Attach the hot water fill hose to the inlet valve to the right. Rotate the coupling by hand until it is snug, then secure the connection using pliers.
- Step 9: Repeat the same step to attach the cold water fill hose.
- Step 10: Restore power to the washer.
- Step 11: Turn it on and run a test cycle to check if the washer fills and starts.
Clogged Water Lines
Aside from clogged water inlet screens, the water lines can get clogged. You can remove the obstructions by flushing them out with water, which we’ll walk you through below.
However, if the clog won’t come out, it’s best to have the hoses replaced. You can get the right replacement for your specific model from Maytag or other repair shops near you.
Quick Note:
Water inlet hoses must be replaced every 5 years to reduce the risk of malfunctions. After replacing your hoses, label the date of replacement using a permanent marker.
What you’ll need:
- Pliers
- Laundry tub or bucket
Solution: To remove obstructions in your washer’s water supply lines, follow these steps:
- Step 1: Disconnect the hot and cold fill hoses from the washer’s port. Use pliers, if needed.
- Step 2: Place the hoses over a laundry tub or bucket.
- Step 3: Turn on the faucets and run the water for a few seconds to clear any obstructions in the lines.
- Step 4: Reconnect the hot water fill hose to the inlet valve to the right. Screw the coupling by hand until it is snug, then secure the connection using pliers.
- Step 5: Repeat the same step to connect the cold fill hose to the inlet valve on the left.
Poor Water Pressure
If the water supply hoses have no obstructions or kinks, your filling error might be because of poor water pressure. Ideally, your household should have around 30 to 80 psi for your washer to function properly.
Solution: Call a licensed plumber to diagnose the water pressure issue in your home. Depending on the underlying cause, they might recommend unclogging or replacing pipes to promote better water flow.
The cost will depend on your area, the plumbing services, and the extent of the repairs.
F8 E2
An F8 E2 error indicates a problem with your detergent dispenser. It usually happens when there’s too much detergent residue clogging up the dispenser.
Whenever you’re cleaning the washer, you should include the dispenser and the area around it to prevent detergent from hardening. It can be quite tricky to clean once there’s a solid build-up of residue.
More importantly, you should remove any residue to prevent excess suds from forming during wash cycles.
What you’ll need:
- Damp cloth or sponge
- Mild soap
- Soft brush
Solution: To clean your Maytag washer’s dispenser drawer, follow these steps:
- Step 1: Press the dispenser drawer level to unlock it.
- Step 2: Remove the drawer.
- Step 3: Clean the drawer under running water.
- Step 4: Wipe the housing area with a damp cloth or sponge. If needed, use a soft brush to remove any hardened detergent residue.
- Step 5: Rinse the dispenser drawer. Then, wipe it dry before reinstalling it.
- Step 6: Wipe the housing area using a dry cloth.
- Step 7: Reinstall the dispenser drawer.
F9 E1
Kinks, obstructions, and poor installation of the drain system are some of the most common causes of drain errors in washing machines. Lucky for you, they are so easy to troubleshoot and don’t require repair service.

Obstructed Drain Hose
Lint, hair, and other small items that you forget to remove from the pockets can accumulate in the drain hose, eventually blocking the flow of water out of the washer.
Quick Note:
Check and empty all the pockets of your clothes before loading them into the wash. For small pieces of clothing, put them inside a mesh bag so you don’t lose them.
What you’ll need:
- Tape
- Towels
- Wet or dry vacuum
- Warm water
- Distilled white vinegar
- Small bowl
Solution: To unclog a drain hose, follow these steps:
- Step 1: Unplug the power cord or turn off power at the circuit breaker.
- Step 2: Detach the drain hose from its port.
- Step 3: Plug the end of the drain hose into a wet or dry vacuum. Then, tape the ends together.
- Step 4: Turn on the vacuum and keep it running for 5 minutes.
- Step 5: Clean the drain hose using a homemade solution of 1:1 warm water and distilled white vinegar. Just pour the solution down the hose and let it sit for several minutes.
- Step 6: After 15 minutes, pour hot water down the hose to clear the solution.
- Step 7: Wipe the drain port on the washer before reattaching the hose.
- Step 8: Restore power to the washer and turn it on.
- Step 9: Run a quick cycle to confirm that the washer drains.
Incorrect Drain Hose Installation (Standpipe)
Whether you use a floor or a wall standpipe for drainage, you must comply with the recommended length to prevent errors. According to Maytag, the top of the standpipe must measure at least 39” or no greater than 96” from the bottom of the washer.
On top of that, the standpipe must have a diameter of 2” and a carry-away capacity of 17 gal. per minute.
What you’ll need:
- Measuring tape
- Cable tie
Solution: To promote better drainage with a standpipe drain system, follow these steps:
- Step 1: Use the measuring tape to confirm that the top of the standpipe is at least 39” from the floor and no more than 96” high. Make the necessary adjustments to meet this requirement.
- Step 2: Insert the drain hose 4.5” into the standpipe. Don’t insert the hose too far down the pipe as it will create a siphon effect, causing your washer to drain and fill at the same time.
- Step 3: Secure the drain hose to the standpipe using the supplied tie.
Quick Note:
Never seal the connection of the drain hose to the standpipe as this may cause siphoning, which makes your washer fill and drain at the same time.
Incorrect Drain Hose Installation (Laundry Tub)
Another way to drain the water out of your washer is through a laundry tub.
Like the standpipe setup, the top of the tub must measure no less than 39” and no more than 96” from the floor. It must also have a minimum capacity of 20 gal. per minute.
What you’ll need:
- Measuring tape
- Cable tie
Solution: To install a drain hose on a laundry tub, follow these steps:
- Step 1: Check that the top of the laundry tub measures at least 39” from the floor and no more than 96” high.
- Step 2: Hook the drain hose onto the laundry tub. Make sure to insert 4.5” of the hose into the tub to prevent siphoning.
- Step 3: Secure the drain hose to the leg of the laundry tub.
Incorrect Drain Hose Installation (Floor Drain)
If you want to connect the washer to a floor drain, you need a Siphon Break Kit, which can be purchased separately. This is to prevent your washer from draining and filling up with dirty water during operations.
What you’ll need:
- Siphon break kit
Solution: To set up a floor drain system for your Maytag washer, follow these steps:
- Step 1: Remove the pre-installed drain clamp on the hose.
- Step 2: Elevate the siphon break at least 28” from the floor.
- Step 3: Insert the hose about 4.5” into the drain pipe.
Quick Note:
If you’re continuing to have problems after installing the drain hose properly, straightening kinks, and clearing obstructions, there are a few other possible causes you can look into.
We have a more comprehensive guide for troubleshooting an F9 E1 error code on a Maytag washer here(maytag e1 f9).
Frequently Asked Questions
Most homemade detergent formulas are made with ingredients like vinegar, baking soda, and borax. Although these ingredients can clean your clothes, they may cause damage to your washer, which is why manufacturers often discourage their use.
Not only that, using homemade detergent may void your warranty. If it does cause damage to the washer, you could end up with a hefty repair fee.
Always unplug the power cord of your washing machine or turn off the power at the circuit breaker before conducting any repairs or maintenance. If needed, disconnect the water inlet hoses and turn off the hot and cold faucets.
Troubleshoot your Maytag front load washer error codes before calling professional services. Most of the time, you can resolve errors with proper installation, deep cleaning, or a quick reset.
After ruling out the easy repairs, contact professional services to help you identify the underlying cause of the error. They can also recommend the best fix for your problem.