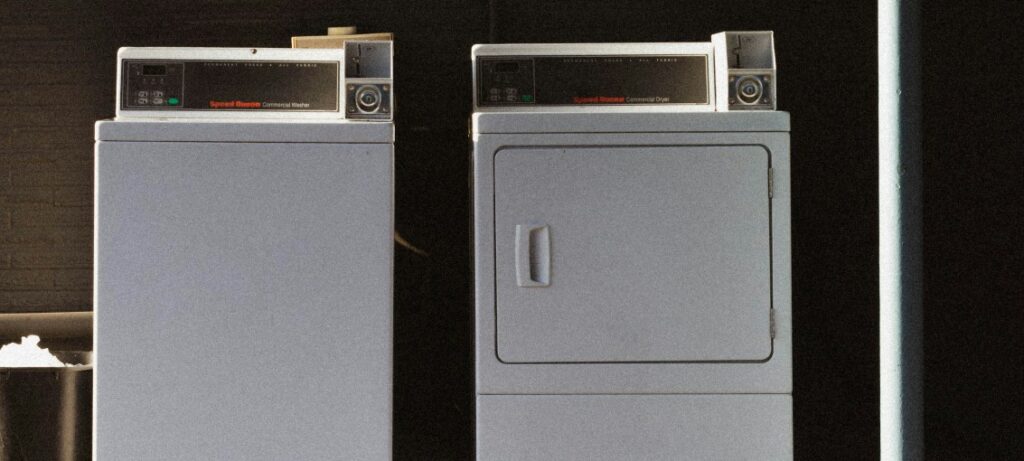
It was one of those hectic laundry days—you know, when the pile of dirty clothes spills out of the hamper and takes over your floor. After washing, I tossed the clothes into the dryer only to find out that it won’t start.
Finding places to hang freshly laundered clothes in a small apartment is a problem I don’t want to encounter again. Luckily for me, and my old dryer, I was able to get it back up and running after making a few replacements.
If you’re in the same boat, don’t worry! This article will walk you through all the possible causes and show you step-by-step solutions to fix a Maytag Centennial dryer that won’t start.
Why won’t my Maytag Centennial Dryer start?
A Maytag Centennial dryer won’t start when the door is left ajar. If the unit has no underlying problems, it should start up once the door is closed.
Other issues that may prevent a dryer from starting include a faulty door switch, frayed drive belt, bad heating element, and damaged control board.
Sometimes, the fix is easier than you think. Before diving into the complicated repairs, here are a few ways to troubleshoot your dryer.
- Check if the power cord is plugged in.
Yes, it sounds too simple to be true, but believe it or not, a dryer that won’t start isn’t always broken. Sometimes, the power cord gets accidentally unplugged.
- Confirm that the outlet has power.
If the dryer still won’t start, pull the power cord and plug in another device to confirm the outlet has power. If the outlet’s dead, don’t worry—it could just be a tripped circuit breaker, which we’ll cover in more detail below.
- Close the door.
Your dryer will not start if the door is open. Give the door a firm push until you hear it latch, and then try running a new cycle.
- Check for obstructions.
Inspect the area around the door. Look for items that might have gotten lodged into the rubber seal, and then remove them if you find any.
Causes and Solutions
Here’s an overview of the common causes of a Maytag Centennial dryer that won’t start, along with step-by-step instructions for resolving them.
| Causes | Solutions |
| Tripped Circuit Breaker | Locate your circuit breaker and identify the switch that tripped. It will be slightly out of alignment with the others. Flip the switch to the OFF position. Wait a few seconds, then turn it back ON. Next, plug in your dryer back. Check if it powers up and runs smoothly. Turn on any lights or appliances connected to the same circuit. If the breaker trips again, one of those devices may have faulty wiring or be overloading the circuit. Call a licensed electrician to troubleshoot and fix the issue safely. |
| Defective Door Switch | Unplug the power cord of your dryer. Unthread the screws securing the lower access panel using a 5/16-inch nut driver. Then, detach the panel. Unfasten the screws securing the bottom of the front panel. Gently pull the front panel downward to remove it from the dryer. This will give you access to the inner components. Take note of the orientation of the wires connected to the door switch before disconnecting them. Use pliers to depress the retaining tabs and remove the door switch. Insert the door switch in the front panel until it snaps into place. Depending on your dryer model, you might have to replace one or two terminals on the door switch’s wire connectors. Snip off the old terminals on the wire connectors. Then, remove about 1/4-inch of insulation from the wires. Insert the wires into the new terminals. Use a crimping tool to keep them secure. Reattach the door switch wires to the correct terminals. Align the front panel with the dryer’s main top and hook the retaining clips into place. Then, thread the screws back in. Mount the lower access panel and refasten the screws. Reconnect your dryer to its power source. Turn it on and run a test cycle to ensure everything is working smoothly! |
| Faulty Door Catch | Unplug the power cord of your dryer. Unthread the screws securing the lower access panel using a 5/16-inch nut driver. Then, detach the panel. Unfasten the screws securing the bottom of the front panel. Pull the front panel down to detach it from the dryer. Take note of the orientation of the wires connected to the door switch before disconnecting them. Open the dryer door. Use pliers to depress the retaining tabs and remove the broken door catch. Next, remove the door strike. Get your replacement parts. Insert the new strike into the door and the new door catch in the front panel. Close the door to confirm that it latches properly. Reconnect the door switch wires to their respective terminals. Hook the retaining clips on the front panel to the dryer’s main top. Rethread the screws to secure the front panel. Mount the lower access panel and refasten its screws. Finally, reconnect your dryer to power. Turn it on and run a test cycle to verify the fix worked. |
| Blown Thermal Fuse | Unplug the power cord of your dryer. Unthread the screws holding the lower access panel in place. Once the screws are out, detach the panel and set it aside. Loosen the screws at the bottom of the front panel. Pull the panel down and detach it from the dryer. Remember the orientation of the wires connected to the door switch before unplugging them. Remove the front panel and set it aside. Unfasten the top mounting screws. Lift up the main top, and use a chain to prop it open. Unplug the light assembly wires. Remove them from the retainer. Remove the four front bulkhead mounting screws. Next, carefully lift the bulkhead and detach it from the cabinet. Reach under the drum to unhook the belt from the pulley and the motor shaft. Take out the drum from the cabinet and set it aside. Unplug the thermal fuse wires. Unfasten the mounting screws and remove the fuse from the dryer. Align the new fuse into the burner tube and thread the screws to keep it in place. After, reconnect the wires to the new fuse. Mount the drum on the cabinet by aligning it on the rollers. Reach under the drum and loop the belt on the pulley and motor shaft in a zigzag pattern. Then, gently rotate the drum to align the belt. Reinstall the front bulkhead by aligning the tabs into the slots on the cabinet. Rethread the mounting screws to keep it secure. Slip the light assembly wires into the retainer and reconnect them. Lower the main top, reinstall its screws, and reconnect the door switch wires to the correct terminals. Mount the front panel by reconnecting its retaining clips to the main top. Then, rethread the screws at the bottom. Reinstall the lower access panel and refasten its screws. Reconnect your dryer to power. Turn it on and run a test cycle to confirm that it starts. |
| Damaged Drive Belt | Unplug the power cord of your dryer. Use a 5/16-inch nut driver to remove the screws from the lower access panel; then, set the panel aside. Unthread the screws at the bottom of the front panel. Pull the panel down and remove it from the dryer. Take note of the orientation of the door switch wires. After, disconnect them to detach the front panel. Unfasten the screws at the top that hold the main top in place. Lift the main top and use a chain or prop to hold it open. Unplug the light assembly wires and remove them from the retainer. Remove the four screws securing the front bulkhead. Next, carefully lift the bulkhead and detach it from the dryer cabinet. Reach under the drum and unhook the belt from the pulley and motor shaft. Pull the damaged drive belt off the drum. Slide the new belt onto the drum with the grooves facing inwards. Reach under and loop the belt on the pulley and motor shaft in a zigzag pattern. Rotate the drum to align the belt. Align the tabs on the front bulkhead with the slots on the cabinet. Then, rethread the mounting screws to keep it secure. Slip the light assembly wires into the retainer and reconnect them. Lower the main top and reinstall the screws. Plug the door switch wires into the appropriate terminals. Mount the front panel by reconnecting its retaining clips to the main top. Then, fasten the screws. Reinstall the lower access panel and refasten its screws. Reconnect your dryer to power. Turn it on and run a test cycle to confirm that it starts. |
| Broken Heating Element | Unplug your dryer from the power source. Use a 5/16-inch nut driver to remove the screws from the lower access panel. Set the panel aside. Unthread the screws mounting the front panel. Pull the panel down and remove it from the dryer. Take note of how the door switch wires are connected, and then disconnect them. Set the front panel aside. Unfasten the screws to release the heating element shield. Remove the nut to detach the power supply wire. Unplug the wires from the high-limit thermostat. Unthread the lower and rear mounting screws on the heating element assembly. Then, remove it from the dryer. Remove the screws to separate the heating element housing. Loosen the nuts and washers to release the heating element coil. Straighten the end of the coil using pliers. Next, carefully slide the coil out of the insulator rings. Take your new coil and thread it through the insulator rings without stretching it. Ensure the coil is spaced evenly to prevent it from touching itself. Secure each end of the coil to an insulator post. Reattach the washers and nuts to keep the coil in place. Join the two halves of the housing with the screws. Align the assembly with the heat duct and fasten it in place using the screws. Plug in the high-limit thermostat wires. Next, reattach the power supply wire and the nut. Mount the heating element shield and thread the screws. Plug the door switch wires into the appropriate terminals. Reattach the front panel by connecting its retaining clips to the main top and refasten the bottom screws. Then, reinstall the lower access panel and secure its screws. Reconnect your dryer to power. Turn it on and run a test cycle to ensure it starts properly. |
| Malfunctioning Control Board | Unplug your dryer from the power source. Pull the dryer away from the wall to access the back part. Unthread the screws at the back of the control panel. Carefully pull the control panel up to free it from its mounting hooks. Flip the control panel and snap a photo of the wires for reference during the reassembly process. Use a small flathead screwdriver to press the locking tab on the wire connector. Then, pull to unplug the wire. Disconnect all the wires on the control board. Unthread the lone screw on the control board mounting bracket. Push the locking tab in the middle and remove the board. Align the tabs on the control board with the slots on the bracket. Then, rethread the screw at the back to secure it. Reconnect all the wires on the control board. Use your photo for reference. Connect the blue wire on the panel to the side of the control board. Reinstall the panel on top of the dryer. Thread the screws at the back of the panel to keep it in place. Reconnect your dryer to power. Turn it on and run a test cycle to ensure it starts properly. |
Tripped Circuit Breaker
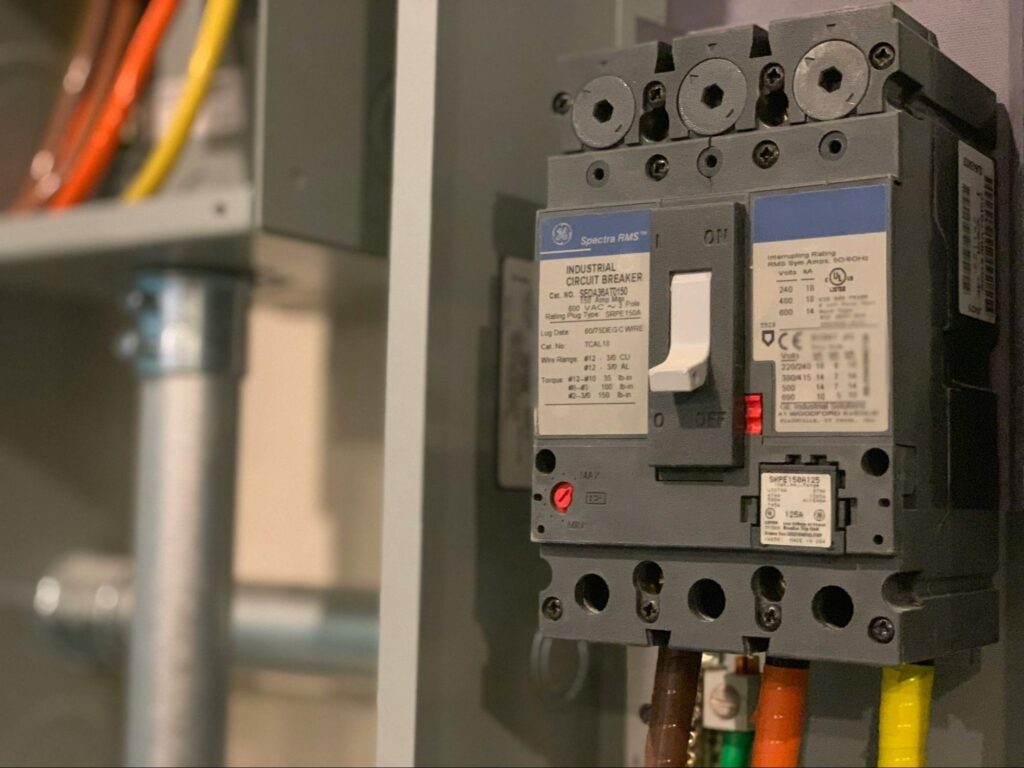
Does your dryer keep turning on and off? You’re most likely dealing with a tripped circuit breaker, which is actually a safety feature that helps reduce the risk of fires or electric shocks in your household.
In many cases, simply resetting the breaker will fix the issue, but if it persists, there could be other electrical problems at play. A common culprit is an overloaded circuit—when too many appliances are drawing power from the same line.
To avoid this, make sure your dryer and other major appliances are plugged into dedicated circuits. This prevents overload and keeps your system running smoothly.
Solution: Turn off the lights and unplug all the appliances and electronics connected to the circuit. Follow these steps to reset it.
- Step 1: Locate the circuit breaker where the dryer is connected.
- Step 2: Turn the switch to the OFF position.
- Step 3: Flip the switch back to the ON position after a few seconds.
- Step 4: Plug in your power cord. Then, check if it turns on and run a test cycle.
Observe the power for a few minutes. If the circuit doesn’t trip, your dryer most likely doesn’t have any issues and should function properly from here on out.
- Step 5: Turn the lights on. Then, plug in the rest of the appliances and electronics one at a time.
If an appliance or light causes the circuit to trip, it may have faulty wiring, which will require servicing. Contact a licensed electrician who can help you diagnose and resolve the issue.
Defective Door Switch
Your Maytag dryer has a small but essential safety feature built into it—the door switch. Its primary purpose is to ensure that the dryer only operates when the door is fully closed.
When you shut the door, the switch signals to the dryer that it’s safe to start. If the door is open or the switch isn’t working properly, the dryer won’t run to prevent accidents.
The easiest way to identify if it’s faulty is by listening for a clicking sound when you shut the door. Your switch may need replacing if you don’t hear the door snap.
What you’ll need:
- Pliers
- Crimping tool
- 5/16 inch nut driver
- New door switch
Solution: To replace a broken door switch on a Centennial Maytag dryer, follow these steps:
- Step 1: Unplug the power cord of your dryer.
- Step 2: Unthread the screws securing the lower access panel using a 5/16-inch nut driver. Then, detach the panel.
- Step 3: Unfasten the screws securing the bottom of the front panel.
- Step 4: Gently pull the front panel downward to remove it from the dryer.
- Step 5: Take note of the orientation of the wires connected to the door switch before disconnecting them.
- Step 6: Use pliers to depress the retaining tabs and remove the door switch.
- Step 7: Insert the door switch in the front panel until it snaps into place.
Depending on your dryer model, you might have to replace one or two terminals on the door switch’s wire connectors.
- Step 8: Snip off the old terminals on the wire connectors.
- Step 9: Remove about 1/4-inch of insulation from the wires.
- Step 10: Insert the wires into the new terminals. Use a crimping tool to keep them secure.
- Step 11: Reattach the door switch wires to the correct terminals.
- Step 12: Align the front panel with the dryer’s main top and hook the retaining clips into place. Then, thread the screws back in.
- Step 13: Mount the lower access panel and fasten the screws to keep it in place.
- Step 14: Reconnect your dryer to its power source.
- Step 15: Turn it on and run a test cycle to ensure everything is working smoothly!
Faulty Door Catch
Aside from a damaged switch, another possible culprit behind a dryer door that won’t close is a broken catch. This tiny component holds the door strike in place, preventing it from swinging open during cycles.
Luckily, a new door catch doesn’t cost an arm and a leg. It’s also quite easy to replace, which will only require two tools and a few minutes of your day.
What you’ll need:
- Pliers
- 5/16 inch nut driver
- New door catch
Solution: To replace a broken catch on a Centennial Maytag dryer, follow these steps:
- Step 1: Unplug the power cord of your dryer.
- Step 2: Grab a 5/16-inch nut driver and remove the screws holding the lower access panel in place. Once the screws are out, detach the panel and set it aside.
- Step 3: Unfasten the screws securing the bottom of the front panel.
- Step 4: Pull the front panel down to detach it from the dryer.
- Step 5: Take note of the orientation of the wires connected to the door switch before disconnecting them.
- Step 6: Isolate the front panel. Then, open the dryer door.
- Step 7: Use pliers to depress the retaining tabs and remove the broken door catch. Next, remove the door strike.
- Step 8: Get your replacement parts.
- Step 9: Insert the new strike into the door.
- Step 10: Install the new door catch on the front panel.
- Step 11: Close the door to confirm that it latches properly.
- Step 12: Reconnect the door switch wires to their respective terminals.
- Step 13: Hook the retaining clips on the front panel to the dryer’s main top.
- Step 14: Rethread the screws to secure the front panel.
- Step 15: Mount the lower access panel and refasten its screws.
- Step 16: Reconnect your dryer to power. Turn it on and run a test cycle to verify the fix worked.
Blown Thermal Fuse
A thermal fuse is a safety feature that trips whenever your dryer gets too hot, preventing it from catching fire.
If your centennial Maytag dryer blows air but doesn’t actually heat up, you can suspect a blown fuse. However, the best way to confirm is through a continuity test, which will require you to isolate the part.
Unfortunately, you can no longer repair a blown fuse, but you can replace it to get your machine back up and running. The cost of the part will vary per model, but it most likely will be under $100, which is worth it if you can’t afford to get a new dryer.
Quick Note:
A clogged venting system often causes a blown thermal fuse. To prevent this from happening again, clean your vents at least once per year—more if you use your dryer regularly.
What you’ll need:
- 5/16-inch nut driver
- 1/4-inch nut driver
- Multimeter
- New thermal fuse
Solution: First, isolate the thermal fuse from your Maytag dryer and perform a continuity test using a multimeter.
- Step 1: Unplug the power cord of your dryer.
- Step 2: Use a 5/16-inch nut driver to remove the screws holding the lower access panel in place. Once the screws are out, detach the panel and set it aside.
- Step 3: Unthread the screws at the bottom of the front panel.
- Step 4: Pull the front panel down to detach it from the dryer.
- Step 5: Remember the orientation of the wires connected to the door switch before unplugging them.
- Step 6: Remove the front panel and set it aside.
- Step 7: Unfasten the top mounting screws.
- Step 8: Lift up the main top. Then, use a chain to prop it open while you perform the repair.
- Step 9: Unplug the light assembly wires. Remove them from the retainer.
- Step 10: Remove the four front bulkhead mounting screws.
- Step 11: Carefully lift the bulkhead and detach it from the cabinet.
- Step 12: Reach under the drum to unhook the belt from the pulley and the motor shaft.
- Step 13: Take out the drum from the cabinet and set it aside.
- Step 14: Unplug the thermal fuse wires.
- Step 15: Use a 1/4-inch nut driver to loosen the mounting screws and remove the thermal fuse.
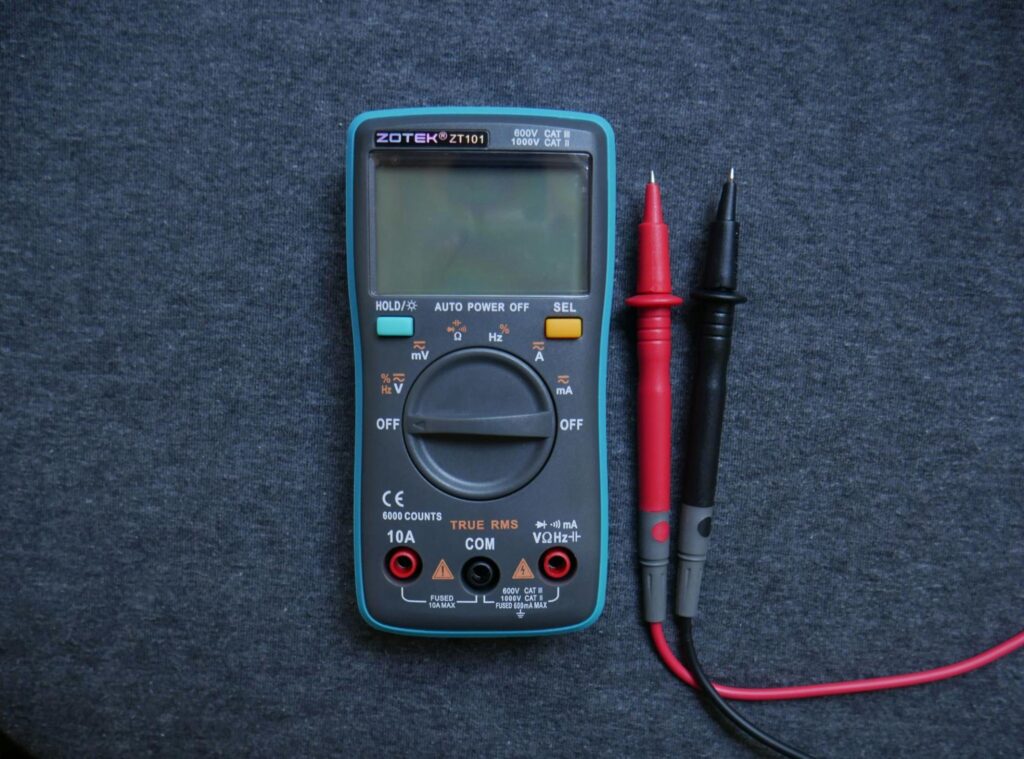
- Step 16: Grab your multimeter and turn it to the continuity setting.
- Step 17: Place a probe on each of the fuse’s wire terminals and wait for a beep. If the multimeter stays silent, it means the fuse has blown and requires a replacement.
To replace a defective thermal fuse on a Centennial Maytag dryer, follow these steps:
- Step 1: Unplug the power cord of your dryer.
- Step 2: Use a 5/16-inch nut driver to remove the screws holding the lower access panel in place. Once the screws are out, detach the panel and set it aside.
- Step 3: Unthread the screws at the bottom of the front panel.
- Step 4: Pull the front panel down to detach it from the dryer.
- Step 5: Remember the orientation of the wires connected to the door switch before unplugging them.
- Step 6: Remove the front panel and set it aside.
- Step 7: Unfasten the top mounting screws.
- Step 8: Lift up the main top. Then, use a chain to prop it open while you perform the repair.
- Step 9: Unplug the light assembly wires. Remove them from the retainer.
- Step 10: Remove the four front bulkhead mounting screws.
- Step 11: Carefully lift the bulkhead and detach it from the cabinet.
- Step 12: Reach under the drum to unhook the belt from the pulley and the motor shaft.
- Step 13: Take out the drum from the cabinet and set it aside.
- Step 14: Unplug the thermal fuse wires.
- Step 15: Use a 1/4-inch nut driver to loosen the mounting screws and remove the old fuse.
- Step 16: Align the new fuse into the burner tube. Then, thread the screws to keep it in place.
- Step 17: Reconnect the wires to the new fuse.
- Step 18: Mount the drum on the cabinet by aligning it on the rollers.
- Step 19: Reach under the drum and loop the belt on the pulley and motor shaft in a zigzag pattern.
- Step 20: Gently rotate the drum to align the belt.
- Step 21: Reinstall the front bulkhead by aligning the tabs into the slots on the cabinet. Rethread the mounting screws to keep it secure.
- Step 22: Slip the light assembly wires into the retainer and reconnect them.
- Step 23: Lower the main top and reinstall the screws.
- Step 24: Reconnect the door switch wires to the appropriate terminals.
- Step 25: Mount the front panel by reconnecting its retaining clips to the main top. Then, rethread the screws at the bottom.
- Step 26: Reinstall the lower access panel and refasten its screws.
- Step 27: Reconnect your dryer to power.
- Step 28: Turn it on and run a test cycle to confirm that it starts.
Damaged Drive Belt
Another likely culprit behind a centennial Maytag dryer that won’t start is a worn-out drive belt. Over time, the belt, which is responsible for spinning the drum, can get frayed and damaged.
Once it’s broken, the drum will no longer move or the dryer may not even turn on. The easiest way to determine a damaged drive belt, without disassembling the dryer, is by manually spinning the drum.
Just open the door, reach into the drum, and try to rotate it by hand. If it turns easily with little to no resistance, it’s most likely damaged, requiring replacement.
On the bright side, it is an affordable part to replace—probably just less than $20. You can save hundreds more by performing the fix yourself, which should only take a couple of minutes.
What you’ll need:
- 5/16-inch nut driver
- New drive belt
Solution: To replace a damaged drive belt on a Centennial Maytag dryer, follow these steps:
- Step 1: Unplug your dryer from the power source.
- Step 2: Use a 5/16-inch nut driver to remove the screws from the lower access panel. Set the panel aside.
- Step 3: Unthread the screws at the bottom of the front panel.
- Step 4: Pull the front panel down and remove it from the dryer.
- Step 5: Take note of how the door switch wires are connected. Then, disconnect them.
- Step 6: Set the front panel aside.
- Step 7: Unfasten the screws at the top that hold the main top in place.
- Step 8: Lift the main top and use a chain or prop to hold it open.
- Step 9: Unplug the light assembly wires and remove them from the retainer.
- Step 10: Remove the four screws securing the front bulkhead.
- Step 11: Carefully lift the bulkhead and detach it from the dryer cabinet.
- Step 12: Reach under the drum and unhook the belt from the pulley and motor shaft.
- Step 13: Take the damaged drive belt off the drum.
- Step 14: Slide the new belt onto the drum with the grooves facing inwards.
- Step 15: Reach under the drum and loop the belt on the pulley and motor shaft in a zigzag pattern.
- Step 16: Rotate the drum to align the belt.
- Step 17: Align the tabs on the front bulkhead with the slots on the cabinet. Then, rethread the mounting screws to keep it secure.
- Step 18: Slip the light assembly wires into the retainer and reconnect them.
- Step 19: Lower the main top and reinstall the screws.
- Step 20: Plug the door switch wires into the appropriate terminals.
- Step 21: Mount the front panel by reconnecting its retaining clips to the main top. Then, rethread the screws at the bottom.
- Step 22: Reinstall the lower access panel and refasten its screws.
- Step 23: Reconnect your dryer to power.
- Step 24: Turn it on and run a test cycle to confirm that it starts.
Broken Heating Element
Your dryer’s heating element is responsible for generating hot air, which is then circulated in the main drum of your machine.
If the element is malfunctioning, you might notice that the dryer is taking a longer time to dry the usual load or it won’t heat up at all. The most accurate way to determine if it’s defective is through a continuity test.
Quick Note:
There are several possible causes behind a faulty heating element, such as a tripped circuit breaker, a broken thermal fuse, and blocked vents. Aside from replacing the part, you must identify the underlying cause to prevent the issue from recurring.
What you’ll need:
- Wrench
- Pliers
- multimeter
- 5/16-inch nut driver
- New heating element assembly
Solution: Isolate the heating element from your Centennial Maytag dryer. Then, check for continuity using a multimeter to verify that it requires a replacement.
- Step 1: Unplug your dryer from the power source.
- Step 2: Use a 5/16-inch nut driver to remove the screws from the lower access panel. Set the panel aside.
- Step 3: Unthread the screws at the bottom of the front panel.
- Step 4: Pull the front panel down and remove it from the dryer.
- Step 5: Take note of how the door switch wires are connected. Then, disconnect them.
- Step 6: Set the front panel aside.
- Step 7: Unfasten the screws to release the heating element shield.
- Step 8: Remove the nut to detach the power supply wire.
- Step 9: Unplug the wires from the high-limit thermostat.
- Step 10: Unthread the lower and rear mounting screws on the heating element assembly. Then, remove it from the dryer.
- Step 11: Get your multimeter and turn the dial to the lowest setting for ohms of resistance.
- Step 12: Touch each probe to one of the element’s terminals.
If the multimeter displays a reading between 0 to 50 ohms of resistance, the element has continuity. This means it’s functioning well.
The element has no continuity if the display doesn’t change significantly. In this case, the part has burned out and needs a replacement.
To replace a defective heating element on a Centennial Maytag dryer, follow these steps:
- Step 1: Unplug your dryer from the power source.
- Step 2: Use a 5/16-inch nut driver to remove the screws from the lower access panel. Set the panel aside.
- Step 3: Unthread the screws at the bottom of the front panel.
- Step 4: Pull the front panel down and remove it from the dryer.
- Step 5: Take note of how the door switch wires are connected. Then, disconnect them.
- Step 6: Set the front panel aside.
- Step 7: Unfasten the screws to release the heating element shield.
- Step 8: Remove the nut to detach the power supply wire.
- Step 9: Unplug the wires from the high-limit thermostat.
- Step 10: Unthread the lower and rear mounting screws on the heating element assembly. Then, remove it from the dryer.
- Step 11: Remove the screws to separate the heating element housing.
- Step 13: Loosen the nuts and washers to release the heating element coil.
- Step 14: Straighten the end of the coil using pliers. Next, carefully slide the coil out of the insulator rings.
- Step 15: Take your new coil and thread it through the insulator rings without stretching it. Ensure the coil is spaced evenly to prevent it from touching itself.
- Step 16: Secure each end of the coil to an insulator post. Reattach the washers and nuts to keep the coil in place.
- Step 17: Join the two halves of the housing with the screws.
- Step 18: Align the assembly with the heat duct and fasten it in place using the screws.
- Step 19: Plug in the high-limit thermostat wires. Next, reattach the power supply wire and the nut.
- Step 20: Mount the heating element shield and thread the screws.
- Step 21: Plug the door switch wires into the appropriate terminals.
- Step 22: Reattach the front panel by connecting its retaining clips to the main top. Refasten the bottom screws.
- Step 23: Reinstall the lower access panel and secure its screws.
- Step 24: Reconnect your dryer to power.
- Step 25: Turn it on and run a test cycle to ensure it starts properly.
Malfunctioning Control Board
The main control board oversees the dryer’s core functions like drying times and temperature. It’s also responsible for the electrical components of the machine.
Once the control board is defective, your dryer will stop working. A replacement is necessary to get the unit to operate again.
The replacement part can cost more than $100. You can save a lot more by doing the fix yourself, which is surprisingly quite easy to do.
What you’ll need:
- Phillips screwdriver
- Small flathead screwdriver
- 1/4-inch nut driver
- New control board
Solution: Perform a continuity test on the control board to determine if it’s still functioning well. If necessary, replace the component.
- Step 1: Unplug your dryer from the power source.
- Step 2: Pull the dryer away from the wall to access the back part.
- Step 3: Unthread the screws at the back of the control panel.
- Step 4: Carefully pull the control panel up to free it from its mounting hooks.
- Step 5: Flip the control panel and snap a photo of the wires for reference during the reassembly process.
- Step 6: Get the wiring diagram for your Maytag dryer to determine which connections on the control board can be tested for continuity.
- Step 7: Grab your multimeter and select the ohms setting. Touch each probe to the proper connections identified on the diagram.
If the display doesn’t show any significant changes once the probes touch the control board, the component lacks continuity. It should be replaced.
To replace a malfunctioning control board on a Centennial Maytag dryer, follow these steps:
- Step 1: Unplug your dryer from the power source.
- Step 2: Pull the dryer away from the wall to access the back part.
- Step 3: Unthread the screws at the back of the control panel.
- Step 4: Carefully pull the control panel up to free it from its mounting hooks.
- Step 5: Flip the control panel and snap a photo of the wires for reference during the reassembly process.
- Step 6: Use a small flathead screwdriver to press the locking tab on the wire connector. Then, pull to unplug the wire.
- Step 7: Disconnect all the wires on the control board.
- Step 8: Unthread the lone screw on the control board mounting bracket.
- Step 9: Push the locking tab in the middle and remove the old control board.
- Step 10: Align the tabs on the control board with the slots on the bracket. Then, rethread the screw at the back to secure it.
- Step 11: Reconnect all the wires on the control board. Use your photo for reference.
- Step 12: Connect the blue wire on the panel to the side of the control board.
- Step 13: Reinstall the panel on top of the dryer.
- Step 14: Thread the screws at the back of the panel to keep it in place.
- Step 15: Reconnect your dryer to power.
- Step 16: Turn it on and run a test cycle to ensure it starts properly.
Frequently Asked Questions
Is it worth replacing a heating element in a centennial Maytag dryer?
Replacing the heating element in your Maytag Centennial dryer is worth it if your dryer is still in good overall condition. It’s a relatively affordable fix compared to buying a new dryer—and an easy one.
You can extend the life of your dryer and restore full functionality by replacing the assembly. If you perform the fix yourself, you can save hundreds of dollars on repair fees.
How do you know when you need a new dryer?
If the repair cost is more than 50% of the price of a new dryer, it’s time to consider getting a new one, especially when you have an old unit.