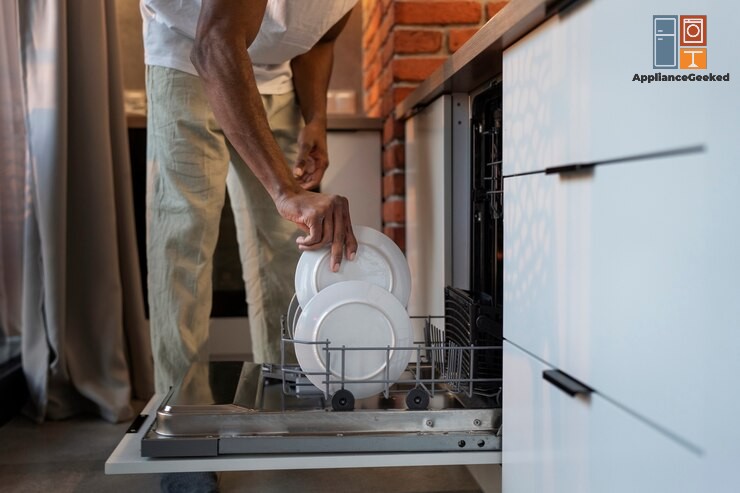
They said you can’t spell dishwasher without her, and I really took that to heart as a child. Whenever our Maytag wouldn’t start, I was always on dishwashing duty until our unit would get fixed—which I dreaded every time.
Perhaps it’s because of my disdain for doing the dishes or my innate need to fix things, but I somehow learned how to fix my dishwasher. I can get it back up and running in no time, avoid handwashing the dishes, and save hundreds of dollars in the process.
Here, we’ll help you figure out why your Maytag dishwasher won’t start. We’ll also walk you through all the steps to fix it.
Why won’t my Maytag dishwasher start?
A Maytag dishwasher won’t start if the door is left ajar for more than 3 seconds after pressing START.
Other possible causes include a damaged door latch, a broken door switch, and a faulty control panel. If a defective component is the underlying cause, replace it to get the dishwasher to start.
Before making any repairs, here are a few quick ways to troubleshoot your Maytag dishwasher.
- Reset the dishwasher.
Unplug your dishwasher for a minute or two to clear any errors and system glitches. If your unit is hard-wired to the power supply, turn it off from the breaker.
- Check if the door is closed.
If you leave the door ajar for more than three seconds after pushing START, your dishwasher won’t start. Push the door firmly and press the START button to run a new cycle.
- Confirm that it’s connected to power.
The power cord might not be plugged into an outlet, which happens even to the best of us. Plug it into a functioning outlet to restore power to your dishwasher.
If the dishwasher still doesn’t turn on after being plugged in, check if your power supply is functioning by connecting other electronic devices to the outlet. Get in touch with a licensed electrician if you suspect a problem with the power supply.
- Verify that the water supply is on.
Your dishwasher won’t start if it’s not receiving any water. Make sure that it’s connected to the water supply line and that it’s turned on.
- Turn off Sleep Mode.
Some Maytag dishwasher models will automatically go into Sleep mode if the unit is on but not in use. To deactivate Sleep mode on a Maytag dishwasher, you’ll either have to open and close the door or press START/RESUME.
Causes and Solutions
Here’s an overview of the possible causes of a Maytag dishwasher that won’t start. We also included step-by-step solutions for resolving each one.
| Causes | Solutions |
| Control Lock is on. | Press the Control Lock button for three seconds. |
| Delay Start is selected. | Click on the CANCEL/DRAIN button to cancel the delay. Click on the START/RESUME to start the cycle. |
| The door latch assembly is damaged. | Unplug the dishwasher’s power cord or turn it off at the circuit breaker. Open the dishwasher door. Use the Torx 15 driver to unfasten the screws on the door frame. Lift the door up without latching it, and tilt the front panel forward. Unplug the wire connecting the control panel to the control board. Lift and remove the front door panel, then, set it aside. Locate the door latch assembly on the door frame. Use a flathead screwdriver to push its tabs and unmount it from the door. Unplug the wiring harness on the assembly to isolate it from the dishwasher. Get your replacement and plug the wiring harness into its terminal. Mount the new door latch assembly on the dishwasher. Align the tabs on the front door panel with the hinges on the tub. Then, reconnect the control panel’s wire harness to the control board. Reinstall the screws to secure the front panel. Then, close the door shut to check if it latches. Reconnect your dishwasher to its power source. Turn it on and run a test cycle to confirm that it starts. |
| The door switch mounting bracket is broken. | Unplug the dishwasher’s power cord or turn it off at the circuit breaker. Open the dishwasher door. Use the Torx 15 driver to unfasten the screws mounting the control panel to the door frame. Lower the control panel to access the bracket. Use a flathead screwdriver to unhook the door switch’s wire harness from the divider. Unfasten the screw mounting the door switch to the bracket using a 3/6” nut driver. Set the switch aside. Carefully remove the bracket from the dishwasher. Pull out the spring attached to the handle and the bracket. Use a flathead screwdriver to detach the handle. Slide and lift the detachable middle piece from the bracket. Then, set it aside. Get your replacement part. Attach the middle piece to the new bracket until it snaps into place. Attach the handle to the new bracket. Next, hook the spring to the handle and the bracket. Install the new bracket in your dishwasher. Align the locking tabs on each side to keep it secure. Mount the door switch to the new bracket. Then, slip the wires into their tabs. Lift and close the control panel. Use the Torx 15 driver to fasten the screws. Close the dishwasher door and check if it latches. Reconnect the dishwasher to its power source. Run a test cycle to confirm that it starts. |
| The door switch is defective. | Unplug the dishwasher’s power cord or turn it off at the circuit breaker. Open the door and unfasten the screws mounting the control panel to the door frame using a Torx 15 driver. Lower the control panel to access the door switch mounting bracket. Remove the defective switch. Start by unhooking its wire harness from the divider using a flathead screwdriver. Unfasten the screw mounting the switch to the bracket using a 3/6” nut driver, and remove it from the bracket. Push the tab and unplug the wire harness from the switch to remove it from your dishwasher. Plug the wire harness into the new door switch. Mount it to the bracket, then reinstall the screw to secure it. Slip the wire harness into the clip. Lift and close the control panel. Use the Torx 15 driver to fasten the screws. Close the door and reconnect the dishwasher to its power source. Run a test cycle to confirm that it starts. |
| The control panel is faulty. | Unplug the dishwasher’s power cord or turn it off at the circuit breaker. Open the door and unfasten the screws holding the front panel in place using a Torx 15 driver. Close the door without engaging the latch and tilt the front panel forward. Unplug the wire harness connecting the control panel to the control board. Lift the front panel up and remove it from the dishwasher. Lay a towel over a sturdy working surface before working on the door to prevent any damage. Then, carefully remove the door insulation. Use a flathead screwdriver to press the retaining tabs mounting the control panel to the door panel. Gently pry the pocket handle out of the faulty control panel using a flathead screwdriver. Install the pocket handle on the new control panel. Align the tabs and press down on each of the four corners. Align the four retaining tabs on the control panel to the slots on the door panel. Then, push them in to mount the panel. Reinstall the door insulation. Align the door panel hangers to the hinges on the door frame and slide them into place. Reconnect the wiring harness to the door. Mount the door panel and reinstall the screws to keep it secure. Close the door and reconnect the dishwasher to its power source. Run a test cycle to confirm that it starts. |
| The main control board is malfunctioning. | Unplug the dishwasher’s power cord or turn it off at the circuit breaker. Open the door and unfasten the screws holding the front panel in place using a Torx 15 driver. Close the door without engaging the latch and tilt the front panel forward. Unplug the wire harness connecting the control panel to the control board. Lift the front panel up and remove it from the dishwasher. Take a photo of the electrical connectors on the control board for reference during the reassembly process. Pry on the locking tabs on the connector brace and pull them downward. Pull out the connector brace and box. Unplug all the connectors from the control board. Start by depressing the tab on the wire harness, and pull to unplug it. Use a flathead screwdriver to pry the locking tab mounting the control board. Slide it to the left and pull it forward to remove it from the dishwasher. Get your replacement. Align the control board to the brackets, and then slide it to the right to lock it in place. Use your photo reference to reinstall the wire harnesses to the control board. Slide the connector brace behind the wires and mount it on the retainers. Lift it upward until the tabs snap into place. Reinstall the connector box Align the door panel hangers to the hinges on the door frame and slide them into place. Reconnect the wiring harness to the door. Mount the door panel and reinstall the screws to keep it secure. Close the door and reconnect the dishwasher to its power source. Run a test cycle to confirm that it starts. |
Control lock is on.
The Control Lock is a safety function that prevents curious little hands from making unintentional changes to your wash cycles.
If you press the buttons on the dishwasher if the Control Lock is enabled, its indicator light will blink three times. However, your unit will not respond to your commands until you deactivate the function.
Solution: To disable the Control Lock mode, press the Lock button for three seconds.
Delay Start is selected.
Delay Start is a very convenient function, enabling you to run a cycle during off-peak hours even when you’re not around. All you have to do is load the dishes and select the delay time.
Once this function is activated, then your dishwasher will only start at the programmed time. You have to deactivate it first to get your machine to run a cycle right away.
Quick Note:
The exact steps for disabling the Delay Start function will vary per model. Check your user manual to find out how to disable this function on your Maytag dishwasher.
Solution: To turn off the Delayed wash option on a Maytag dishwasher, follow these steps:
- Step 1: Click on the CANCEL/DRAIN button to cancel the delay.
- Step 2: Click on the START/RESUME to start the cycle.
In other models, you can press the Delay Start button again to cancel it. After, you’ll see the indicator light switch off, then your dishwasher will run the programmed cycle immediately.
The door latch assembly is damaged.

Located on the tub frame, the door latch assembly is a locking mechanism that keeps the dishwasher secure while it’s running. When you close the door, the latch flips a safety switch that initiates a cycle.
Over time, the door latch assembly can get worn out, misaligned, and damaged with constant use. If the door no longer latches, it can’t flip the safety switch to initiate a cycle.
You can’t repair a defective door latch, but you can replace it. With our help, you can do it yourself, which should help you save hundreds of dollars in repair fees.
What you’ll need:
- Torx 15 driver
- Flathead screwdriver
- New door latch
Solution: To replace a door latch assembly on a Maytag dishwasher, follow these steps:
- Step 1: Unplug the dishwasher’s power cord or turn it off at the circuit breaker.
- Step 2: Open the dishwasher door. Use the Torx 15 driver to unfasten the screws on the door frame.
- Step 3: Lift the door up without latching it, then tilt the front panel forward.
- Step 4: Unplug the wire connecting the control panel to the control board.
- Step 5: Lift the front door panel up and separate it from the dishwasher. Then, set it aside.
- Step 6: Locate the door latch assembly on the top part of the dishwasher’s door frame. Unmount it by pressing its tabs using a flathead screwdriver.
- Step 7: Remove the damaged assembly from the dishwasher by pressing the locking tab and unplugging the wire harness.
- Step 8: Get your replacement and plug the wiring harness into its terminal.
- Step 9: Mount the new door latch assembly on the door.
- Step 10: Align the tabs on the front door panel with the hinges on the tub.
- Step 11: Reconnect the control panel’s wire harness to the control board.
- Step 12: Reinstall the screws mounting the front panel to the door. Then, close the door shut to check if it latches.
- Step 13: Reconnect your dishwasher to its power source.
- Step 14: Turn on the dishwasher. Run a test cycle to confirm that it starts.
The door switch mounting bracket is broken.

The door switch mounting bracket holds the handle and the door switch in place. If the handle or the bracket itself is broken, the dishwasher will think that the door is open, which prevents it from running a cycle.
Luckily, replacing the bracket is quick and easy. You can do it yourself in a matter of minutes.
What you’ll need:
- Torx 15 driver
- Flathead screwdriver
- 3/16” nut driver
- New door switch mounting bracket
Solution: To replace a door switch mounting bracket on a Maytag dishwasher, follow these steps:
- Step 1: Unplug the dishwasher’s power cord or turn it off at the circuit breaker.
- Step 2: Open the dishwasher door. Use the Torx 15 driver to unfasten the screws mounting the control panel to the door frame.
- Step 3: Lower the control panel to access the bracket.
- Step 4: Use a flathead screwdriver to unhook the door switch’s wire harness from the divider.
- Step 5: Unfasten the screw mounting the door switch to the bracket using a 3/6” nut driver. Set the switch aside.
- Step 6: Carefully remove the bracket from the dishwasher.
- Step 7: Pull out the spring attached to the handle and the bracket.
- Step 8: Use a flathead screwdriver to detach the handle.
- Step 9: Slide and lift the detachable middle piece from the bracket. Then, set it aside.
- Step 10: Get your replacement part. Attach the middle piece to the new bracket until it snaps into place.
- Step 11: Attach the handle to the new bracket. Next, hook the spring to the handle and the bracket.
- Step 12: Install the new bracket in your dishwasher. Align the locking tabs on each side to keep it secure.
- Step 13: Mount the door switch to the new bracket. Then, slip the wires into the clip.
- Step 14: Lift and close the control panel. Use the Torx 15 driver to fasten the screws.
- Step 15: Close the dishwasher door and check if it latches.
- Step 16: Reconnect the dishwasher to its power source. Run a test cycle to confirm that it starts.
The door switch is defective.

Can’t find visible signs of damage on the door latch assembly and bracket?
Another component that you should check is the door switch. This safety feature prevents the dishwasher from starting a cycle if it detects an unlatched door.
If the door switch is bad, the dishwasher will think that the door is open, which is why it can’t start. The best way to confirm that it’s defective is through a continuity test.
Quick Note:
Depending on your dishwasher, you might have one or two door switches, but most have two. If your unit has two, you must check each one for continuity, then replace whichever is defective.
What you’ll need:
- Multimeter
- Torx 15 driver
- Flathead screwdriver
- New door switch
Solution: First, isolate the door switch and perform a continuity test to confirm that it’s defective. Then, replace it if necessary.
- Step 1: Unplug the dishwasher’s power cord or turn it off at the circuit breaker.
- Step 2: Open the door and unfasten the screws mounting the control panel to the door frame using a Torx 15 driver.
- Step 3: Lower the control panel to access the bracket.
- Step 4: Use a flathead screwdriver to unhook the door switch’s wire harness from the clips.
- Step 5: Unfasten the screw mounting the door switch to the bracket using a 3/6” nut driver.
- Step 6: Unplug the wire harness on the switch to remove it from the bracket. If your dishwasher has a second door switch, repeat Steps 4 and 5 to isolate it.
- Step 7: Get your multimeter and turn its knob to the continuity setting. Touch the probes together to confirm that it’s working.
- Step 8: Touch one probe to each terminal, then press the switch. If the multimeter display has no continuity reading, the switch is defective and requires a replacement.
- Step 9: Test the second switch for continuity and replace it if needed.
To replace a defective door switch, follow these steps:
- Step 1: Unplug the dishwasher’s power cord or turn it off at the circuit breaker.
- Step 2: Open the door and unfasten the screws mounting the control panel to the door frame using a Torx 15 driver.
- Step 3: Lower the control panel to access the door switch mounting bracket.
- Step 4: Use a flathead screwdriver to unhook the defective switch’s wire harness from the divider.
- Step 5: Unfasten the screw mounting the door switch to the bracket using a 3/6” nut driver, and remove it from the bracket.
- Step 6: Press the tab on the defective switch and unplug the wire harness to remove it from your dishwasher.
If the second door switch is defective, repeat Steps 4, 5, and 6 to remove it.
- Step 7: Get your new door switches. Plug the wire harnesses into their terminals.
- Step 8: Mount the new switches to the bracket. Reinstall the screws to secure them in place.
- Step 9: Slip the wire harnesses into the clips.
- Step 10: Lift and close the control panel. Use the Torx 15 driver to fasten the screws.
- Step 11: Close the door and reconnect the dishwasher to its power source.
- Step 12: Run a test cycle to confirm that it starts.
The control panel is faulty.

The control panel contains all the buttons you need to operate the dishwasher. It’s connected to the main control board, which initiates the commands that you select.
If your dishwasher won’t turn on or respond to other inputs, the contacts in the touchpad may have gone bad. Once this component malfunctions, the entire panel has to be replaced.
What you’ll need:
- Towel
- Torx 15 driver
- Flathead screwdriver
- New control panel
Solution: To replace a faulty control panel on a Maytag dishwasher, follow these steps:
- Step 1: Unplug the dishwasher’s power cord or turn it off at the circuit breaker.
- Step 2: Open the door and unfasten the screws holding the front panel in place using a Torx 15 driver.
- Step 3: Close the door without engaging the latch and tilt the front panel forward.
- Step 4: Unplug the wire harness connecting the control panel to the control board.
- Step 5: Lift the front panel up and remove it from the dishwasher.
- Step 6: Lay a towel over a sturdy working surface before working on the door to prevent any damage. Then, carefully remove the door insulation.
- Step 7: Use a flathead screwdriver to press the retaining tabs mounting the control panel to the door panel.
- Step 8: Gently pry the pocket handle out of the faulty control panel using a flathead screwdriver.
- Step 9: Install the pocket handle on the new control panel. Align the tabs and press down on each of the four corners.
- Step 10: Align the four retaining tabs on the control panel to the slots on the door panel. Then, push them in to mount the panel.
- Step 11: Reinstall the door insulation.
- Step 12: Align the door panel hangers to the hinges on the door frame and slide them into place.
- Step 13: Reconnect the wiring harness to the door.
- Step 14: Mount the door panel and reinstall the screws to keep it secure.
- Step 15: Close the door and reconnect the dishwasher to its power source.
- Step 16: Run a test cycle to confirm that it starts.
The main control board is malfunctioning.

The main control board manages most, if not all, dishwasher functions, such as washing, drying, and draining. It also controls other power electronics in your dishwasher like the pump, sensors, heater, and water valve.
If the main control board is malfunctioning, it can cause various symptoms, which is why it’s quite hard to diagnose. You should only consider such a possibility once you’ve ruled out everything else.
Quick Note:
A main control board can cost hundreds of dollars. Depending on the age of your dishwasher, as well as its issues, it might cost more to repair an older unit, and it might be more cost-effective to replace it.
To save big bucks on repair fees, you can perform the replacement yourself with a few tools and our handy-dandy repair guide.
What you’ll need:
- Torx 15 driver
- Flathead screwdriver
- Multimeter
- New main control board
Solution: To confirm that the main control board is defective, isolate it from your Maytag dishwasher and do a continuity test.
- Step 1: Unplug the dishwasher’s power cord or turn it off at the circuit breaker.
- Step 2: Open the door and unfasten the screws holding the front panel in place using a Torx 15 driver.
- Step 3: Close the door without engaging the latch and tilt the front panel forward.
- Step 4: Unplug the wire harness connecting the control panel to the control board.
- Step 5: Lift the front panel up and remove it from the dishwasher.
- Step 6: Locate the main control board. Check your user manual if necessary.
- Step 7: Take a photo of the electrical connectors on the control board for reference during the reassembly process.
- Step 8: Remove the connector brace by prying on the locking tabs and pulling them downward.
- Step 9: Pull out the connector brace and box. Set them aside.
- Step 10: Depress the tab on the wire harness, and then pull to unplug it from the control board. Repeat the process until all the connectors are unplugged.
- Step 11: Use a flathead screwdriver to pry the locking tab mounting the control board. Slide it to the left and pull it forward to remove it from the dishwasher.
- Step 12: Remove the top cover of the control board housing by prying on the locking tabs.
- Step 13: Flip the housing over. Pry on the three locking tabs to separate the control board from the housing.
- Step 14: Refer to your tech sheet to identify the two fuses on the control board that you need to test.
- Step 15: Get your multimeter and turn the knob to the continuity settings.
- Step 16: Place the probes on each side of the fuse. If the multimeter doesn’t beep, the fuse is bad.
- Step 17: Repeat the same process to check the continuity of the other fuse. If either of the fuses are blown, a replacement is necessary.
Some multimeters don’t have the continuity setting. In such cases, you can choose the lowest ohm setting to test the control board.
If the multimeter reading is close to the baseline, the fuse is good. But if the reading doesn’t change, the fuse is bad.
The fuses on the control board are no longer serviceable. Since they aren’t sold separately, you have to replace the entire board once they malfunction.
To replace a Maytag dishwasher’s main control board, follow these steps:
- Step 1: Unplug the dishwasher’s power cord or turn it off at the circuit breaker.
- Step 2: Open the door and unfasten the screws holding the front panel in place using a Torx 15 driver.
- Step 3: Close the door without engaging the latch and tilt the front panel forward.
- Step 4: Unplug the wire harness connecting the control panel to the control board.
- Step 5: Lift the front panel up and remove it from the dishwasher.
- Step 6: Locate the main control board. Check your user manual if necessary.
- Step 7: Take a photo of the electrical connectors on the control board for reference during the reassembly process.
- Step 8: Remove the connector brace by prying on the locking tabs and pulling them downward.
- Step 9: Pull out the connector brace and box. Set them aside.
- Step 10: Depress the tab on the wire harness, and then pull to unplug it from the control board. Repeat the process until all the connectors are unplugged.
- Step 11: Use a flathead screwdriver to pry the locking tab mounting the control board. Slide it to the left and pull it forward to remove it from the dishwasher.
- Step 12: Get your replacement. Align the control board to the brackets, and then slide it to the right to lock it in place.
- Step 13: Use your photo reference to reinstall the wire harnesses to the control board.
- Step 14: Slide the connector brace behind the wires and mount it on the retainers. Lift it upward until the tabs snap into place.
- Step 15: Reinstall the connector box.
- Step 16: Align the door panel hangers to the hinges on the door frame and slide them into place.
- Step 17: Reconnect the wiring harness to the door.
- Step 18: Mount the door panel and reinstall the screws to keep it secure.
- Step 19: Close the door and reconnect the dishwasher to its power source.
- Step 20: Run a test cycle to confirm that it starts.
Frequently Asked Questions
How do you reset a Maytag dishwasher?
A Maytag dishwasher doesn’t have a dedicated reset button. To reset it, simply unplug the power cord for a few minutes to let the electrical charge clear out of the dishwasher, and then reconnect it to power.
If your dishwasher is hardwired to the power supply, turn off the power from your home’s circuit breaker. Wait for a minute or two before restoring power.
Is it better to repair or replace a dishwasher?
Most errors you’ll encounter on your dishwasher are serviceable and preventable. You can even perform the fixes yourself to cut costs.
Issues on older dishwashers are more expensive to resolve, especially when component failure is involved. But once the repairs cost more than half the price of a dishwasher, you should consider getting a new one.

![Why is my Samsung ice maker making clicking noises [How to Fix]](https://www.appliancegeeked.com/wp-content/uploads/2023/04/Why-is-my-Samsung-ice-maker-making-clicking-noises-How-to-Fix.jpg)
