I’ll never forget the day I pulled a load of damp laundry out of the dryer. There’s nothing quite as frustrating, especially when you’re juggling a million things at once.
Since I already knew my way around my dryer as I’ve had to troubleshoot it before, I quickly went to work and tried fixing it. At first, I thought it was a heating problem, but a quick inspection of the drum made it clear that it was a spinning issue.
With only a few tools and a brand-new component, I was able to get it back up and running. It saved me hundreds of dollars in repair fees, and I was able to finish the laundry in no time.
If you’re in the same boat, I’ve got good news. This guide is here to walk you through the fix—even if you’re totally clueless about DIY.
Why won’t my Maytag Centennial Dryer spin?
There are several reasons a Maytag Centennial Dryer won’t spin, including power issues, a broken drive belt, a faulty motor, or a blown thermal fuse.
If component failure is the root cause, a replacement might be necessary to restore your dryer’s function.
Before we go into the nitty-gritty of fixing your dryer, here are a few steps that you can do to troubleshoot it.
- Confirm that your dryer is connected to power.
Check if your dryer is plugged into a dedicated outlet. Make sure that the outlet has power and isn’t tripping.
If you have a power issue, contact a licensed electrician who can properly diagnose and resolve your problem.
- Reset your dryer.
Unplug your dryer’s power cord or turn it off at the circuit breaker. After a few minutes, restore its connection to power and run a test cycle to see if the error is resolved.
Causes and Solutions
Let’s take a closer look at the most common causes behind a dryer that won’t spin. We also provide easy-to-follow instructions to help you resolve each problem in a jiffy.
| Causes | Solutions |
| Faulty Door Switch | Unplug the power cord of your dryer. Unthread the screws securing the lower access panel using a 5/16-inch nut driver. Then, detach the panel. Unfasten the screws securing the bottom of the front panel. Gently pull the front panel downward to remove it from the dryer. This will give you access to the inner components. Take note of the orientation of the wires connected to the door switch before disconnecting them. Use pliers to depress the retaining tabs and remove the door switch. Insert the door switch in the front panel until it snaps into place. Depending on your dryer model, you might have to replace one or two terminals on the door switch’s wire connectors. Snip off the old terminals on the wire connectors. Then, remove about 1/4-inch of insulation from the wires. Insert the wires into the new terminals. Use a crimping tool to keep them secure. Reattach the door switch wires to the correct terminals. Align the front panel with the dryer’s main top and hook the retaining clips into place. Then, thread the screws back in. Mount the lower access panel and refasten the screws. Reconnect your dryer to its power source. Turn it on and run a test cycle to ensure it spins. |
| Blown Thermal Fuse | Unplug the power cord of your dryer. Unthread the screws holding the lower access panel in place. Once the screws are out, detach the panel and set it aside. Loosen the screws at the bottom of the front panel. Pull the panel down and detach it from the dryer. Remember the orientation of the wires connected to the door switch before unplugging them. Remove the front panel and set it aside. Unfasten the top mounting screws. Lift up the main top, and use a chain to prop it open. Unplug the light assembly wires. Remove them from the retainer. Remove the four front bulkhead mounting screws. Next, carefully lift the bulkhead and detach it from the cabinet. Reach under the drum to unhook the belt from the pulley and the motor shaft. Take out the drum from the cabinet and set it aside. Unplug the thermal fuse wires. Unfasten the mounting screws and remove the fuse from the dryer. Align the new fuse into the burner tube and thread the screws to keep it in place. After, reconnect the wires to the new fuse. Mount the drum on the cabinet by aligning it on the rollers. Reach under the drum and loop the belt on the pulley and motor shaft in a zigzag pattern. Then, gently rotate the drum to align the belt. Reinstall the front bulkhead by aligning the tabs into the slots on the cabinet. Rethread the mounting screws to keep it secure. Slip the light assembly wires into the retainer and reconnect them. Lower the main top, reinstall its screws, and reconnect the door switch wires to the correct terminals. Mount the front panel by reconnecting its retaining clips to the main top. Then, rethread the screws at the bottom. Reinstall the lower access panel and refasten its screws. Reconnect your dryer to power. Turn it on and run a test cycle to confirm that it spins. |
| Damaged Drive Belt | Unplug the power cord of your dryer. Use a 5/16-inch nut driver to remove the screws from the lower access panel; then, set the panel aside. Unthread the screws at the bottom of the front panel. Pull the panel down and remove it from the dryer. Take note of the orientation of the door switch wires. After, disconnect them to detach the front panel. Unfasten the screws that hold the main top in place. Lift the main top and use a chain or prop to hold it open. Unplug the light assembly wires and remove them from the retainer. Remove the four screws securing the front bulkhead. Next, carefully lift the bulkhead and detach it from the dryer cabinet. Reach under the drum and unhook the belt from the pulley and motor shaft. Pull the damaged drive belt off the drum. Slide the new belt onto the drum with the grooves facing inwards. Reach under and loop the belt on the pulley and motor shaft in a zigzag pattern. Rotate the drum to align the belt. Align the tabs on the front bulkhead with the slots on the cabinet. Then, rethread the mounting screws to keep it secure. Slip the light assembly wires into the retainer and reconnect them. Lower the main top and reinstall the screws. Plug the door switch wires into the appropriate terminals. Mount the front panel by reconnecting its retaining clips to the main top. Then, fasten the screws. Reinstall the lower access panel and refasten its screws. Reconnect your dryer to power. Turn it on and run a test cycle to confirm that it spins. |
| Defective Dryer Motor | Unplug your dryer from the power source. Pull the dryer away from the wall to access the back part. Unthread the screws on the lower access panel using a 5/16-inch nut driver or socket. Pull the panel down to release the clips at the top. Take note of the orientation of the door switch wires. Disconnect the wires and remove them from the retaining clips on the panel. Then, set the panel aside. Release the wires from the front bulkhead. Unthread the screws to release the bulkhead from the cabinet. Carefully reach under the drum and push the idler pulley to release the belt tension. Remove the belt from the pulley and shaft. Pull the belt out of the dryer and lift the drum out of the dryer. Set it aside. Unfasten the screws on the blower housing cover. Remove the spring clamp using pliers and the front snap ring using snap ring pliers. Pull the blower wheel out of the dryer and the rear snap ring. Unplug the wires on the motor switch, and unthread the screw to release the grounding wire. Remove the motor retaining clips using a flathead screwdriver. Take the old motor out of the dryer. Insert the replacement part into the motor support and secure it by reattaching the retaining clips. Loosen the set screw on the old motor to release the pulley. Install the pulley on the new motor shaft about ⅜ inches from the motor support and tighten the set screw. Reconnect the wires on the motor switch and secure the grounding wire with the screw. Slide the rear snap ring and blower wheel onto the shaft. Secure it by adding the front snap ring and spring clamp. Mount the housing cover in place and rethread the screws. Next, reinstall the drum by aligning its rim on the support rollers. Slide the belt over the drum with the flat side down and loop it over the pulley and motor shaft in a zigzag pattern. Slowly rotate the drum to align the belt. Mount the front bulkhead and reinstall its screws to secure it. Slide the wire harness into the retaining clips on the front bulkhead and front panel. Plug the wires into the proper terminals on the door switch. Reattach the front panel and its screws. Restore power to your dryer. Finally, run a test cycle to confirm that it spins. |
| Malfunctioning Control Board | Unplug your dryer from the power source. Pull the dryer away from the wall to access the back part. Unthread the screws at the back of the control panel. Carefully pull the control panel up to free it from its mounting hooks. Flip the control panel and snap a photo of the wires for reference during the reassembly process. Use a small flathead screwdriver to press the locking tab on the wire connector. Then, pull to unplug the wire. Disconnect all the wires on the control board. Unthread the lone screw on the control board mounting bracket. Push the locking tab in the middle and remove the board. Align the tabs on the control board with the slots on the bracket. Then, rethread the screw at the back to secure it. Reconnect all the wires on the control board. Use your photo for reference. Connect the blue wire on the panel to the side of the control board. Reinstall the panel on top of the dryer. Thread the screws at the back of the panel to keep it in place. Reconnect your dryer to power. Turn it on and run a test cycle to ensure it spins. |
Faulty Door Switch
A door switch is a safety mechanism that prevents your dryer from running a spinning cycle when the door is open. Once it’s closed, the switch sends a signal to the control board to let it know that it’s safe to operate.
However, if the switch is broken, it will only detect an open door. This prohibits your dryer from running a cycle.
Damage to the door switch can either be a mechanical or electrical problem. Whatever the case may be, the most accurate way of determining a faulty component is through a continuity test using a multimeter.
Once you’ve confirmed a lack of continuity, go ahead and replace the switch to restore your dryer’s functions.
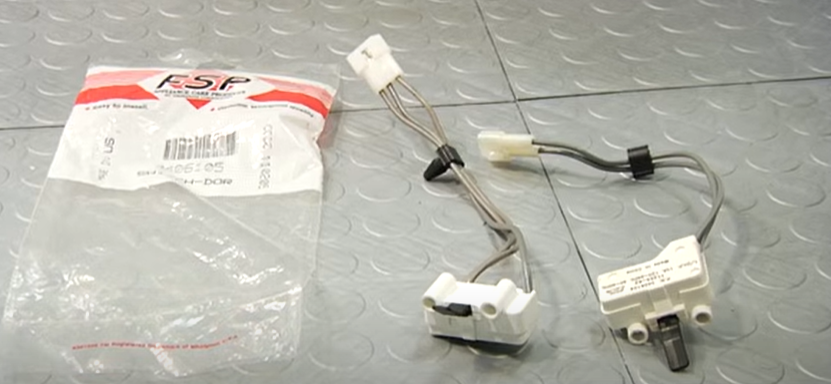
What you’ll need:
- Pliers
- Crimping tool
- 5/16 inch nut driver
- New door switch
Solution: Take the door switch out of the dryer to test it for continuity. Then, replace it if necessary.
- Step 1: Unplug the power cord of your dryer.
- Step 2: Unthread the screws securing the lower access panel using a 5/16-inch nut driver. Then, detach the panel.
- Step 3: Unfasten the screws securing the bottom of the front panel.
- Step 4: Pull the front panel downward to remove it from the dryer.
- Step 5: Take note of the orientation of the wires connected to the door switch before disconnecting them.
- Step 6: Use pliers to depress the retaining tabs and remove the door switch.
- Step 7: Set the multimeter to the lowest setting for ohms of resistance.
- Step 8: Touch each probe to one of the terminals on the switch.
- Step 9: Actuate the switch and check the display.
If the reading shows 0 ohms of resistance, the switch has continuity. However, if the digital display doesn’t change significantly, it lacks continuity and requires replacement.
To replace a broken door switch on a Centennial Maytag dryer, follow these steps:
- Step 1: Unplug the power cord of your dryer.
- Step 2: Unthread the screws securing the lower access panel using a 5/16-inch nut driver. Then, detach the panel.
- Step 3: Unfasten the screws securing the bottom of the front panel.
- Step 4: Gently pull the front panel downward to remove it from the dryer.
- Step 5: Take note of the orientation of the wires connected to the door switch before disconnecting them.
- Step 6: Use pliers to depress the retaining tabs and remove the door switch.
- Step 7: Insert the door switch in the front panel until it snaps into place.
Depending on your dryer model, you might have to replace one or two terminals on the door switch’s wire connectors.
- Step 8: Snip off the old terminals on the wire connectors.
- Step 9: Remove about 1/4-inch of insulation from the wires.
- Step 10: Insert the wires into the new terminals. Use a crimping tool to keep them secure.
- Step 11: Reattach the door switch wires to the correct terminals.
- Step 12: Align the front panel with the dryer’s main top and hook the retaining clips into place. Then, thread the screws back in.
- Step 13: Mount the lower access panel and fasten the screws to keep it in place.
- Step 14: Reconnect your dryer to its power source.
- Step 15: Turn it on and run a test cycle to ensure everything is working smoothly!
Blown Thermal Fuse
The thermal fuse is a critical safety feature that trips whenever your dryer gets too hot. It prevents the machine from overheating and catching fire.
You can suspect a blown fuse if your dryer isn’t heating up or even starting. However, the best way to verify is through a continuity test using a multimeter.
If the fuse lacks continuity, you must replace it with a new one to get the dryer back up and running. It usually costs under $100, which is a pretty small price to pay to get your dryer back in action without investing in a new one!
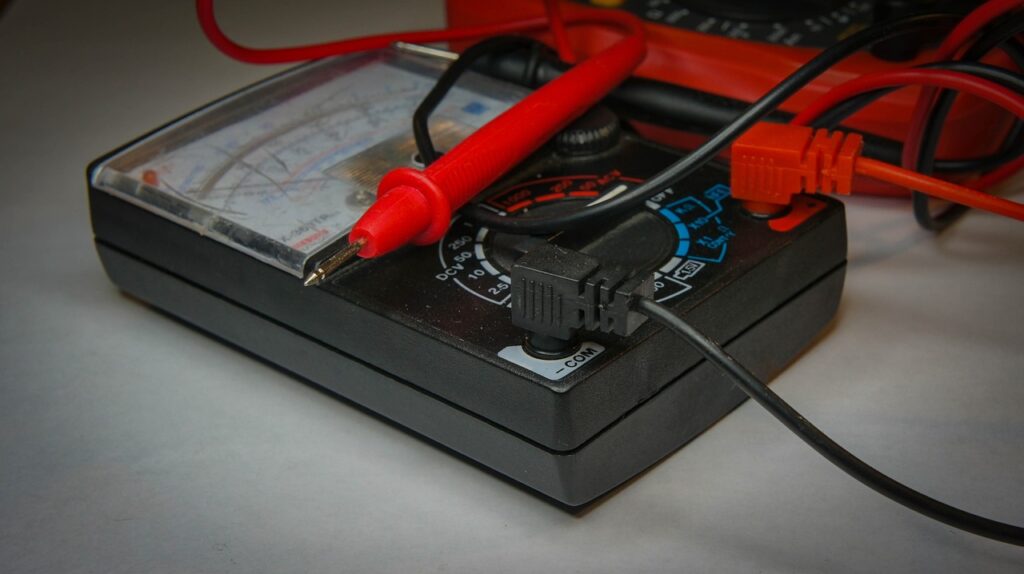
What you’ll need:
- 5/16-inch nut driver
- 1/4-inch nut driver
- Multimeter
- New thermal fuse
Solution: Isolate the thermal fuse from your Maytag dryer and do a continuity test to confirm that it’s defective.
- Step 1: Unplug the power cord of your dryer.
- Step 2: Unfasten the screws holding the lower access panel using a 5/16-inch nut driver. Next, detach the panel and set it aside.
- Step 3: Remove the screws at the bottom of the front panel.
- Step 4: Pull the front panel down to detach it from the dryer.
- Step 5: Remember the orientation of the wires connected to the door switch before unplugging them.
- Step 6: Remove the front panel and set it aside.
- Step 7: Unfasten the top mounting screws.
- Step 8: Lift up the main top. Then, use a chain to prop it open while you perform the repair.
- Step 9: Unplug the light assembly wires. Remove them from the retainer.
- Step 10: Remove the four front bulkhead mounting screws.
- Step 11: Carefully lift the bulkhead and detach it from the cabinet.
- Step 12: Reach under the drum to unhook the belt from the pulley and the motor shaft.
- Step 13: Take out the drum from the cabinet and set it aside.
- Step 14: Unplug the thermal fuse wires.
- Step 15: Use a 1/4-inch nut driver to loosen the mounting screws and remove the thermal fuse.
- Step 16: Grab your multimeter and turn it to the continuity setting.
- Step 17: Place a probe on each wire terminal. If you hear no beep, the fuse is blown and will need replacing.
To replace a defective thermal fuse on a Centennial Maytag dryer, follow these steps:
- Step 1: Unplug the power cord of your dryer.
- Step 2: Use a 5/16-inch nut driver to remove the screws holding the lower access panel in place. Once the screws are out, detach the panel and set it aside.
- Step 3: Unthread the screws at the bottom of the front panel.
- Step 4: Gently pull the front panel downward to release it from the dryer.
- Step 5: Note the orientation of the wires on the door switch before unplugging them.
- Step 6: Remove the front panel and set it aside.
- Step 7: Unfasten the top mounting screws.
- Step 8: Lift the main top up, and use a chain to prop it open while you work.
- Step 9: Unplug the light assembly wires. Remove them from the retainer.
- Step 10: Remove the four front bulkhead mounting screws.
- Step 11: Carefully lift the bulkhead and detach it from the cabinet.
- Step 12: Reach under the drum to unhook the belt from the pulley and the motor shaft.
- Step 13: Take out the drum from the cabinet and set it aside.
- Step 14: Unplug the thermal fuse wires.
- Step 15: Use a 1/4-inch nut driver to loosen the mounting screws and remove the old fuse.
- Step 16: Align the new fuse into the burner tube. Then, thread the screws to keep it in place.
- Step 17: Reconnect the wires to the new fuse.
- Step 18: Mount the drum on the cabinet by aligning it on the rollers.
- Step 19: Reach under the drum and loop the belt on the pulley and motor shaft in a zigzag pattern.
- Step 20: Gently rotate the drum to align the belt.
- Step 21: Reinstall the front bulkhead by aligning the tabs into the slots on the cabinet. Rethread the mounting screws to keep it secure.
- Step 22: Slip the light assembly wires into the retainer and reconnect them.
- Step 23: Lower the main top and reinstall the screws.
- Step 24: Reconnect the door switch wires to the appropriate terminals.
- Step 25: Mount the front panel by reconnecting its retaining clips to the main top. Then, rethread the screws at the bottom.
- Step 26: Reinstall the lower access panel and refasten its screws.
- Step 27: Reconnect your dryer to power.
- Step 28: Turn it on and run a test cycle to confirm that it spins.
Damaged Drive Belt
A worn-out drive belt is a common culprit behind a Maytag Centennial dryer that won’t spin.
The belt is what keeps the drum spinning, but over time, it can become frayed. When it breaks, the drum won’t move, and sometimes, the dryer won’t even start.
You can check for a damaged drive belt without taking the machine apart. Just open the door, reach inside, and try spinning the drum by hand.
If it rotates easily with little resistance, the belt is likely broken and needs replacing. The good news? A new drive belt is affordable, often under $20.
Plus, replacing it yourself is quick and easy, saving you hundreds in repair costs!
What you’ll need:
- 5/16-inch nut driver
- New drive belt
Solution: To replace a damaged drive belt on a Centennial Maytag dryer, follow these steps:
- Step 1: Unplug your dryer from the power source.
- Step 2: Use a 5/16-inch nut driver to remove the screws from the lower access panel. Set the panel aside.
- Step 3: Unthread the screws at the bottom of the front panel.
- Step 4: Pull the front panel down and remove it from the dryer.
- Step 5: Take note of how the door switch wires are connected. Then, disconnect them.
- Step 6: Set the front panel aside.
- Step 7: Unfasten the screws at the top that hold the main top in place.
- Step 8: Lift the main top and use a chain or prop to hold it open.
- Step 9: Unplug the light assembly wires and remove them from the retainer.
- Step 10: Remove the four screws securing the front bulkhead.
- Step 11: Carefully lift the bulkhead and detach it from the dryer cabinet.
- Step 12: Reach under the drum and unhook the belt from the pulley and motor shaft.
- Step 13: Take the damaged drive belt off the drum.
- Step 14: Slide the new belt onto the drum with the grooves facing inwards.
- Step 15: Reach under the drum and loop the belt on the pulley and motor shaft in a zigzag pattern.
- Step 16: Rotate the drum to align the belt.
- Step 17: Align the tabs on the front bulkhead with the slots on the cabinet. Then, rethread the mounting screws to keep it secure.
- Step 18: Slip the light assembly wires into the retainer and reconnect them.
- Step 19: Lower the main top and reinstall the screws.
- Step 20: Plug the door switch wires into the appropriate terminals.
- Step 21: Mount the front panel by reconnecting its retaining clips to the main top. Then, rethread the screws at the bottom.
- Step 22: Reinstall the lower access panel and refasten its screws.
- Step 23: Reconnect your dryer to power.
- Step 24: Turn it on and run a test cycle to ensure it spins.
Defective Drive Motor
Does your unit stop drying mid-cycle? Does it make loud or squeaking noises when it’s spinning?
You might have a defective drive motor. The motor, which is connected to the pulley wheel belt, provides the necessary power to spin the drum.
Without a functioning motor, your dryer can’t spin. You must replace it with a new one to get the dryer to spin again.
What you’ll need:
- Pliers
- Snap ring pliers
- Flathead screwdriver
- Phillips screwdriver
- 5/16-inch nut driver or socket
- New dryer motor
Solution: To replace a defective drive motor on a Centennial Maytag dryer, follow these steps:
- Step 1: Unplug your dryer from the power source.
- Step 2: Pull the dryer away from the wall to access the back part.
- Step 3: Unthread the screws on the lower access panel using a 5/16-inch nut driver or socket.
- Step 4: Pull the panel down to release the clips at the top.
- Step 5: Take note of the orientation of the door switch wires.
- Step 6: Disconnect the wires and remove them from the retaining clips on the panel. Then, set the panel aside.
- Step 7: Release the wires from the front bulkhead.
- Step 8: Unthread the screws to release the front bulkhead from the cabinet.
- Step 9: Carefully reach under the drum and push the idler pulley to release the belt tension.
- Step 10: Remove the belt from the pulley and motor shaft. Then, pull the belt out of the dryer.
- Step 11: Carefully lift the drum out of the dryer and set it aside.
- Step 12: Unfasten the screws on the blower housing cover.
- Step 13: Remove the spring clamp using pliers. Then, use snap ring pliers to take off the front snap ring.
- Step 14: Pull the blower wheel out of the dryer and the rear snap ring.
- Step 15: Unplug the wires on the motor switch. After, unthread the screw to release the grounding wire.
- Step 16: Remove the motor retaining clips using a flathead screwdriver.
- Step 17: Take the old motor out of the dryer.
- Step 18: Insert the replacement part into the motor support and secure it by reattaching the retaining clips.
- Step 19: Loosen the set screw on the old motor to release the pulley.
- Step 20: Install the pulley on the new motor shaft about ⅜ inches from the motor support. Then, tighten the set screw.
- Step 21: Reconnect the wires on the motor switch and secure the grounding wire with the screw.
- Step 22: Slide the rear snap ring and blower wheel onto the shaft. Secure it by adding the front snap ring and spring clamp.
- Step 23: Mount the housing cover in place and rethread the screws.
- Step 24: Reinstall the drum by aligning its rim on the support rollers.
- Step 25: Slide the belt over the drum with the flat side down. Loop the belt over the pulley and motor shaft in a zigzag pattern.
- Step 26: Slowly rotate the drum to align the belt.
- Step 27: Mount the front bulkhead and reinstall its screws to secure it.
- Step 28: Slide the wire harness into the retaining clips on the front bulkhead and front panel.
- Step 29: Plug the wires into the proper terminals on the door switch.
- Step 30: Reattach the front panel and its screws.
- Step 31: Restore power to your dryer.
- Step 32: Run a test cycle to confirm that it spins.
Malfunctioning Control Board
The main control board manages your dryer’s drying times, temperature settings, and other core functions—like spinning! When it fails, it brings the entire machine to a standstill, making a replacement necessary.
Although the replacement board can cost over $100, you can save significantly by installing it yourself. The process is simpler than you think, even for those without much DIY experience.
With a little guidance and some basic tools, you can swap out the defective control board and get your dryer back in action in no time.
What you’ll need:
- Phillips screwdriver
- Small flathead screwdriver
- 1/4-inch nut driver
- New control board
Solution: First, isolate the control board and perform a continuity test to verify that it’s defective. If it has no continuity, you can replace the board or get a new dryer.
- Step 1: Unplug your dryer from the power source.
- Step 2: Pull the dryer away from the wall to access the back part.
- Step 3: Unthread the screws at the back of the control panel.
- Step 4: Lift the control panel carefully to release it from its mounting hooks.
- Step 5: Flip the panel over and take a photo of the wires to make reassembly easier.
- Step 6: Get the wiring diagram for your Maytag dryer to determine which connections on the control board can be tested for continuity.
- Step 7: Set your multimeter to the ohms setting. Touch each probe to the proper connections identified on the diagram.
If you aren’t seeing significant changes on the display, your control board lacks continuity. This means it’s defective and requires a replacement.
To replace a malfunctioning control board on a Centennial Maytag dryer, follow these steps:
- Step 1: Unplug your dryer from the power source.
- Step 2: Pull the dryer away from the wall to access the back part.
- Step 3: Unthread the screws at the back of the control panel.
- Step 4: Lift the control panel carefully to release it from its mounting hooks.
- Step 5: Flip the panel over and take a photo of the wires to make reassembly easier.
- Step 6: Using a small flathead screwdriver, press the locking tab on each wire connector and pull to unplug them.
- Step 7: Disconnect all the wires on the control board.
- Step 8: Remove the screw holding the control board’s mounting bracket.
- Step 9: Push the locking tab in the middle and remove the old control board.
- Step 10: Position the new control board by aligning its tabs with the slots on the bracket, and then secure it with the screw.
- Step 11: Reconnect all the wires on the control board. Use your photo for reference.
- Step 12: Connect the blue wire on the panel to the side of the control board.
- Step 13: Reinstall the panel on top of the dryer.
- Step 14: Secure it by rethreading the screws at the back.
- Step 15: Plug the dryer back into the power source.
- Step 16: Turn on the dryer and run a test cycle to ensure it’s working properly.
