Who’s going to wash the dishes? Apparently, dishwashing causes more relationship distress than any other household chore—especially when the task always falls on women.
If a broken dishwasher is causing a lot of strain on your relationships, we totally understand. We can’t give you relationship advice, but we can help you fix your dishwasher, which might be the same thing at this point.
Below, we’ll delve into the Bosch dishwasher E09 code, what it means, and how to fix it.
What does a Bosch dishwasher E09 error code mean?
An E09 error code on a Bosch dishwasher indicates a faulty heating element. In some cases, it could be caused by a defective control board, which has failed to supply the heating element with power.
If E09 appears with an illuminated salt LED, a dirty salt sensor might be triggering the wrong code.
Before making any repairs, we recommend power cycling your Bosch dishwasher. Just follow these steps to reset it.
- Step 1: Unplug your power cord, or turn off the power at the circuit breaker.
- Step 2: Wait for at least 30 seconds.
- Step 3: Restore power to your dishwasher.
A reset should clear any glitches in the system, which often cause error codes to appear when there aren’t any problems. If there is an underlying issue that needs to be resolved, the same error code should reappear.
Keep reading our guide below to find out how to fix the E09 error code on your Bosch dishwasher.
Troubleshooting a Bosch Dishwasher E09 Error Code
To fix a Bosch dishwasher E09 error code, you must remove the heating element and perform a continuity test. If it doesn’t have continuity, replace it with a new one.
If the E09 code appears with an illuminated salt LED, try cleaning the salt dispenser with vinegar or a descaling solution.
| Causes | Solutions |
| Defective Heating Element | • Perform a continuity test to determine if the heating element is defective. • Less than 5 ohms of resistance indicates a faulty heating element. • Unplug the dishwasher or turn off the power at the circuit breaker. • Then, shut off the water supply valve. • Disconnect the drain hose from the garbage disposal system or the sink. Skip this step if it doesn’t apply to your unit. • Unmount the dishwasher from the cabinet, then pull it out for better access. • Remove the outer door panel, lower rack, lower spray arm, fine filter, and filter basket. • Lay a towel on the floor and place the dishwasher on its back. • Disconnect the fill hose and outlet hose from the sump. • Unmount the heater assembly and unplug the turbidity sensor wire. • Remove the clamps on the heater and disconnect the old heater assembly from the circulation pump. • Connect the new assembly to the circulation pump, then replace the clamp. • Transfer the wires on the old assembly to the new one. • Reconnect the turbidity sensor wire to the heater and the sump outlet hose to the assembly. • Mount the assembly on the base and install the drain pump on the sump housing. • Lift the dishwasher to its upright position and start reassembling the unit. • Reinstall the outer door panel, lower rack, lower spray arm, fine filter, and filter basket. • Mount the dishwasher on the cabinet. • Restore power to the dishwasher and turn on the water supply. |
| Faulty Salt Sensor | • Wipe the salt dispenser using a vinegar solution or a descaling product. • Remove any stubborn residue using an old toothbrush. |
| Damaged Main Control Board | • Use a multimeter to check if the main control board is receiving power. • If the heating element isn’t defective but power is reaching the control board, then the board is most likely defective. • Before performing the repair, unplug your dishwasher and turn off the water supply. • Open the door of your dishwasher and unthread its mounting screws. • Put a towel and a container under the shadow valve to absorb spills. • Disconnect the water line and the drain hose. • Carefully pull out the dishwasher from the counter. • Tilt it back and unthread the screws on the lower panel. • Tilt the dishwasher on the left side and move the insulation out of the way. • Use a flathead screwdriver to push the tab on the control board. Then, remove the cap. • Remove the harness from the retainers and disconnect all the electrical plugs. • Open the cap on the new control board and connect it to all the electrical plugs. • Place the harness in the retainers to secure the wires. Then, reattach the cap until it locks. • Slide the control board into the opening until it snaps into place. • Flip the insulation back into its original position and keep the dishwasher upright. • Tilt the dishwasher back and mount the lower panel. • Move the unit back into the counter, and reinstall its mounting screws. • Reinstall the water line and the drain hose. • Plug in the dishwasher and turn on the water supply. |
Defective Heating Element
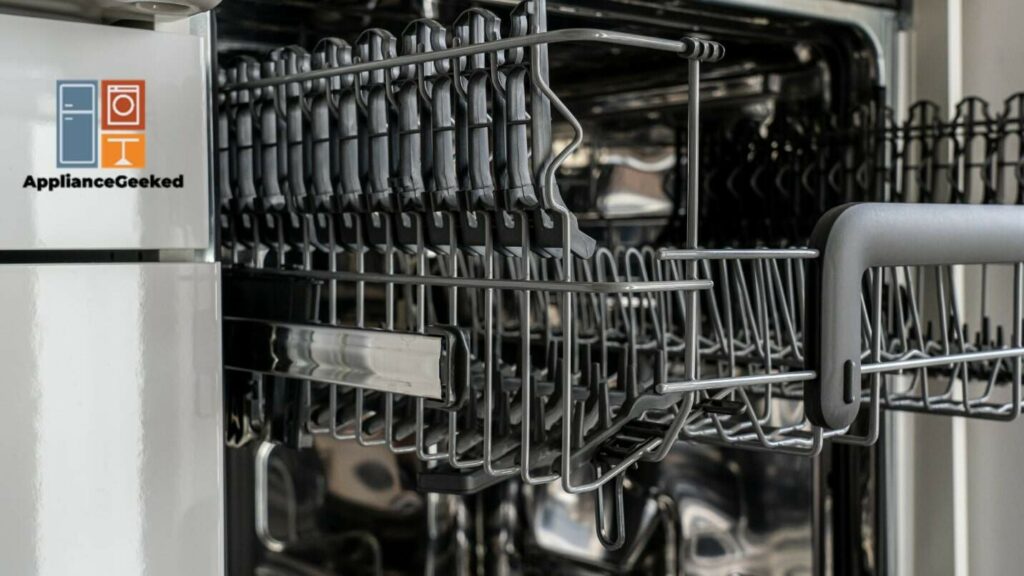
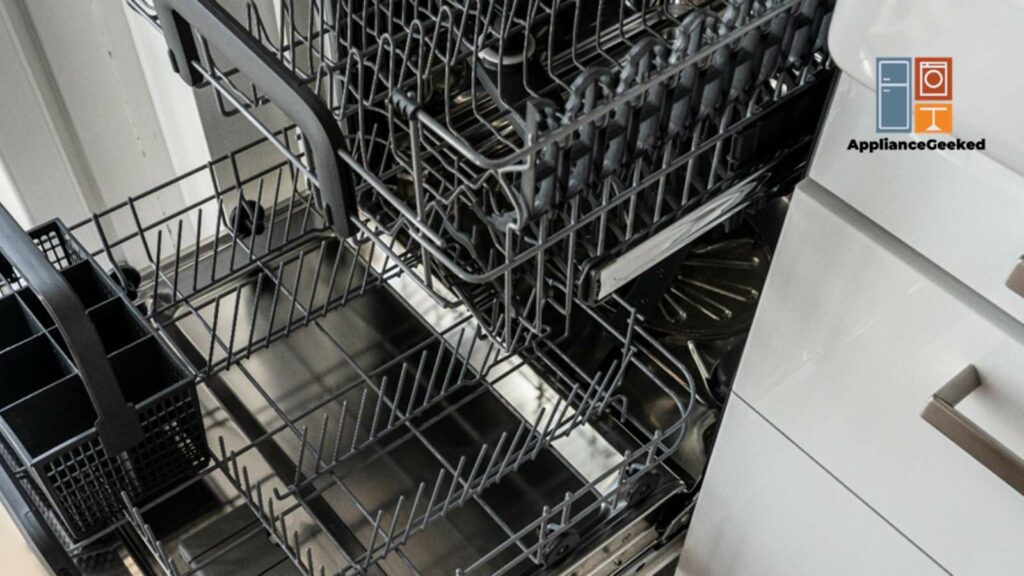
Older Bosch dishwasher models use a heating element to dry the dishes in the tub.
Located at the bottom of the tub, the heating element raises the temperature of the water to clean and sterilize your dishes. It also helps speed up the drying process.
Although a faulty heating element isn’t a common problem for Bosch dishwashers, it can happen, especially if your unit is a little old. Other issues that cause the heating element to burn out include moisture and mineral build-up.
Once this component is defective, you can longer repair it, but you can replace it with a new one.
The fix isn’t easy and requires a number of steps just to disassemble the dishwasher. However, it isn’t impossible—even for someone with little repair experience.
Testing: There are two ways to check if the heating element is defective: a visual inspection or a continuity test.
Visual Inspection
You can disassemble the Bosch dishwasher and inspect the heating element for signs of damage or moisture. If you see corrosion, cracks, and blistering, these are strong indicators that the element is defective and requires replacement.
To do a visual inspection, follow these steps:
- Step 1: Unplug your dishwasher or turn off the power at the circuit breaker.
- Step 2: Turn off the water supply valve.
- Step 3: Unthread the screws on the lower access panel. Remove and set the panel aside.
- Step 4: Locate the heating element and check for leaks around the area. Look for signs of corrosion, blistering, and cracking.
If you see any of the signs mentioned, you should replace the heating element with a new one.
Continuity Test
A continuity test can help you verify if the heating element requires replacement or not. Using a multimeter, you can easily determine if an electrical current can flow through the element.
- Step 1: Pull out the dishwasher’s power cord or turn off the power at the circuit breaker.
- Step 2: Shut off the water supply valve.
- Step 3: Unthread the screws on the lower access panel, then remove the panel.
- Step 4: Set a towel underneath the water supply line to absorb any spills. Then, disconnect the line from the inlet valve.
- Step 5: Unfasten the screw on the junction box cover. Pull out the cover and set it aside.
- Step 6: Loosen the screws to release the wires on the terminal block. Take note of the orientation of the wires.
- Step 7: Remove the screw mounting the wire strain relief bracket.
- Step 8: Use a flathead screwdriver to release the strain relief from the bracket.
- Step 9: Disconnect the drain hose from the garbage disposal system or the sink. Then, push it out of the cabinet.
- Step 10: Open the dishwasher door and remove the screws on the mounting brackets.
- Step 11: Carefully pull the dishwasher out of the cabinet.
- Step 12: Unsnap the covers for the hinge ropes. Disconnect the hinge ropes on both sides of the door.
- Step 13: Open the dishwasher door and unthread the screws on the outer door panel. Then, close the door and pull out the panel to remove it.
- Step 14: Unthread the screws to remove the inner access plate. Move the insulation out of the way.
- Step 15: Unfasten the front and rear screws securing the dishwasher’s frame to the base.
- Step 16: Pull out the lower rack and the lower wash arm. Turn the filter basket to the right to release it from the sump, then remove the fine filter.
- Step 17: Undo all the screws on the lower arm support and the sump supports. Set aside the supports and the screws.
- Step 18: Take off the insulation blanket and side cover.
- Step 19: Set a towel on the floor. Place the dishwasher on its back with the rear panel resting on the towel.
- Step 20: Disconnect the fill hose from the sump.
- Step 21: Slide the base away from the tub.
- Step 22: Push the tab on the drain pump. Turn the pump to the right to remove it.
- Step 23: Detach the circulation pump from the base and disconnect the outlet hose from the sump. Lift the assembly out of the base.
- Step 24: Unthread the screws mounting the heater assembly. Unplug the turbidity sensor wire and remove it from the retaining clip.
- Step 25: Turn the assembly over. Use pliers to remove the clamps on the heater.
- Step 26: Pull the tab back to detach the heater assembly from the circulation pump.
- Step 27: Disconnect the wires on the heater assembly.
- Step 28: Check the user manual to determine the heater’s input and output terminals and the designated ohms of resistance.
- Step 29: Get your multimeter and turn the dial to the lowest setting for ohms of resistance.
- Step 30: Place the multimeter’s black probe on the input terminal and the red probe on the output terminal of the heater.
- Step 31: Check the reading on the multimeter.
If the multimeter shows between 5 to 30 ohms of resistance, your heating element has electrical continuity. It is functioning well and doesn’t require a replacement.
Less than 5 ohms of resistance indicates a faulty heating element. It should be replaced.
Solution: To replace a defective heating element in your Bosch dishwasher, follow these steps carefully:
Disassembly
- Step 1: Unplug your dishwasher, or turn off the power at the circuit breaker.
- Step 2: Turn off the water supply valve.
- Step 3: Unthread the screws on the lower access panel. Remove and set the panel aside.
- Step 4: Set a towel underneath the water supply line to absorb any spills. Then, disconnect the line from the inlet valve.
- Step 5: Unfasten the screw on the junction box cover. Pull out the cover and set it aside.
- Step 6: Loosen the screws to release the wires on the terminal block. Take note of the orientation of the wires.
- Step 7: Remove the screw mounting the wire strain relief bracket.
- Step 8: Use a flathead screwdriver to release the strain relief from the bracket.
- Step 9: Disconnect the drain hose from the garbage disposal system or the sink. Then, push it out of the cabinet.
- Step 10: Open the dishwasher door and remove the screws on the mounting brackets.
- Step 11: Carefully pull the dishwasher out of the cabinet.
- Step 12: Unsnap the covers for the hinge ropes. Disconnect the hinge ropes on both sides of the door.
- Step 13: Open the dishwasher door and unthread the screws on the outer door panel. Then, close the door and pull out the panel to remove it.
- Step 14: Unthread the screws to remove the inner access plate. Move the insulation out of the way.
- Step 15: Unfasten the front and rear screws securing the dishwasher’s frame to the base.
- Step 16: Pull out the lower rack and the lower wash arm. Turn the filter basket to the right to release it from the sump, then remove the fine filter.
- Step 17: Undo all the screws on the lower arm support and the sump supports. Set aside the supports and the screws.
- Step 18: Take off the insulation blanket and side cover.
- Step 19: Lay a towel on the floor. Then, tilt the dishwasher back with the rear panel resting on the towel.
Removal and Replacement
- Step 20: Disconnect the fill hose from the sump.
- Step 21: Slide the base away from the tub.
- Step 22: Depress the tab on the drain pump. Rotate the pump clockwise to remove it.
- Step 23: Detach the circulation pump from the base and disconnect the outlet hose from the sump. Lift the assembly out of the base.
- Step 24: Unthread the screws mounting the heater assembly. Unplug the turbidity sensor wire and remove it from the retaining clip.
- Step 25: Turn the assembly over. Use pliers to remove the clamps on the heater.
- Step 26: Pull the tab back to detach the old heater assembly from the circulation pump.
- Step 27: Take the new heater assembly and reinstall a new clamp on the housing seal.
- Step 28: Connect the new assembly to the circulation pump. Tighten the clamp.
- Step 29: Remove the thermistor cover from the old assembly. Transfer the wires from the old heater to the new one, then install the cover.
- Step 30: Reconnect the turbidity sensor wire to the heater and insert the wire into the retaining clip. Reinstall the mounting screws on the assembly.
- Step 31: Reconnect the sump outlet hose to the assembly.
- Step 32: Align the assembly on the base and secure it with the mounting straps.
- Step 33: Align the drain pump on the sump housing. Turn it counterclockwise to lock it in place.
- Step 34: Reattach the dishwasher’s base to the tub.
- Step 35: Reconnect the fill hose and keep it secure using its retaining clip.
Reassembly
- Step 36: Lift the dishwasher to its upright position.
- Step 37: Reinstall the side cover and the insulation blanket.
- Step 38: Align the sump supports and secure them with the screws.
- Step 39: Replace the support screws on the lower wash arm.
- Step 40: Reinstall the fine filter. Then, insert the filter basket into the sump and rotate it clockwise to lock it in place.
- Step 41: Return the lower wash arm and the lower dish rack.
- Step 42: Reinstall the front and rear screws on the base to secure it to the frame.
- Step 43: Reposition the insulation at the bottom of the dishwasher.
- Step 44: Align the inner access place to the frame and rethread the screws to secure it.
- Step 45: Slide the outer door panel into position and replace the screws in the inner panel.
- Step 46: Reconnect the hinge rope hooks on both sides of the door and reinstall the covers.
- Step 47: Slide the dishwasher back into the cabinet.
- Step 48: Secure the dishwasher to the cabinet by replacing the mounting screws.
- Step 49: Reconnect the drain hose to the garbage disposer or sink drain.
- Step 50: Insert the wire strain relief through the bracket and tighten the nut.
- Step 51: Align the bracket with the terminal block and replace the screw to secure it.
- Step 52: Reattach the wires to their respective terminals. Use the screws to secure them but don’t tighten them too much.
- Step 53: Replace the junction box cover and its mounting screw.
- Step 54: Reconnect the water supply line to the inlet valve.
- Step 55: Replace the lower access panel and the screws.
- Step 56: Turn on the water supply and restore power to the dishwasher.
Faulty Salt Sensor
Some Bosch dishwashers have a special reservoir for dishwasher salt. Adding it to your cleaning cycles will help improve the results by softening the water.
All you have to do is pour salt into the reservoir. Never use sea salt, kosher salt, and regular table salt as it may cause damage to your appliance.
Depending on the hardness of the water in your area, your dishwasher might be prone to mineral buildup. The salt reservoir is no exception.
Mineral buildup will often lead to false readings of the level of salt in the tank. For instance, it might activate the salt LED indicator even if it the reservoir is full.
Solution: Wipe the salt dispenser using a vinegar solution or a descaling product. Remove any stubborn residue using an old toothbrush.
Damaged Main Control Board
The main control board manages most if not all functions on your Bosch dishwasher. Since it is malfunctioning, it can cause a wide range of issues in your appliance, which also makes it harder to diagnose.
Thus, once you’ve ruled out a faulty heating element and a dirty sensor, you should consider a defective main control board.
Like most of the internal components, a faulty main control board can no longer be repaired, but it can be replaced. Although it can be a tricky fix, it isn’t an impossible one.
Testing: Use a multimeter to determine whether the control board is defective or not. Follow these steps:
- Step 1: Unplug your dishwasher and turn off the water supply.
- Step 2: Open the door of your dishwasher.
- Step 3: Unthread the screws mounting the dishwasher to the counter.
- Step 4: Put a towel and a container under the shadow valve to absorb spills.
- Step 5: Use a 5/8” open-ended wrench to disconnect the water line.
- Step 6: Use the 5/16” nut driver to loosen the hose clamp. Then, pull the drain hose from the air gap.
- Step 7: Carefully pull out the dishwasher from the counter.
- Step 8: Tilt it back to access the bottom part of the unit.
- Step 9: Unthread the screws on the lower panel.
- Step 10: Tilt the dishwasher on the left side. Move the insulation out of the way.
- Step 11: Use a flathead screwdriver to push the tab on the control board to detach it.
- Step 12: Inspect the control board for signs of damage, such as burning or shorted-out components.
- Step 13: Set the multimeter for volts AC.
- Step 14: Restore power to the dishwasher.
- Step 15: Check the wiring diagram on the user manual. Identify which terminals are receiving power.
- Step 16: Place the black probe on an incoming power terminal and the red probe on another terminal.
- Step 17: Check the multimeter reading.
Power is reaching the control board if the multimeter displays close to 120 volts of alternating current. If the heating element isn’t defective but power is reaching the control board, then the board is most likely defective and needs replacement.
Solution: To replace a Bosch dishwasher main control board, follow these steps:
- Step 1: Unplug your dishwasher and turn off the water supply.
- Step 2: Open the door of your dishwasher.
- Step 3: Unthread the screws mounting the dishwasher to the counter.
- Step 4: Put a towel and a container under the shadow valve to absorb spills.
- Step 5: Use a 5/8” open-ended wrench to disconnect the water line.
- Step 6: Use the 5/16” nut driver to loosen the hose clamp. Then, pull the drain hose from the air gap.
- Step 7: Carefully pull out the dishwasher from the counter.
- Step 8: Tilt it back to access the bottom part of the unit.
- Step 9: Unthread the screws on the lower panel.
- Step 10: Tilt the dishwasher on the left side. Move the insulation out of the way.
- Step 11: Use a flathead screwdriver to push the tab on the control board. Then, remove the cap.
- Step 12: Remove the harness from the retainers and disconnect all the electrical plugs.
- Step 13: Open the cap on the new control board and connect it to all the electrical plugs. Place the harness in the retainers to secure the wires.
- Step 14: Reattach the cap until it locks.
- Step 15: Slide the control board into the opening until it snaps into place.
- Step 16: Flip the insulation back into its original position and keep the dishwasher upright.
- Step 17: Tilt the dishwasher back and mount the lower panel.
- Step 18: Move the unit back into the counter and reinstall its mounting screws.
- Step 19: Reinstall the water line and the drain hose.
- Step 20: Plug in the dishwasher and turn on the water supply.
Frequently Asked Questions
Older Bosch dishwashers have heating elements, while modern models use the condensation process to dry the dishes in the tub.
Instead of a single heating element, multiple dishwashing elements are used to dry the load. It starts at the final rinse when high-temperature water is sprinkled all over the dishes, making them extra hot.
When hot, moist air comes into contact with the stainless steel tub, water droplets form. These droplets will simply trickle down to the bottom of the tub, where they will be drained.
If an error code appears on your Bosch dishwasher, you can do a hard reset to get rid of any glitches that might be triggering a false error. Just unplug the power cord or turn off the power at the circuit breaker.
After at least 30 seconds, restore power to the dishwasher to reset the system. If the error code appears, start inspecting the unit for the possible causes, then perform the necessary fix to clear the issue and the code.