Did you find a puddle right under your Samsung washer? If you have, you must stop the ongoing wash cycle — that is if your washer hasn’t automatically stopped it yet.
Look for the cause of the leak and fix it before finishing your laundry. In most cases, it is caused by a loose connection, which can be resolved in a few minutes.
Although not as common, the leak can also be caused by a faulty component. Its fix is more complicated because you must replace the malfunctioning part to resolve the issue.
On the bright side, it isn’t impossible, even for beginners. If you follow our step-by-step guide carefully, you can solve the problem yourself and get back to your laundry.
What causes a Samsung washer to leak from the bottom?
Poor installation, loose connections, and faulty components are some of the most common causes of leaks in a Samsung washer.
Your laundry habits could also be the culprit. If you use too much detergent or add too much laundry to the drum, you’re unknowingly causing leaks in your washer.
How to Fix Leaks on a Samsung Washer
Fixing a leak on a Samsung washer can be as simple as reinstalling the hose, leveling the legs correctly, or correcting your laundry habits. A deep cleanse might also be necessary.
If a component is faulty, you must replace it to stop the leak and keep your washer running smoothly.
Refer to the table below when you’re identifying the cause of the leak in your Samsung washer. We have easy-to-follow instructions for both front-load and top-load washers.
| Causes | Solution for Front Load-Washers | Solution for Top-Load Washers |
| Loose Hose Connections | • Connect the drain hose to a vertical drain pipe, which should be no less than 60 cm and no more than 90 cm from the floor. • You must insert the hose six to eight inches into the pipe to prevent the siphoning effect. | • Press the joint ring and install it into the drain hose. • Use the joint ring to connect the hose to the drain outlet securely. • Adjust the length of the hose if needed. |
| Off-Balance Washer | • Set the spirit level along the seam of the washer to check if it’s level from front to back. • Next, place it near the lid to check if it’s level from side to side. • Observe the position of the bubble and determine how to adjust the height of the leveling legs. • Rotate the leveling leg’s clamp nut in a clockwise direction to loosen it. • Turn the height nut clockwise to lower the leg and counterclockwise to raise it. • Don’t forget to rotate the clamp nut counterclockwise to secure the leveling leg. | • Pour water into the drum until it reaches right below the pulsator level. • Check the position of the pulsator while it’s submerged underwater. If it is centered, your washer is leveled correctly. • If it appears off-center, your unit is not level and requires adjustment. • Use Channellock pliers to adjust the height of the leveling legs. Turn it clockwise to lower it or counterclockwise to raise it. |
| Detergent Residue Build-Up | • Pull the detergent drawer all the way out and carefully lift it up to remove it. • Rinse the drawer in warm water and use a soft brush to scrub away any detergent build-up. Then, wipe the drawer opening with a soft cloth or non-metallic brush to clear the hardened gunk and residue. • Use a dry cloth to wipe the drawer and the area around the dispenser. • Align the drawer with the rails and push it back into place. | |
| Clogged Debris Filter | • Unplug the washer. Then, put a towel under the cover to prevent spills. • Open the debris filter cover. • Grab the drain hose and remove its cap to drain excess water into a bowl. Or, use the auto drain feature in your washer. • Reinstall the cap and push the hose back in after the water stops draining. • Rotate the debris filter counterclockwise and pull it out to remove it. • Remove any blockages (e.g. coins, clips, and buttons). • Clean the filter with a soft brush and rinse it under running water. • Reinstall the filter into the housing and rotate it clockwise. • Close the cover. | N/A |
| Faulty Door Gasket | • Unplug the washer and disconnect it from the water supply. • Move the washer to access the back panel. Then, unmount the top panel and set it aside. • Unthread the screws mounting the control panel. • Remove the detergent drawer and the screws near its opening. • Disconnect the control panel and set it on top of the washer. • Move your hand around the door seal and feel for a spring. • Insert the flathead screwdriver between the seal and the spring and remove the outer clamp. • Remove the door lock screws, and gently push the door lock in. • Pull the rubber gasket away from the edges and push it back into your washer. • Unmount the front panel. Then, loosen the screw on the inner door seal clamp and remove the clamp. • Pull out the damaged gasket, and install the new seal with the arrow positioned at the center. • Push the gasket in and work your way around it to install it securely. • Reinstall the inner cramp and secure its screws. Mount the front panel and replace its top screws. • Reinstall the door lock and the control panel. Then, refit the screws on the detergent drawer, and push the drawer back into place. • Pull the lip of the gasket and fit it around the edges of the door.Fit the outer clamp into the groove of the rubber seal. • Mount the top panel to complete the repair. • Plug in your washer and turn on the water supply. Finally, fill it up with water and check if the fix solved the leak. | N/A |
| Faulty Drain Pump | • Unplug the washer and turn off its water supply. Tape its lid shut before moving it around and laying it on its back. • Locate the drain pump. Pull on the edges of the cover to remove it and unplug its electrical connectors. • Push the clips on the hose, slide them out of the way, and disconnect the hoses. Then, use a wrench to remove the mounting bolts on the pump. • Take a photo of the pump for reference when you reassemble it. • Remove the four screws on the drain pump housing and remove the bracket. Then, clean the housing before installing the new component. • Open the photo reference of the pump. Align the new pump in its housing and push it in place. • Reinstall the screws on the drain pump and the bracket. Make sure the shortest one is positioned next to the drain fitting. • Mount the new pump on the washer. • Reconnect the hoses and slide the clamp back in place. Plug in the electrical connectors and reattach the cover. • Lift the washer back in an upright position. • Plug the washer back in and turn on the water supply. Test if it is draining properly. |
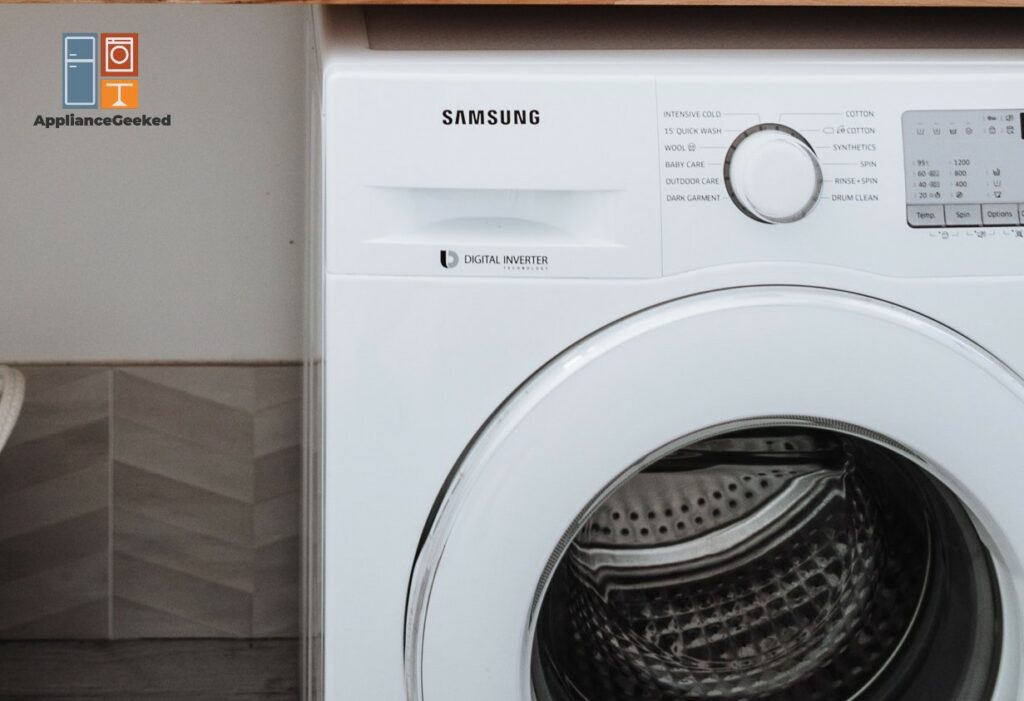
Loose Hose Connections
One of the most common causes of water leaks in a washing machine is a loose hose connection. Improperly installed connections, kinks, or damages can cause leakage when you’re running operations.
Whether you have a front-load or a top-load model, a poor connection can prevent your washer from draining properly.
Water can spill all over your laundry room floor when your washer attempts to drain the tub. Or, your washer won’t drain (Samsung washer not draining) at all.
Front-Load Washers
Fixing a leak caused by a loose hose connection is quite easy. If the hose isn’t damaged, you just have to reinstall it correctly.
The fix will depend on your preferred method of draining. On a front-load washer, you can install the drain hose over the sink, on a sink drain pipe branch, or on a drain pipe.
Solution: To fix a loose hose connection on a front-load washer, follow these tips:
- Over the sink: Mount the drain hose at least 60 cm above the floor. Use the supplied plastic hose guide to keep the spout in a bent position.
To prevent the hose from moving around while draining, mount it to the wall with a hook. Or, use a string to tie the spout to the tap.
- On a sink drain pipe branch: Keep the drain pipe branch above the sink siphon. The end of the hose should be at least 60 cm above the floor.
- On a standpipe: Connect the hose to a vertical standpipe, measuring about 65 cm. It should be no shorter than 60 cm and no longer than 90 cm.
Avoid inserting the hose too low or too deep into the standpipe to prevent the siphoning effect. If it happens, sewer water can fill up the tub and make your washer smell like sewage (Samsung top load washer smells like sewer).
Top-Load Washers
Most Samsung top-load washers have a joint ring that keeps the hose connected securely, preventing water from spilling out as it drains.
Some models don’t. To install the hose correctly and prevent further issues, we recommend checking your user manual.
Solution: To install the drain hose on a top-load washer, follow these steps:
- Step 1: Press the joint ring and pull out the drain hose pipe.
- Step 2: Press the clip again and insert it into the pipe.
- Step 3: Connect the hose to the drain outlet. Use the joint ring to secure the connection.
- Step 4: Adjust the length of the hose if needed.
- Step 5: Check the hose for kinks and bent areas. Then, straighten them if necessary.
Off-Balance Washer
Leveling is a very important part of the installation process. Skipping this step can lead to a variety of problems, including water leakage, excessive vibrations, loud noises, and performance issues.
Front-Load Washers
You can check if your front-load washer is balanced from front to back by placing a spirit level along the seam of the unit. If the bubble moves to the front, you can lower the leveling legs to keep the machine balanced.
Then, place the spirit level near the lid of the washer to check if it is level from side to side. If the bubble moves to the right, you either need to lower the right leg or raise the left one.
Solution: First, make sure your washer is set on a stable and level surface. To level a front-load Samsung washer, follow these steps:
- Step 1: Use a spirit level to check if your washer is balanced from front to back and from side to side.
The bubble will appear between the leveling marks if your appliance is balanced. If it is not, it will rise to the higher side.
- Step 2: Use a wrench to loosen the clamp nut of the leveling leg.
- Step 3: Rotate the height nut clockwise to lower the leg and counterclockwise to raise it.
- Step 4: Check again if the washer is balanced. Make the necessary adjustments until your unit is leveled on all sides.
- Step 5: Turn the clamp nut counterclockwise to secure the leveling leg.
Top-Load Washers
There’s a different way to check if a top-load Samsung washer is level. Instead of using a spirit level, you can fill up the drum with water to a certain level and check the position of the pulsator when it’s submerged underwater.
Solution: To level a top-load Samsung washer, follow these steps:
- Step 1: Pour water into the tub until it reaches right under the pulsator level.
- Step 2: Look at the position of the pulsator.
If it looks centered, your washer is leveled correctly. If it is off-center, your unit is not level and must be adjusted.
- Step 3: Use Channellock pliers to adjust the height of the leveling legs. Rotate the leg clockwise to lower its height or counterclockwise to raise it.
Detergent Residue Build-Up
Using too much high-efficiency detergent can lead to an excessive amount of suds or foam in your washer. It prevents your laundry from getting properly cleaned and might even leave a slimy, chalky film on your clothes.
Over time, detergent residue can build up in the drawer, causing it to leak. Lucky for you, a quick clean-up is all it takes to stop the leak.
You can also prevent it from happening by using the right amount of detergent for your laundry load and washer.
Solution: To clean the detergent drawer on a Samsung washer, follow these steps:
- Step 1: Pull the detergent drawer all the way out.
- Step 2: Slightly lift the drawer up to remove it.
- Step 3: Rinse the drawer in warm water. Use a soft brush to scrub away the detergent build-up inside.
- Step 4: Use a soft cloth or non-metallic brush to scrub the drawer opening.
- Step 5: Wipe the drawer and the area around it with a dry cloth.
- Step 6: Gently push the drawer back into place.
| Tips: • HE Washer: Use about two tablespoons of HE detergent on a normal-sized laundry load. • Regular Washer: Use ¼ cup of HE detergent on a normal-sized laundry load. |
Clogged Debris Filter
If you have a front-load Samsung washer, you need to inspect the debris filter, which is located at the bottom corner of your unit. Water may leak from the filter if it is clogged or improperly closed.
A quick visual inspection of the debris filter will let you know what the underlying issue is. Then, you can clean it up and reinstall it correctly to stop the leak.
Solution: To clean a debris filter on a front-load Samsung washer, follow these steps:
- Step 1: Turn off the washer, and unplug its cord. Then, turn off the water supply.
- Step 2: Place a towel to protect your floors from water damage.
- Step 3: Open the debris filter cover.
- Step 4: Grab the drain hose and remove its cap to drain excess water into a bowl. Or, use the auto drain feature in your washer.
- Step 5: Reinstall the cap and push the hose back in after the water stops draining.
- Step 6: Rotate the debris filter counterclockwise and pull it out to remove it.
- Step 7: Remove any blockages (e.g. coins, clips, and buttons).
- Step 8: Clean the filter with a soft brush and rinse it under running water.
- Step 9: Reinstall the filter into the housing and rotate it clockwise.
- Step 10: Close the cover.
- Step 11: Plug in the washer and turn on the water supply. Then, check if it still leaks from the bottom.
Faulty Door Gasket
Is the leak coming from the door?
If it is, do a quick visual inspection of the door seal. Look for signs of damage such as rips and tears.
A damaged door gasket can cause water to leak from your front-load washer, preventing the drum from filling up properly.
You can get a new door seal that matches your Samsung washer model. Then, you can carry out the repair by yourself.
Aside from the new component, all you need is a Phillips screwdriver and a flathead screwdriver to resolve the issue. It should take about 30 minutes or less.
Solution: To replace a door gasket on a Samsung Ecobubble, follow these steps:
- Step 1: Unplug the washer, and disconnect it from the water supply.
- Step 2: Pull out the washer to access the back panel.
- Step 3: Use a Phillips screwdriver to unmount the top panel.
- Step 4: Remove the top panel and set it aside.
- Step 5: Unthread the screws mounting the control panel.
- Step 6: Remove the detergent drawer. Then, unthread the screws near its opening.
- Step 7: Use a flathead screwdriver to disconnect the control panel.
- Step 8: Move your hand around the door seal and feel for a spring.
- Step 9: Insert the flathead screwdriver between the seal and the spring. Then, move it around to remove the clamp.
- Step 10: Remove the door lock screws, and gently push the door lock in.
- Step 11: Pull the rubber gasket away from the edges and push it back into your washer.
- Step 12: Tilt the washer back to remove the mounting screws located at the bottom of the front panel. Make sure it is supported by a solid stable surface.
- Step 13: Keep the washer upright, and remove the screws on the top part of the front panel.
- Step 14: Lift up the front panel and set it aside.
- Step 15: Loosen the screw on the inner door seal clamp and remove the clamp.
- Step 16: Pull out the damaged gasket.
- Step 17: Install the new door seal with the arrow positioned at the center. Keep it aligned with the main groove of the washer’s top center.
- Step 18: Push the seal in and work your way around it to install it securely.
- Step 19: Attach the inner clamp into the groove of the new door gasket. Then, tighten the screw to secure it in place.
- Step 20: Mount the front panel and replace the top screws. Tilt the machine back again to reinstall the bottom screws.
- Step 21: Reinstall the door lock and its screws.
- Step 22: Reattach the control panel and its screws.
- Step 23: Refit the screws on the detergent drawer, and push the drawer back into place.
- Step 24: Pull the lip of the gasket and fit it around the edges of the door.
- Step 25: Fit the outer clamp into the groove of the rubber seal.
- Step 26: Mount the top panel to complete the repair.
- Step 27: Plug the washer back in and turn on the water supply.
- Step 28: Fill it up with water to check if the door still leaks.
Faulty Drain Pump
The drain pump moves water from the drum to the drainage system. Due to natural wear and tear, this component can get damaged, causing your washer to leak from the bottom.
If a drain pump is malfunctioning, you should replace it right away to prevent your washer from getting damaged. It isn’t the easiest fix, but it should cost far less than buying a new unit.
Solution: To replace a faulty drain pump on a Samsung washer, follow these steps:
- Step 1: Unplug the washer, and turn off the water supply.
- Step 2: Tape the lid shut to prevent damage.
- Step 3: Lay the washer on its back.
- Step 4: Locate the drain pump.
- Step 5: Pull on the edges of the cover to remove it, and unplug its wires.
- Step 6: Press the clamps on the hose and slide it off the drain pump assembly. Then, disconnect the hoses.
- Step 7: Use a wrench to remove the two bolts mounting the pump.
- Step 8: Take a photo of the pump for reference. This makes it easier for you to reassemble the pump later.
- Step 9: Unthread the screws on the drain pump housing and remove the bracket. Take note that the shortest one goes right next to the drain fitting.
- Step 10: Clean the housing before installing the new component.
- Step 11: Pull up the photo you took of the pump for reference. Align the new pump in its housing and push it in place.
- Step 12: Reinstall the screws on the drain pump and the bracket.
- Step 13: Align the pump on the frame and reattach the mounting bolts.
- Step 14: Reconnect the hoses and slide the clamp back in place.
- Step 15: Plug the electrical connectors back in.
- Step 16: Reinstall the drain pump cover.
- Step 17: Carefully lift the washer back in an upright position.
- Step 18: Plug the washer back in and turn on the water supply.
- Step 19: Fill the washer with water and check if it’s draining properly.
Frequently Asked Questions
A Samsung washer may display an 11E error code when it detects a low water level inside the drum, which may be a result of a leak. Depending on your model, the error code for water leakage may appear as 11E, E9, LE, LE1, LC, and LC1.
We recommend checking your user manual for the specific error code for water leaks on your Samsung washer.
Water leakages from your washing machine must be addressed immediately because they can pose serious health and safety risks in your home. Even a small puddle can cause you or other unsuspecting members of the household to slip and fall.
Moreover, the excess moisture in your laundry room encourages mold growth. Depending on its severity, it may cause allergic symptoms, such as watery eyes, runny nose, itching, coughing, and more.
A washing machine leak is often caused by a minor problem, such as poor installation, loose connections, or obstructions. Service is rarely required because you can perform the fix yourself and resolve the issue in a matter of minutes.
Even if the root cause of the leak is a faulty component, you can carry out the repair, which should cost less than getting a new unit or requesting service.