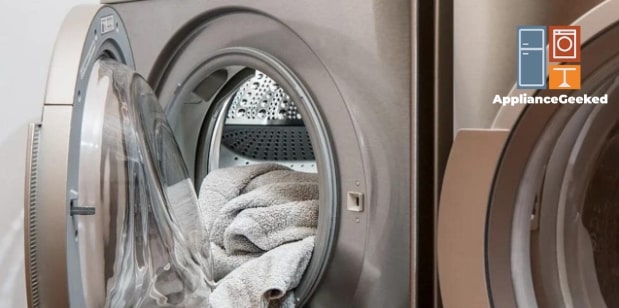
Is your Samsung dryer not spinning even though it’s powered on?
The problem could be just as simple as a safety setting you accidentally toggled, so before you call for service, allow us to offer a few troubleshooting suggestions first!
We prepared a list of all the quick fixes you can do when you run into this problem.
Why is your Samsung dryer not spinning?
The most common reason that your Samsung dryer won’t spin is that the drum or motor system is damaged. It could also be because you’ve left Child Lock on.
Before troubleshooting the drum system, run a Child Lock and Timer test on it first to ensure that the dryer can start a cycle properly.
To check if Child Lock is active, look out for a smiling icon on your dryer’s display panel. When this icon is lit up, that means Child Lock is on and all the buttons on your dryer’s control panel except for the Power button can’t function.
If Child Lock is deactivated, do the following steps to confirm if your dryer can start a cycle properly:
- Step 1: Put your dryer on Time Dry, then press and hold Start.
- Step 2: Observe if the timer on the display screen counts down after a minute. If it doesn’t count down after a minute or two, continue to the next step.
- Step 3: Double-check if the door is shut tightly and that all buttons are functioning.
- Step 4: Re-run the timer test until the timer counts down, the drum spins, or an error code appears on the display screen.
If the timer counts down and the drum doesn’t spin, this means the issue is in the drum system.
You might need to call a professional on the matter — or you can also grab a few tools as we guide you through other troubleshooting methods.
Unplug your dryer and take this chance to learn what’s preventing your Samsung dryer from spinning.
Common Causes of a Samsung Dryer Not Spinning
When the Child Lock and timer test fail, that usually means that your dryer is facing drum or motor issues.
But before you unscrew its back panel off, there are still a couple of other parts you have to look into to confirm that your dryer is facing a systemic issue.
You can learn more about it in the table you’ll find below. Do note that most of these will require some technical tinkering, so if you’re not handy with tools, just use this table as reference material and call a professional.
| Cause | Solution |
| Child Lock Activated | Press and hold the two buttons above the Child Lock label. Do this for 3 seconds or until the smiling icon on the dryer’s display screen disappears. |
| Error Code | Look for flashing letters on the dryer’s display screen and refer to your manual for the corresponding solution. |
| Insufficient Power or Voltage | Check the dryer’s power cord for any loose or damaged wiring. If the dryer is connected to an extension cord, transfer it to a separate circuit to make sure it’s receiving sufficient electrical power. |
| Door Switch Malfunction | Unplug the dryer and carefully unscrew the door assembly to check the door switch for any loose or damaged wiring. |
| Broken Drive Belt | Unplug the dryer and reach into the drum to spin it by hand. If it turns easily, the belt is either loose or broken. Disassemble the dryer to replace the broken drive belt. |
| Broken Idler Pulley | Unplug the dryer and disassemble the panels to have access to the drum. Remove the drum along with the drum belt to inspect the idler pulley at the back. Check if it can spin easily on his shaft; if not, replace it. |
| Broken Drum Roller and Axle | Unplug the dryer and disassemble the dryer’s top and front panel to get access to the drum. Remove the drive belt and turn the drum by hand. If the drum has difficulty turning, check the rollers and their axles for any damage. |
| Worn Out Drum Bearing | Unplug the dryer and remove the top and front panels to get access to the drum. Remove the drive belt and turn the drum by hand. If you hear a squeaking or grinding noise alongside having difficulty turning the drum, check the drum bearing for any damage. |
| Damaged Drum Glide | Unplug the dryer and remove the front bulkhead to get access to the drum glides. Check the glides for wearing or damage, and replace them if necessary. |
| Drive Motor Failure | Unplug the dryer and disassemble its panels to get access to the drive motor and blower wheel. Check the blower wheel for any blockages and clean it out as necessary. Inspect the motor attached to it for any damages and replace it. |
These issues may seem overwhelming to read, but most of these parts are closely connected, so checking on one leads to the other easily.
We’ll get into details on what can cause these issues and how to resolve them step by step, so keep reading to learn more.
Child Lock Activated
An indicator of a great appliance or device is if it implements child-proofing measures — and Samsung dryers are a good example!
No matter the model, these dryers come with a Child Lock function to ensure that households with little kids — or even curious pets — won’t have their drying cycles interrupted.
Unfortunately, if you’re not mindful, you can leave this setting on or accidentally activate it. Once activated, Child Lock disables all the buttons on your dryer’s control panel, with the Power button and control knob as the only exceptions.
Sometimes your dryer would turn on, but wouldn’t spin simply because you’ve left the dryer on Child Lock mode.
When your dryer is on Child Lock, you’ll notice a smiling lock or child symbol lighting up on your dryer’s display panel.
Solution: On your dryer’s control panel, you’ll find two buttons with the words Child Lock underneath. Press and hold these buttons simultaneously for 3 seconds or until the Child Lock symbol on the dryer’s display panel disappears.
Restart your dryer for good measure. Afterward, run a timer test to confirm that your dryer can start a cycle normally.
To run a timer test, do the following:
- Step 1: Put your dryer on Time Dry, then press and hold Start.
- Step 2: Observe if the timer on the display screen counts down after a minute. If the timer counts down but the drum doesn’t spin, continue on to other troubleshooting methods.
Error Code
When you run a timer test on your dryer, one of the results you’ll likely get is a combination of letters on the display screen.
That’s an error code. Samsung dryers use over a dozen of these to communicate an issue and help the owner identify the problem easier.
Solution: To understand an error code, you may refer to our guide on Samsung dryer error codes or run the code through the Samsung Smart Washer/Dryer App.
Insufficient Power or Voltage
A common mistake people make when they have a newly installed Samsung dryer is plugging it into an extension cord.
A Samsung dryer requires 240V to run, so it has to be plugged directly into a power circuit to get enough power.
Furthermore, you also need to ensure that the power around your area is steady. With a fluctuating and unsteady power source, your dryer wouldn’t be able to do anything beyond powering on.
Solution: Check the circuit breakers in your home for anything that might have tripped. Reset them if necessary.
Check the dryer’s power cord for any loose or damaged connections. If the dryer is connected to an extension cord, plug it into a power circuit instead.
Door Switch Malfunction
A Samsung dryer’s first safety measure is ensuring that its door is firmly shut before it runs any command. If the dryer detects that the door is still open, it won’t perform any operation.
When you close your dryer’s door, you may notice the light inside the drum turn off. An indicator of a defective door switch is if the light inside the drum doesn’t shut off even after you’ve closed the door.
Solution: Unplug your dryer and remove the top panel to access the door assembly. Carefully check for any loose or damaged wirings on the door switch.
Replace the door switch assembly if necessary.
Broken Drive Belt
The drive belt is a thin belt wrapped around the dryer’s drum to control its spinning. As your dryer gets older, the belt would naturally get worn down from long use.
Furthermore, while the drive belt is made to be durable, an overloaded cycle can speed up its fraying.
Solution: To check if the drive belt has come loose, reach into the dryer drum and spin it. If the drum turns easily, this means the drive belt is broken.
To access the drive belt, you need to remove the top and front panels of your dryer, so if you’re not handy with tools, it’s best to call a professional on the matter.
More importantly, a broken or loose drive belt can’t be repaired. It strictly has to be replaced.
We also recommend avoiding overloaded cycles. Break down your drying cycles into smaller loads and only fill up the drum 3/4 of the way to avoid wearing down the drive belt sooner.
Broken Idler Pulley
Your dryer’s drive belt is connected to an idler pulley, also known as the tension roller, to ensure that the belt is tense enough to hold up the drum as it spins.
As such, when you go check on the drive belt, you’ll inevitably encounter the idler pulley as well. Although you can replace the drive belt without replacing the idler pulley, it can’t be applied vice versa.
When the idler pulley is damaged or jammed, it will damage the drive belt itself as well.
A telltale sign of a broken idler pulley is when you hear your dryer making squeaking noises alongside the regular thumping of clothes inside the drum.
Solution: Unplug your dryer and open the top and front panels. Remove the drum and the belt to get better access to the idler pulley.
To check if the idler pulley is jammed, spin it in its place. If it doesn’t turn smoothly, replace it.
Broken Drum Roller and Axle
Most dryers have a pair of drum rollers to support the drum. In good condition, these rollers assist the drum in spinning as well.
When either of these gets damaged, it can overload the motor and obstruct the drum from spinning freely.
Drum rollers can wear out over time and usually around the same time as their axles. A worn-down axle can bind its drum roller and prevent it from spinning freely.
Similar to a broken idler pulley, damaged drum rollers and axles will make squeaking sounds as an indicator.
Solution: Unplug the dryer and disassemble the top and front panels.
Drum rollers are typically found at the back of the drum, so you need to remove the drum belt first. Before removing the drum completely, test it out by turning it.
If the drum doesn’t spin smoothly, this likely means that the drum rollers need to be replaced.
Likewise, when you get access to the drum rollers, test them out by spinning them in place. If the drum roller wobbles and/or does not spin freely, replace them.
Furthermore, we suggest replacing both the drum roller and its axle as a safety measure.
Worn Out Drum Bearing
Aside from drum rollers, some dryers also use a drum bearing to support the drum in spinning to complete a cycle.
This component also wears down with age, and the most common tell of a failing drum bearing is a squealing or grinding noise.
The drum bearing is also found at the back of your dryer’s drum and requires removing the entire drum assembly for access.
Solution: Unplug your dryer and remove the panels, drum belt, and drum.
You can try running a spinning test on the drum by spinning it by hand. If it makes a metallic, squeaking noise and struggles to turn freely, that means your dryer’s drum bearing needs replacement.
Damaged Drum Glide
While drum rollers or bearings support your dryer’s drum from the back of the dryer, drum glides — sometimes known as drum slides — support it from the front.
These are plastic, silicone, or rubber pieces found around the cavity of the drum, which makes them easier to inspect for damage.
They also make a more audible grinding noise — an indicator that they’re wearing down.
Drum glides are typically designed to endure the high-temperature environment inside the drum, but can wear out over time.
When they get damaged, you might notice less thumping from the clothes inside the drum as they dry.
Solution: Unplug your dryer and remove the panels and door assembly.
Check the drum glides around the back of the drum’s door for any damage. Replace them if necessary.
Malfunctioning Motor
The motor is one of the most important components of your dryer. It’s responsible for turning the drum and blower fan to regulate the heat in your dryer.
A functioning motor makes a low but constant humming noise when the dryer is powered on. The first sign that it’s malfunctioned is if it’s silent even after restarting the dryer.
If the motor is still humming, however, the next component you should check is the blower fan. It’s directly connected to the motor, and when the blower fan gets obstructed, it can overwork the motor and cause it to fail.
Solution: Listen carefully for a humming noise when you attempt to run a cycle on your dryer. Afterward, unplug the dryer and remove the panels to access the drum assembly.
If you don’t hear a humming noise, replace the motor immediately.
If you hear a humming noise from the motor, check if the blower fan is obstructed. Clean it out with water if necessary.
Test if the blower fan can spin freely in its housing. If it still doesn’t turn smoothly, replace it along with the motor.
One thing about a Samsung dryer that won’t spin even when it’s powered on is that it’s often less about wiring problems, and more about overtime wearing out.
If you’re not too careful about your drying habits, it can also be a case of an overworked dryer.
With this error, prevention is better than cure, so make sure to be extra careful of the loads you put in a cycle.
Furthermore, the longer you use your dryer, the sooner you should watch out for any squeaking noises. When you hear them, reach for this guide to walk you through options you can take to address the issue.