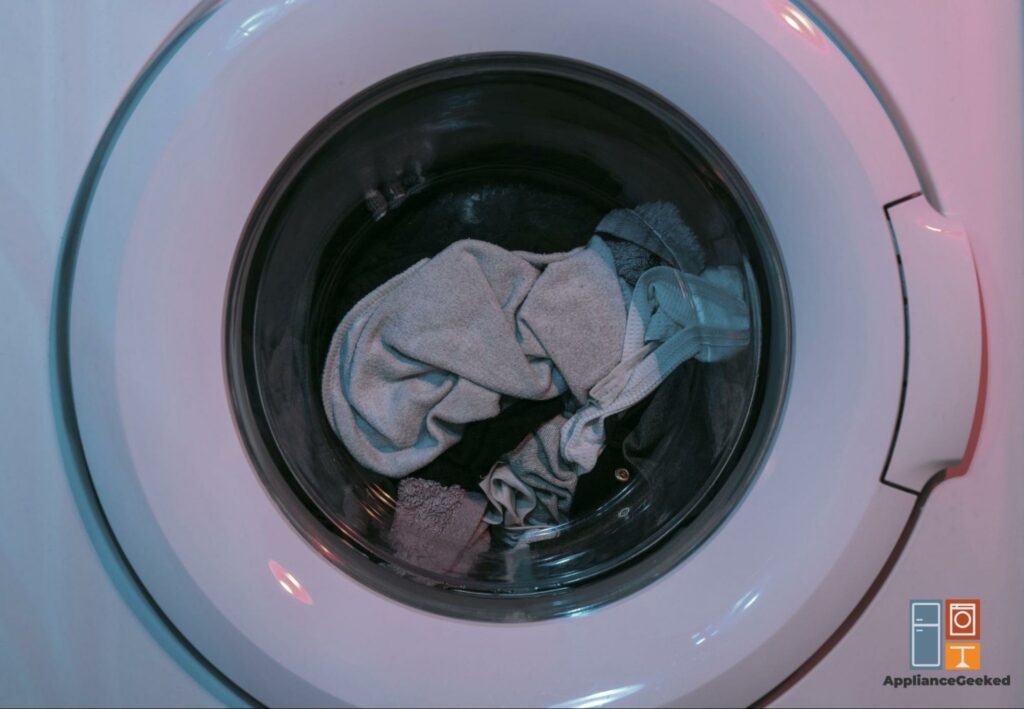
We know it can be a bit concerning when a strange combination of letters and numbers appears on your washer’s display. However, these error codes are important in the upkeep of your appliance.
Your Samsung washer displays an error code to let you know what’s going on with your unit and which particular parts require fixing.
The difficulty of the repairs may vary depending on the root cause of the issue. However, most of them can be done without professional help.
Here, we’re going to help you decode Samsung washer error codes. We will also provide step-by-step instructions for troubleshooting the most common issues.
What do your Samsung washer error codes mean?
Error codes appear when a problem is detected in your Samsung washer. They tell you which part of the washer is faulty and needs fixing.
Most Samsung washer error codes are caused by malfunctioning sensors or electrical components. Others are caused by poor connections and clogs in your unit.
| Error Code | Issue | Causes |
| 1C, 1E, E7 | Water Level Sensor | • A malfunctioning water level sensor • Poor connector contact • Folded hose • Clogged hose |
| E1, 4C, 4E | Water Supply | • Disconnected water supply valve terminal • Clogged mesh filter • Damaged or folded hose |
| E2, 5C, 5E | Drain | • Faulty drain pump • Clogged drain filter • Incorrect drain hose installation • Improper leveling |
| CC, tE | Cooling | • Faulty washing temperature sensor • Water temperature exceeds 22˚F(50˚C) in draining |
| dE, dE1, dE2, dC, DC, DC1, dL, dS, d5, FL, LO, L0 | Door | • Obstructions • Not closed properly |
| 11E, E9, LC, LC1 LE, LE1 | Water Leakage | • A leak on the base, hose, tube, or valve • Incorrect part engagement • Clogged DV case |
| Sud (F70) | Foaming | • Wrong detergent |
| E4, UB, UE, Ur, U6, 1 Ub, 1U6 | Unbalanced Load | • The laundry load is too light or heavy. |
| NF | No Fill | • Not connected to a power source • Clogged debris filter • Clogged water hose |
Troubleshooting Samsung Washer Error Codes
Identify the meaning of the error code on your Samsung washer to understand how to fix it. Most of the time, the fix is as simple as closing a door, connecting a hose, or cleaning a filter.
If errors don’t clear after quick fixes, you probably have a failed component, which needs a replacement.
Samsung washer error codes can be confusing, but understanding them can help you identify and troubleshoot problems with your unit. Here, we’ll teach you how to read the codes and solve them with ease using our step-by-step guide.
1C, 1E, E7 – Water Level Sensor
A 1C, 1E, and E7 error code indicates an issue with the water level sensor.
The sensor uses a pressure switch to determine the water level and control the fill level of the tub.
As the tub fills up with water, the hose gets filled with water, too. Since the air in the hose is trapped, it gets more and more compressed as the water level rises.
When the pressure in the hose gets high enough, it sends a signal to the pressure switch, notifying it that the water level has risen.
Depending on your unit, it could have single, double, or triple levels. The sensor sets the minimum and maximum water levels for different cycles to ensure that the washer has adequate water for your laundry load.
At times, this sensor can malfunction, triggering an error code. Once it is damaged, the only way to resolve the issue is to replace the sensor.
Always check your user manual to find a compatible replacement part for your Samsung washer model. If you do replace the sensor, but with an incompatible part, you will see the same error codes appear on the washer’s display.
Most of the time, these errors are minor. It could just be a disengaged hose or water level sensor terminal, which can easily be fixed by reconnecting them properly.
Another possible cause of these errors is an obstruction to the hose. It could be folded or clogged with foreign material, preventing the sensor from detecting the water level in the tub.
Solution: To resolve water level sensor errors, follow these steps:
- Step 1: Do a hard reset.
Turn off the washer at the circuit breaker for at least two minutes and turn it back on again. If power cycling doesn’t resolve the error, proceed to the next steps.
- Step 2: Inspect the hose for dirt build-up and kinks. Remove any obstructions and straighten out any kinks immediately.
- Step 3: Unplug the washer. Make sure that the wire harness connections between the sensor and the main control board are properly connected.
- Step 4: Plug the washer back in. Then, check if the error is resolved.
- Step 5: Replace the sensor if none of the previous steps cleared the error.
How to Replace the Water Level Sensor
If the water level sensor malfunctions, it will either cause your washer to underfill or overfill with water. You must replace the sensor to fix the issue.
Solution: To replace a faulty water level sensor on a top-load Samsung washer, follow these steps:
- Step 1: Unplug the washer, and turn off the water supply.
- Step 2: Turn the washer around and unmount the cover panel.
- Step 3: Put one hand underneath the cover panel and use a thin tool to open the cover. Lift the panel to release it.
- Step 4: Remove the screws on the control panel. Then, tip the panel forward to access the water level sensor.
- Step 5: Unmount the back cover panel and the small panel to access the hose.
- Step 6: Press the locking clamp on the pressure hose and carefully slide it out of the way.
- Step 7: Disconnect the hose. Then, slide the locking clamp out of the hose and set it aside.
- Step 8: Check the connector for any obstructions and unclog it if necessary.
- Step 9: Push the retaining clip tab and pull out the hose. Slide the house out of the wire tie.
- Step 10: Push the locking tab to remove the electrical connector.
- Step 11: Remove the faulty water level sensor.
- Step 12: Install the new sensor by sliding the hose through the opening.
- Step 13: Align the hose in its housing and press it down until it locks in place.
- Step 14: Reconnect the electrical connector.
- Step 15: Insert the hose in the retaining clip and redo the wire tie.
- Step 16: Slide the locking clamp into the hose and reconnect the hose to the connector.
- Step 17: Move the locking clamp forward in its correct position. Then, make sure the hose doesn’t have any kinks or folds.
- Step 18: Reinstall the small panel and back cover panel.
- Step 19: Flip the control panel back in place and reinstall its screws.
- Step 20: Reinstall the cover panel.
- Step 21: Plug the washer back in and check if it’s working properly.
E1, 4C, 4E – Water Supply
An E1, 4C, and 4E code indicates a problem with the water supply. If the hose gets bent or kinked, it can prevent the washer from filling up with water.
Sometimes, a clogged mesh filter can also block the supply of water to your washer. When this happens, your unit might drain water for three minutes and you can’t use the power button.
Located inside the water hose, the mesh filter traps any foreign substances in the water. Over time, dirt and debris will build up on the filter and block the flow of water.
You can prevent water supply or drainage issues by cleaning the filter at least once or twice per year.
Solution: To resolve an E1, 4C, or 4E Samsung washer error, follow these steps:
- Step 1: Check the water tap connected to the washer. Make sure it is open and that water is flowing from the tap.
- Step 2: Straighten out any kinks on the hose.
- Step 3: Clean the mesh filter.
How to Clean the Water Hose Mesh Filter
If the mesh filter is obstructed by dirt and debris, it prevents water from flowing into your washer. Not to worry, removing the gunk from the filter will fix the water supply problem and clear the error.
Solution: To clean a water hose mesh filter, follow these steps:
- Step 1: Turn off the washer’s water supply.
- Step 2: Unmount the hose from the back of the washer.
- Step 3: Use pliers to pull out the mesh filter from the hose.
- Step 4: Rinse the filter in running water until it’s clean.
- Step 5: Insert the filter back into place using pliers.
- Step 6: Mount the hose back onto the washer.
- Step 7: Confirm that the connections are tight. Then, turn on the tap.
- Step 8: Turn the power button off and on again.
E2, 5C, 5E – Drain
An E2, 5C, and 5E code points to drainage issues in your Samsung washer.
Improper leveling and incorrect drain hose installation are some of the most common causes of drainage problems. Fortunately, they are easy to fix and rarely require repairs.
If you have a front-load washing machine, you also need to check the debris filter for any obstructions. It is located at the front bottom corner of the washer.
The debris filter, also known as the drain pump filter, keeps buttons, coins, and other tiny objects from passing through the pump, allowing your washer to drain properly.
You must clean the debris filter about five or six times a year to prevent drainage problems. Cleaning it regularly also keeps bacteria and bad odors from getting into your laundry.
Solution: To fix a Samsung washer’s drainage problem, follow these steps:
- Step 1: Turn off the washer.
- Step 2: Make sure the washer is level.
- Step 3: Inspect the drain hose for kinks and bent areas. Straighten the hose if necessary.
- Step 4: Check if the hose meets proper installation requirements.
Make sure that it’s inserted no more than six inches and no less than eight inches into the sink or standpipe.
- Step 5: Clean the debris filter if you have a front-load washer.
- Step 6: Turn on the washer and run a test cycle. It should start draining at the beginning of the cycle.
If it doesn’t, we recommend calling Samsung support.
How to Clean the Debris Filter
Only front-load washing machine models have a debris filter. You must clean it every two months or so to prevent it from getting clogged.
Solution: To clean a debris filter on a Samsung washer, follow these steps:
- Step 1: Turn off the washer, and unplug its cord.
- Step 2: Place a towel to protect your floors from water damage.
- Step 3: Open the debris filter cover.
- Step 4: Grab the drain hose and remove its cap to drain excess water into a bowl. Or, use the auto drain feature in your washer.
- Step 5: Reinstall the cap and push the hose back in after the water stops draining.
- Step 6: Rotate the debris filter counterclockwise and pull it out to remove it.
- Step 7: Remove any blockages (e.g. coins, clips, and buttons).
- Step 8: Clean the filter with a soft brush and rinse it under running water.
- Step 9: Reinstall the filter into the housing and rotate it clockwise.
- Step 10: Close the cover.
CC and tE – Cooling
CC and tE error codes appear when the water temperature in your washer exceeds 122˚F(50˚C).
If the water temperature is normal, but you see a CC error, it’s most likely caused by a faulty sensor.
Most modern washers have a built-in heating element that allows them to warm up their own water. The temperature sensor measures the temperature of the water inside the tub.
Based on its reading, it will adjust the mixture of hot and cold water to reach the desired temperature.
If the sensor malfunctioning, the water temperature can exceed 122˚F(50˚C). In this case, you must replace the sensor to resolve the error.
Solution: To troubleshoot a CC error on a Samsung washer, follow these steps:
- Step 1: Measure the temperature of the water.
If it exceeds 122˚F(50˚C), proceed to the next step. However, if it is normal, skip to the third step.
- Step 2: Let the water cool down. Mix some cold water into it to help it cool faster.
- Step 3: Test the water temperature sensor for continuity.
- Step 4: Replace the sensor if it is malfunctioning.
How to Replace the Water Temperature Sensor
The temperature sensor is located at the bottom of your top-load Samsung washer. You must have enough room to tip it on its back.
Solution: First, test the temperature sensor for continuity. If its reading doesn’t fall within Samsung’s recommended range, you must replace the sensor.
- Step 1: Unplug the washer, and turn off the water supply.
- Step 2: Tape the door closed.
- Step 3: Drain the water out of your washer using the auto-drain function. Or, drain it manually using the emergency drain hose.
- Step 4: Carefully move the washer and tip it on its back.
- Step 5: Undo the tie on the connector.
- Step 6: Disconnect the electrical connector.
- Step 7: Remove the mounting screws on the sensor.
- Step 8: Gently pull the sensor out of its housing.
- Step 9: Let the sensor cool to room temperature before performing a continuity test.
- Step 10: Get a multimeter and turn its dial to the ohms setting.
- Step 11: Insert each probe into the connector. Then, read the results.
At 68˚F(20˚C), your sensor should have a reading of 66,000 ohms. At 86˚F(30˚C), it should read 37,000 ohms.
If the reading doesn’t fall within this range, you must replace the water temperature sensor. Make sure you get the right replacement part for your Samsung washer model.
Follow these steps to replace the sensor:
- Step 1: Unplug the washer, and turn off the water supply.
- Step 2: Tape the door closed.
- Step 3: Drain the water out of your washer using the auto-drain function. Or, do it manually by pulling out the drain hose.
- Step 4: Carefully move the washer and tip it on its back.
- Step 5: Undo the tie on the connector.
- Step 6: Disconnect the electrical connector.
- Step 7: Remove the mounting screws on the sensor.
- Step 8: Gently pull the faulty sensor out of its housing.
- Step 9: Remove any dirt and debris from the housing before installing the new sensor.
- Step 10: Insert the new sensor, and reinstall its mounting screws.
- Step 11: Reconnect the electrical connector.
- Step 12: Fold the wire and reinstall the connector in the retaining clip.
- Step 13: Keep the washer in its usual upright position.
- Step 14: Plug in the washer and turn on the water supply.
- Step 15: Check if the fix cleared the error.
dE, dE1, dE2, dC, DC, DC1, dL, dS, d5, FL, LO, L0 – Door
A door error appears if the washer isn’t properly closed or locked. It may happen when your laundry gets caught between the door and the gasket, preventing the door from latching properly.
Even if you aren’t running a cycle, a door error code will appear if Child Lock is activated while water is in the tub. If you don’t shut the door or deactivate Child Lock within 30 seconds, the washer will automatically drain the water.
The culprit could also be a faulty door lock switch. It is a safety feature in your washer, which recognizes when the lid is closed and locks it during cycles.
If the switch malfunctions, a door error code will appear on your display. Your washer usually won’t run a cycle if the switch is broken.
Solution: To resolve a door error on a Samsung washer, follow these steps:
- Step 1: Close the door if it is wide open.
- Step 2: Inspect the door. Make sure your laundry isn’t caught between the door and the gasket.
- Step 3: Test the door switch if it is faulty. Then, replace it if it shows no continuity.
| Quick Note: • On some Samsung washer models, dC is a door error. On other models, it indicates an unbalanced load error. • Check your user manual to be sure. |
How to Replace a Faulty Door Switch
If there aren’t any obstructions preventing the door from closing properly, you most likely have a problem with the door switch.
Solution: Test the door switch for continuity using a multimeter. If it has no continuity, replace it.
- Step 1: Unplug the washer, and turn off the water supply.
- Step 2: Unmount the control panel cover at the back of the washer.
- Step 3: Use a thin tool to pry open the cover. Then, remove it and set it aside.
- Step 4: Press the tab on the switch’s electrical plug to disconnect it.
- Step 5: Push the tabs on the noise filter cover, and lift it to remove it.
- Step 6: Lift the hose on the right to release it from the slot.
- Step 7: Lift the wire to release it. Then, push the wire into the hole.
- Step 8: Remove the screws mounting the top cover.
- Step 9: Move to the front of the washer and insert a putty knife into the seam of the top cabinet to open it. Start on the right side and repeat the same step on the left.
- Step 10: Carefully lift the cover and prop it open.
- Step 11: Unmount the door switch underneath the cover.
- Step 12: Remove the switch and release its wire from the retaining clip.
- Step 13: Test for continuity using a multimeter. Rotate the dial to the lowest setting for ohms of resistance.
- Step 14: Touch each probe to a terminal on the switch. Then, press the switch to get a reading.
If the switch has continuity, the multimeter will indicate close to zero ohms of resistance. It has no continuity if the switch shows little to no change when actuated.
In the latter, case, you’ll need to replace it.
- Step 1: Unplug the washer, and turn off its water supply.
- Step 2: Umount the control panel cover at the back of the washer.
- Step 3: Pry open the cover using a thin tool like a putty knife. Then, remove it and set it aside.
- Step 4: Depress the tab on the switch’s electrical plug to disconnect it.
- Step 5: Push the tabs on the noise filter cover, and lift it to remove it.
- Step 6: Lift the hose on the right to release it from the slot.
- Step 7: Lift the wire to release it. Then, push the wire into the hole.
- Step 8: Remove the screws mounting the top cover.
- Step 9: Insert a putty knife into the seam of the top cabinet in front of the washer. Do this on both the left and right sides of the unit to open it.
- Step 10: Lift the cover and prop it open.
- Step 11: Unmount the door switch underneath the cover.
- Step 12: Remove the switch and release its wire from the retaining clip.
- Step 13: Mont the new switch with the wires facing to the right and the lock sticking out at the top. Then, insert the wire into the clip.
- Step 14: Insert the electrical plug at the opening.
- Step 15: Gently lower the cover back down. Push down on the front clips to lock the cover into place.
- Step 16: Reinstall the mounting screws on the top cover.
- Step 17: Reconnect the electrical plug.
- Step 18: Tuck the wire back into its slot, and insert the plug into its holder.
- Step 19: Push the hose back into place.
- Step 20: Reinstall the noise filter cover
- Step 21: Reattach the control panel cover.
- Step 22: Turn on the washer and its water supply.
- Step 23: Check if the fix resolved the error.
11E, E9, LC, LC1 LE, LE1- Water Leakage
Whether it’s uneven flooring or improper installation, an unlevel washing machine can cause water leaks on both front and top-load washers. You will usually find a leak in front of your washer if isn’t leveled correctly.
A leak coming from the back of the unit is most likely caused by a loose connection. If the drain hose or the supply hose isn’t installed correctly, water will start leaking at the back.
The drain hose should be inserted properly into the drain pipe to prevent leaks. If it is installed correctly, but a leak is coming from the hose, the drain pipe could be clogged.
If the leak is coming from the supply hose, it can also be due to a loose connection or a faulty component. A damaged hose or o-ring must be replaced to stop the leak.
On front-load washers, a dirty door gasket and clogged debris filters are common causes of leaks. Regular cleaning and maintenance can prevent it from happening again.
Solution: To troubleshoot a leaking Samsung washer, follow the steps below. Start from the top and work your way down until it fixes your problem.
- Step 1: Make sure your washer is level. Adjust the leveling legs underneath your washer so it’s not wobbly or lopsided.
- Step 2: Do not overload the washer to keep it balanced. If necessary, remove some clothing to reduce the load.
- Step 3: Check if the water supply hose is connected properly.
- Step 4: Inspect the hoses and their accessories for signs of damage. Then, replace the parts if you find any.
- Step 5: Check the drain hose. Make sure it’s properly inserted into the drain pipe.
Sud (F70) – Foaming

Using regular detergent can lead to excess foam in your high-efficiency Samsung washer. It will trigger a Sud or F70 error code on your display.
Regular detergent is made for washers that require more water. If you use it on a HE washer with lower water levels, you can end up with too many suds.
The excess foam confuses your unit. It often extends the length of each cycle and even affects your washer’s cleaning performance.
You can easily avoid this problem by using high-efficiency laundry detergent on your HE washer. Just look for the HE symbol on the packaging to make sure you’ve got the right one.
Aside from using the wrong detergent, using too much detergent, even the right one, can lead to many suds. Your washer can’t rinse all of the excess product away, so it leaves a sticky and chalky build-up of detergent residue on your clothes.
For normal-sized loads on an HE washer, only use about two tablespoons of HE detergent. If you’re using an HE detergent in a regular washer, use a ¼ cup for a normal-sized laundry load.
Since not all Samsung washers are made equal, it’s best to check the manufacturer’s recommendations in the user manual.
Solution: To resolve a Sud error on a Samsung washer, follow these steps:
- Step 1: Let the suds settle in your washer.
- Step 2: Use the spin cycle.
- Step 3: Wash the clothes without detergent.
- Step 4: Clean your washer.
E4, UB, UE, Ur, U6, 1 Ub, 1U6 – Unbalanced Load

If you put too much or not enough laundry inside the washer, it will throw your unit off balance. It makes the basket spin unevenly and bang against the tub.
Your washer will display an unbalanced load error when it’s starting to spin wildly out of control. It will also stop spinning for safety reasons.
According to Samsung, you should consider the weight of the items that you put into the washer before running a cycle. That’s because small, bulky items can overload your unit just as much as large, lightweight items.
Ideally, the load should be no less than three pounds.
When you’re measuring the ideal load weight for your washer, it must be based on its capacity in cubic feet.
- A small load should fill up ⅓ of the tub, which should be a pound of laundry per cubic foot of your washer’s capacity.
- A medium load is a half-filled tub, which is around two pounds of laundry per cubic foot of capacity.
- A large load of laundry fills up ¾ of the tub. That’s approximately three pounds of laundry per cubic foot of capacity.
If your washer has four cubic feet of capacity, a small load should weigh 4 pounds. A medium load weighs 8 pounds, while a large load weighs 12 pounds.
Solution: To resolve an unbalanced load error on a Samsung washer, follow these steps:
- Step 1: Stop the cycle, or wait for it to end.
- Step 2: Redistribute the load.
Remove items to keep everything balanced. Or, add items evenly around the agitator to maintain a balanced load.
- Step 3: Restart the spin cycle and check if it’s fixed.
| Tips: • Avoid washing large items on their own (e.g. blankets, towels, and sheets). • Don’t twist sheets, towels, and other heavy items. • Don’t pack or push the laundry down when adding them to the tub. • Check the tags of your clothes to confirm that they are machine washable. |
NF- No Fill
An NF code is a No Fill error. If your washer is taking more than 40 minutes to fill up, the error will appear on the washer’s display.
The issues that prompt an NF error are mostly minor and don’t require service. It could be a bent hose or a clogged filter.
If the hot and cold lines on your washer get swapped, it can also trigger an NF error on older models. On newer units, you might see an NF1, 4C2, 4E2, CE, or 14C2 code.
If you have a front-load washing machine, a clogged debris filter can also cause the error.
Solution: To resolve a No Fill error on a Samsung washer, follow these steps:
- Step 1: Confirm that the water supply valve is connected and turned on.
- Step 2: Inspect the hot and cold lines.
Make sure they are connected to the correct valves. Check for kinks on the hoses and straighten them out.
- Step 3: Clean the debris filter. If you don’t have a front-load washer, proceed to the next step.
- Step 4: Look for kinked or bent areas on the drain hose, and straighten them out if you find any.
- Step 5: Confirm that the drain hose is installed properly. It should be inserted no less than 6 inches and no more than 8 inches into the drain pipe.
- Step 6: Hard reset your washer.
- Step 7: Turn on the washer. Then, run a cycle to check if the error is resolved.
Frequently Asked Questions
Samsung washers don’t have a reset button. If you want to reset your washer to clear an error code, you can power cycle your unit instead.
Turn off power at the circuit breaker for at least two minutes to clear the electrical charge from your washer. Then, turn it back on and check if it cleared the error code.
In some cases, power cycling your unit will resolve an error, especially if it’s caused by a glitch in the system.
Smart Care is the easiest way to interpret your Samsung washer or dryer error codes. It is a built-in feature in some Samsung washer models.
Just download the Samsung Smart Washer/Dryer app on your phone. You don’t need to pair it with your washer to use its features.
Tap the Smart Care button on your appliance to run a quick diagnostic test. A code will appear on the washer’s display after the test.
Open the Samsung Smart Washer/Dryer mobile app and scan the code to identify the current error. Then, you will receive step-by-step instructions to troubleshoot the issue.
The app also keeps a history of the error codes on your washer so that you can resolve them faster next time.